
Time is really getting on now. With only just over a month till submission, its time to bring things together.
The first thing that has been on my mind for this is getting the displays working correctly, this appears to involve setting up a dock with drivers, as m1 mac minis only support 2.

One thing I have noticed with these experiments is that it slows the workflow right down, as I need to wait for the bake, which is much slower, currently working from home over the easter weekend and the first week off to use both my laptop and PC to bake and render at the same time to double my output. But at both times there is a substantial gap where I am waiting for something to happen. This at least gives me time to reflect on what I am doing and consider other aspects of my project, such as the staging mentioned above.
Casting
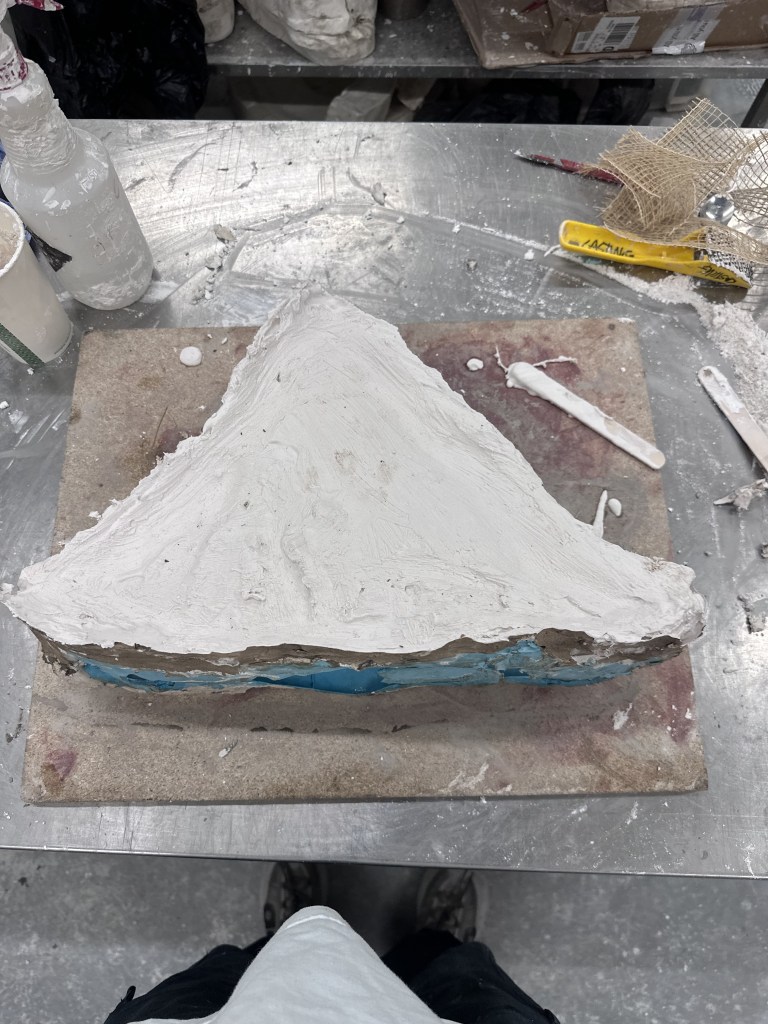
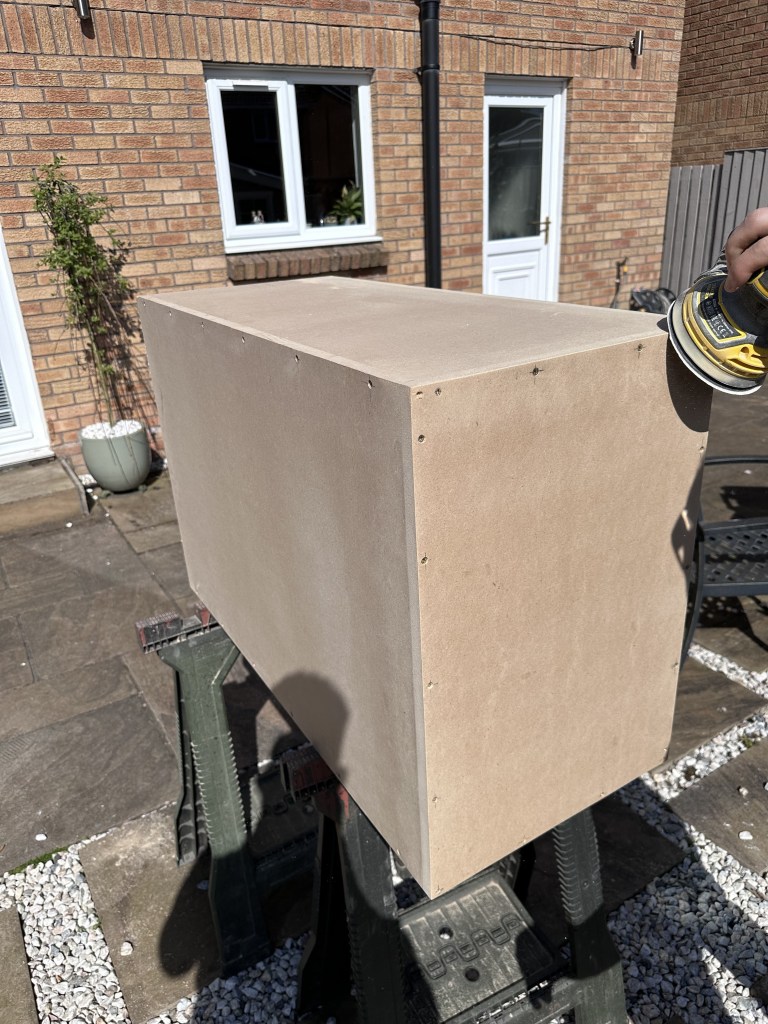
After doing the renders I decided to yet again create a mould of my 3d prints, but first I had to assemble.
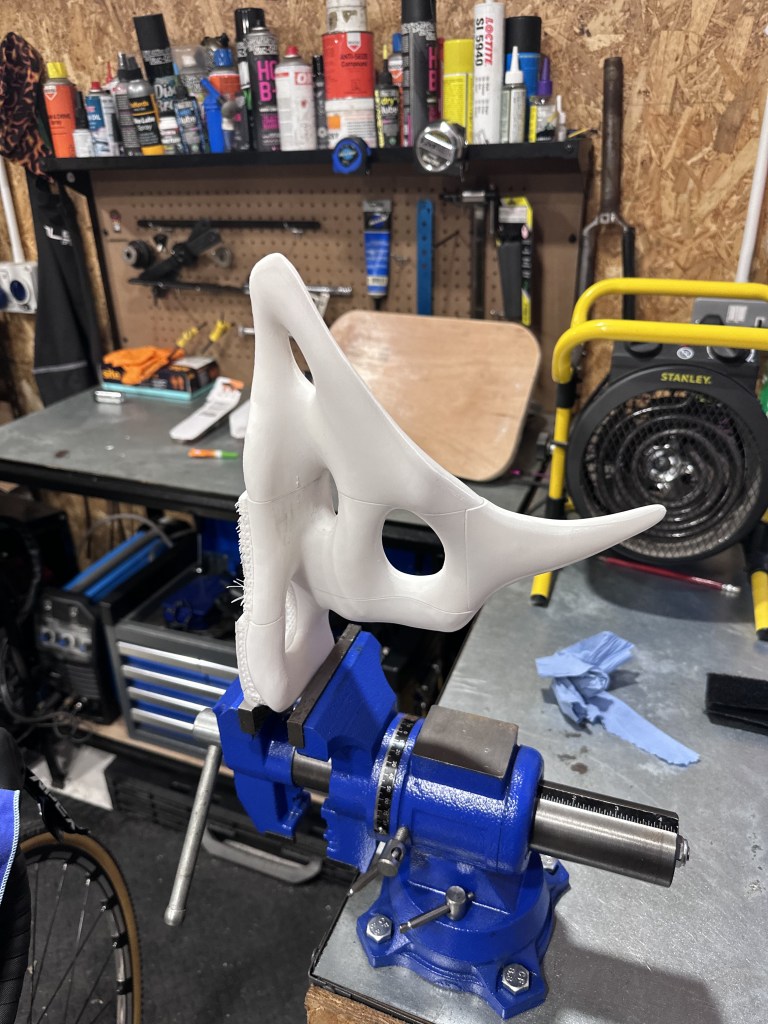
Using a vice and some gorilla super glue, I managed to get it assembled before continuing to casting.
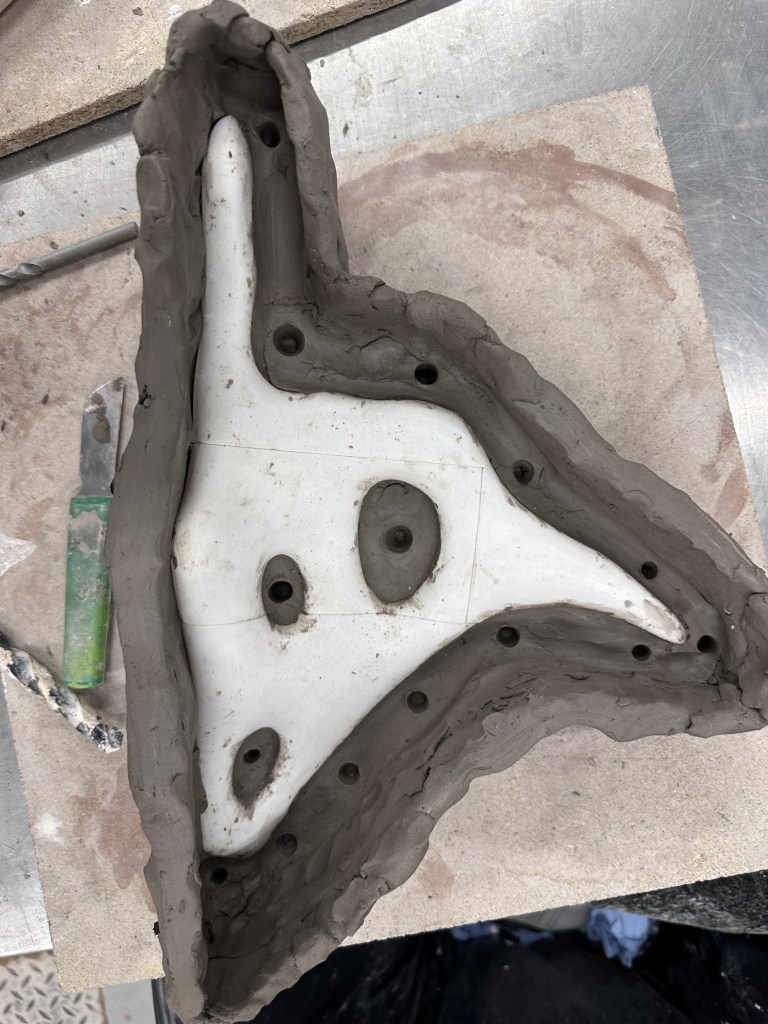

Using the same methods as my previous mould doing a 2 part mould with an initial first pour of purely silicone to capture detail then reinforcing with a second pour with pieces of recycled silicone from previous moulds and a silicone thickener.


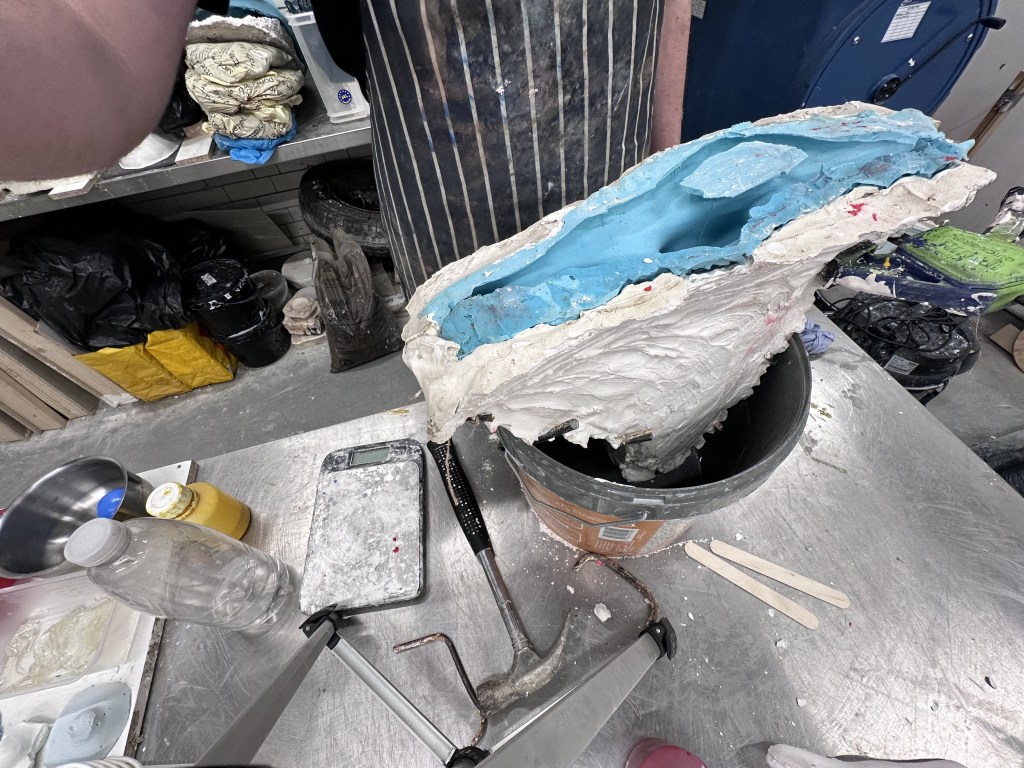
Returning on Wednesday after recovering from my week long stint from the cold, allowed me to create the first half of a plaster jacket for my mould. This is something I hadn’t done for my previous mould, however due to this new moulds size, Amy the technician recommended that I do this.


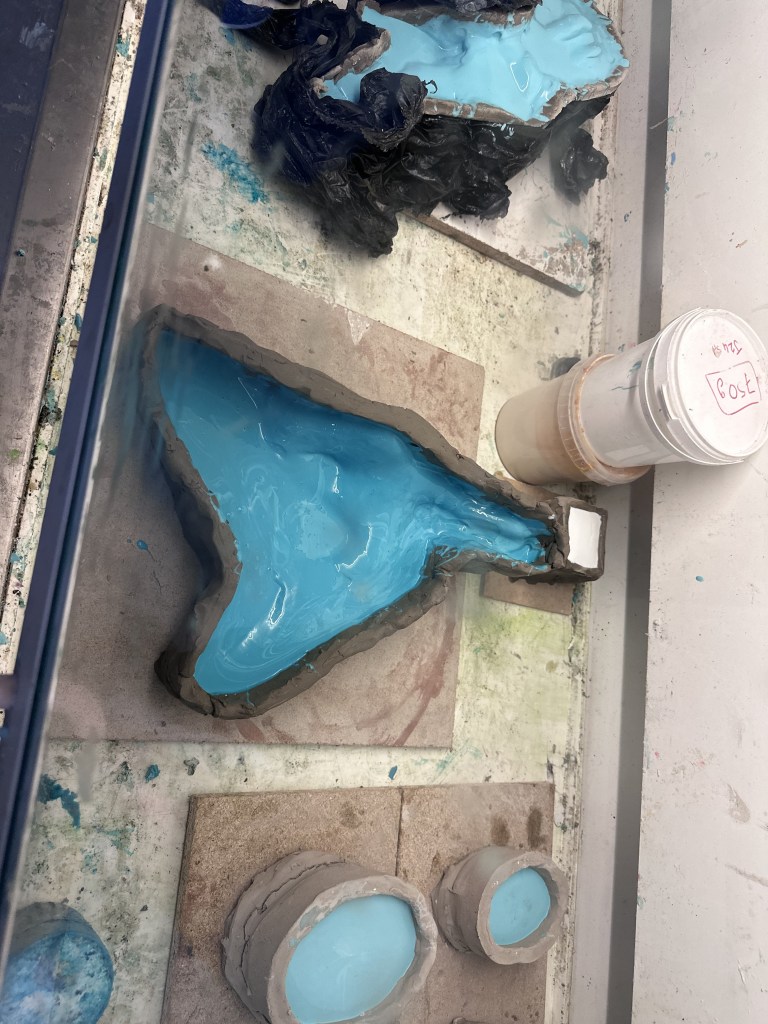
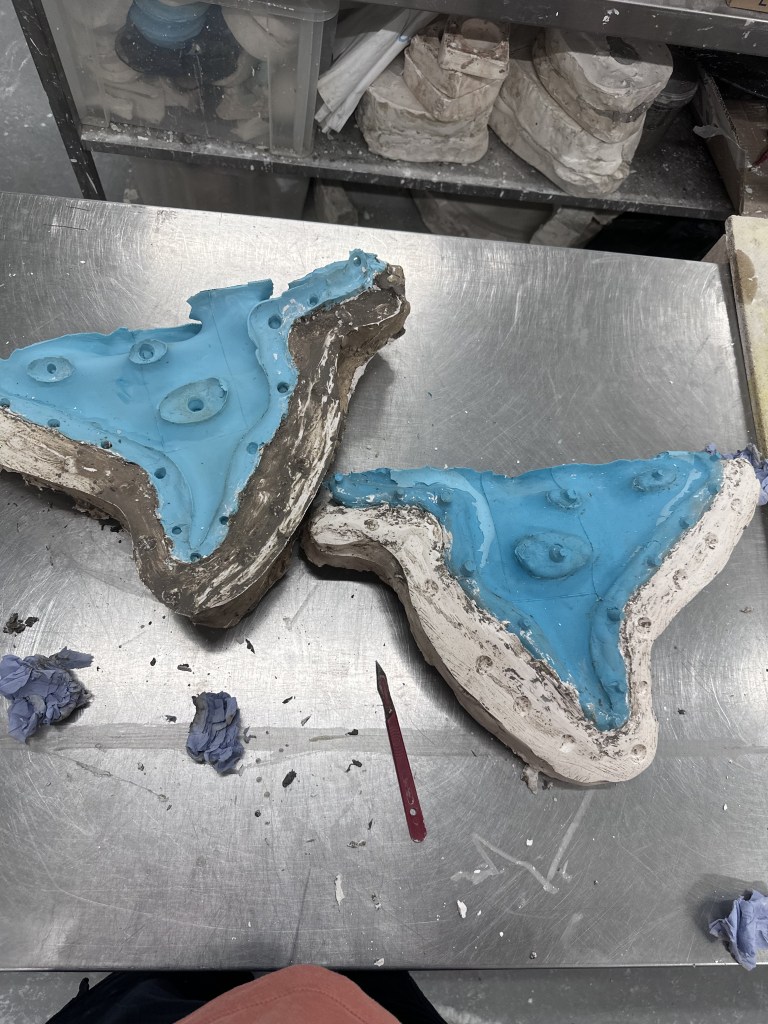
Returning later I de moulded my pint and conducted a test cast using plaster. However due to using the recycled silicone, the mould was difficult to fit back in the plaster jacket so I decided to leave it for the time being. For my first pour I was a bit hasty and didn’t secure the mould tight enough, so some plaster leaked out the bottom, however after leaving it for a few minutes to set, it sealed the gaps itself and I managed to finish the mould.
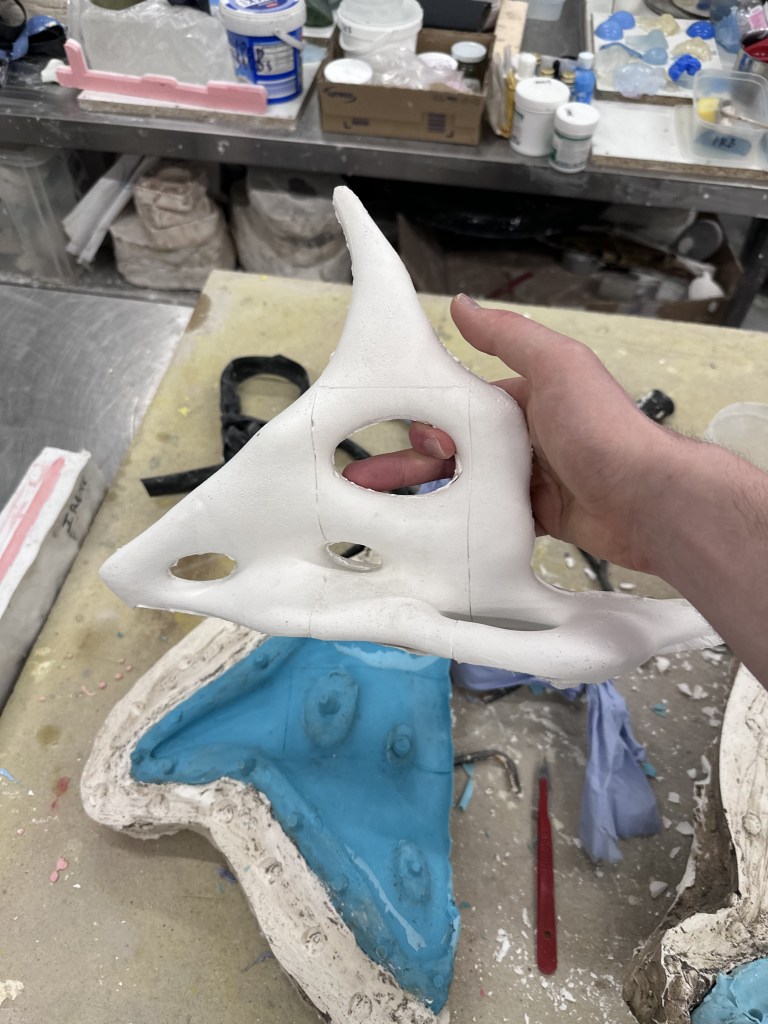
My main concern with de moulding is the hole along the base of the object, I used herculite so hopefully it will be strong enough to survive
3D Difficulties
Over the Easter break, I have managed to once again become ill, thankfully not covid this time. Using this time to generate more animations in 3D. There has been some problems however. As each file needs a substantial cache for the animation, these caches can reach ridiculous sizes for each file.

Without realising I actually managed to fill the rest of the storage on my laptop. I remidied this by backing up these caches to my sandiskSSD, which has a fast enough write speed to work from.


I also had an issue of for whatever reason the baked simulation would suddenly stop in the render. This caused me a great deal of frustration as I waited a good while for the baking and rendering to complete.
I believed this was caused by blender automatically applying easy ease and curved graphs to its animations, therefore when the animation slows back down there isn’t enough force in the movement to create the ripples in the water. To fix this I stretched out the ending of the animation to frame 300 and baked frame 200 to 300. This allowed me to render out 205 – 275 and the animation would not slow down.
After rendering, in after effects I continued as normal, bringing in both as an image sequence. With the smaller sequence going at the end.

I then did a makeshift dissolve transition that I used for my sky time lapse videos to get them to loop.
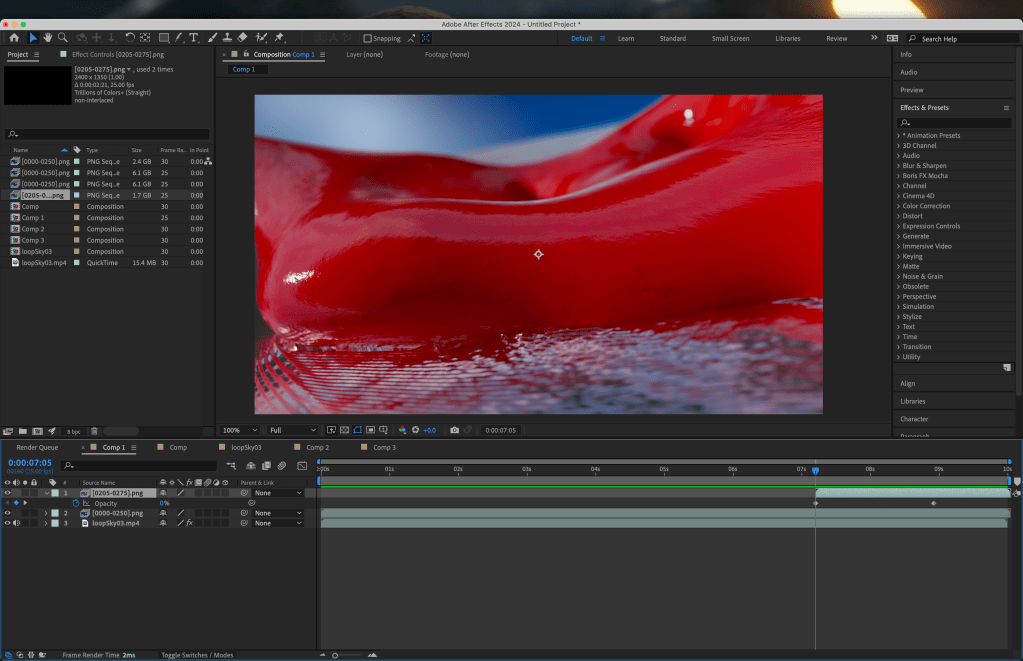
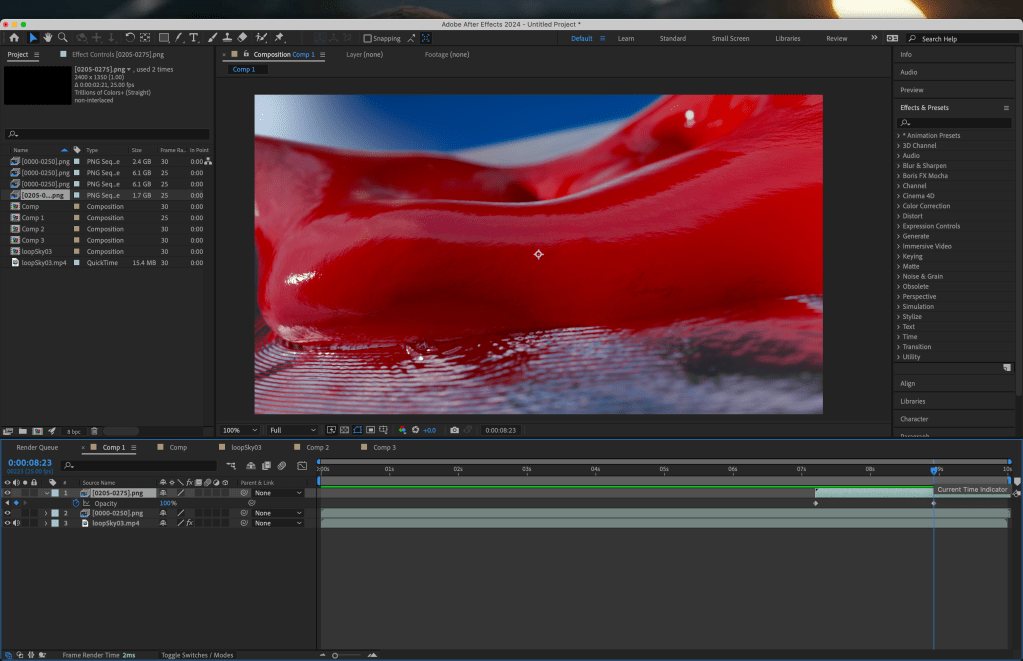
Keyframing the opacity at 0 when the clip starts then to 100 when the animation issue occurs. Allowing a seamless loop.
As can be seen from the full video, the point where the video changes is nearly unnoticeable.
I have also experimented with adding some form of emerging animation to my scene. I am quite split on this as I like the animation etc, however the water on the sculpture I feel leaves a little to be desired.
Compositing
For my final I still want the distortion to only effect the object itself. This means that I will need to figure out how blenders compositing layer system works.
After a while of watching videos that didn’t really help, I came across this video that is exactly what I needed.

Here it can be seen this is exactly what I needed. with the object being obscured by the water at the necessary points and the reflections still being present.
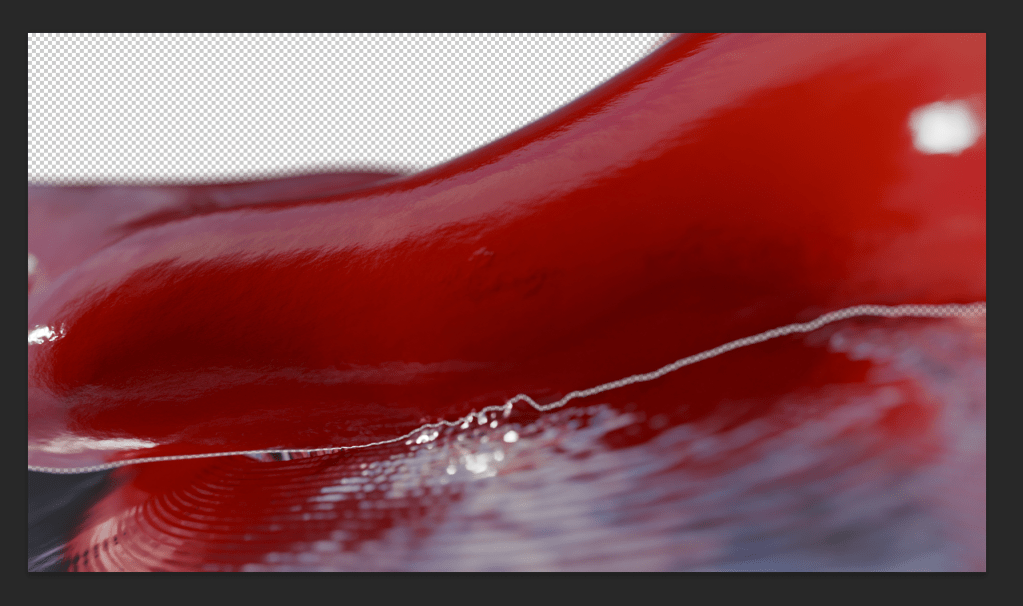
However, a problem presented itself when putting the images together as a test in photoshop. There was a small feathered gap, as can be seen in the images above. I belive this was caused by the DOF giving a slight feathered edge rather than the sharpness that is required. To remedy this, I will attempt another render, this time disabling the masking of the object to get the full background of the water.

Here I tested my theory and it seems to be working. I will render this out and see how it looks distorted, I may have to tone down the level of distortion, however I believe this is the fix that was needed.
This ended up working successfully, leaving them to render while in workshops / overnight to make the best use of time. However when taking them into TD to test I noticed some issues with the syncing of video
Using a function similar to keypressed in processing, I tested this over and over again, however to no avail, there was a missmatch in frame rates of my exported video.
It can be seen here that the video of the object is only 17 seconds long. Changing the framerate in after effects will fix this.
This was the solution to my problem, with some of the distortions misaligning the video, however I am still very happy with the outcome.
3 Screen Test
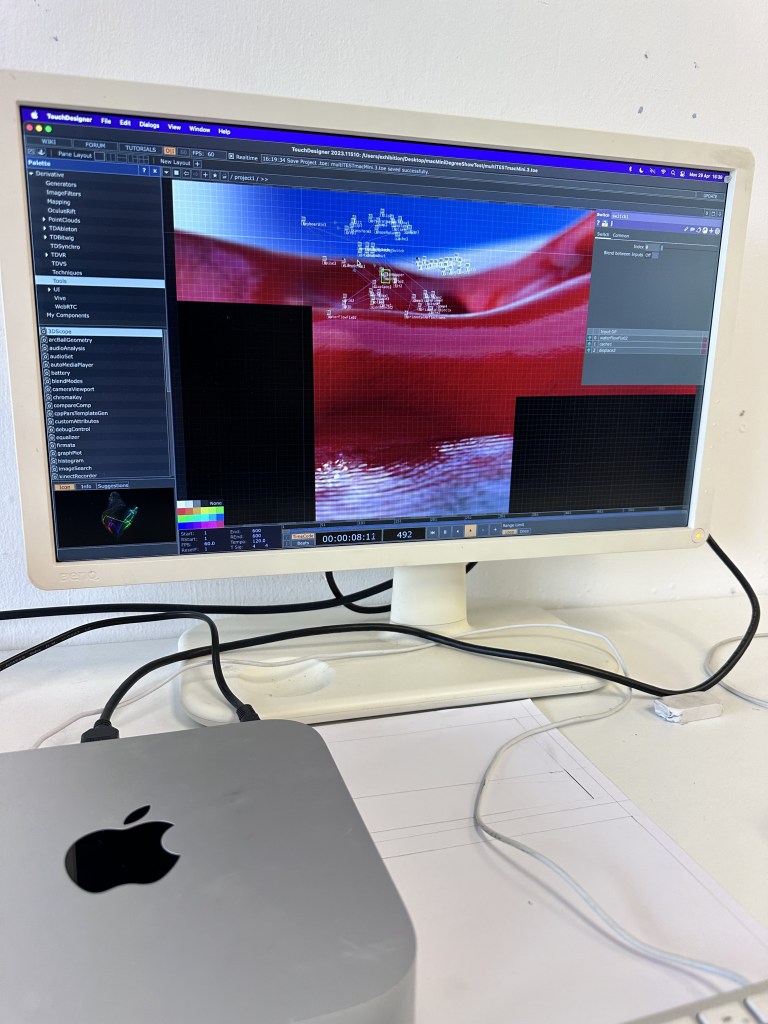
Now that I am more commonly in the studio, I decided to test my dock for the multiple screens.
My next test would be to get it running on the mac mini as well as figuring out the details of multiple screens with touchdesigner.
I will need to re render some sections of video but these ones shown are by no means my final, this is something I intend to focus on in week 10, with matching lighting in each scene, as well as a collective “narrative” (I use this as I am unsure of a proper word).
This tutorial essentially has the setup I desire, with some individual events, then multi screen takeovers, I will follow this and add my videos where possible.
I may have to render multiple angles placing the cameras side by side, however I am totally ok with this, as between my laptop and computer it shouldn’t take too long. There is also the choice of using render farms, however that would be a last resort for any last minute changes before degree show.
Media Studio
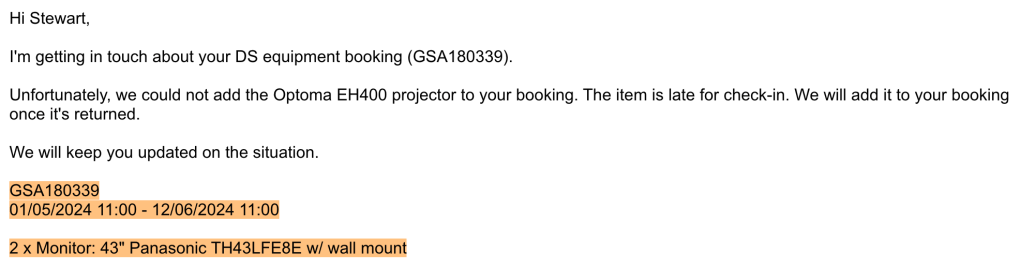
I received this email from media studio on Friday, a relief for degree show as I know exactly what I’m working with. I’m also picking up my equipment relatively early, so that I can get my equipment and test it when possible, this will also aid my documentation.
Multi Screen Tests
With my experiments in TD I decided to put everything together in the studio.
Using the switch it allows me to go between the multiple different inputs, I will need to find a way for this to work with what I need, however it is a good start.
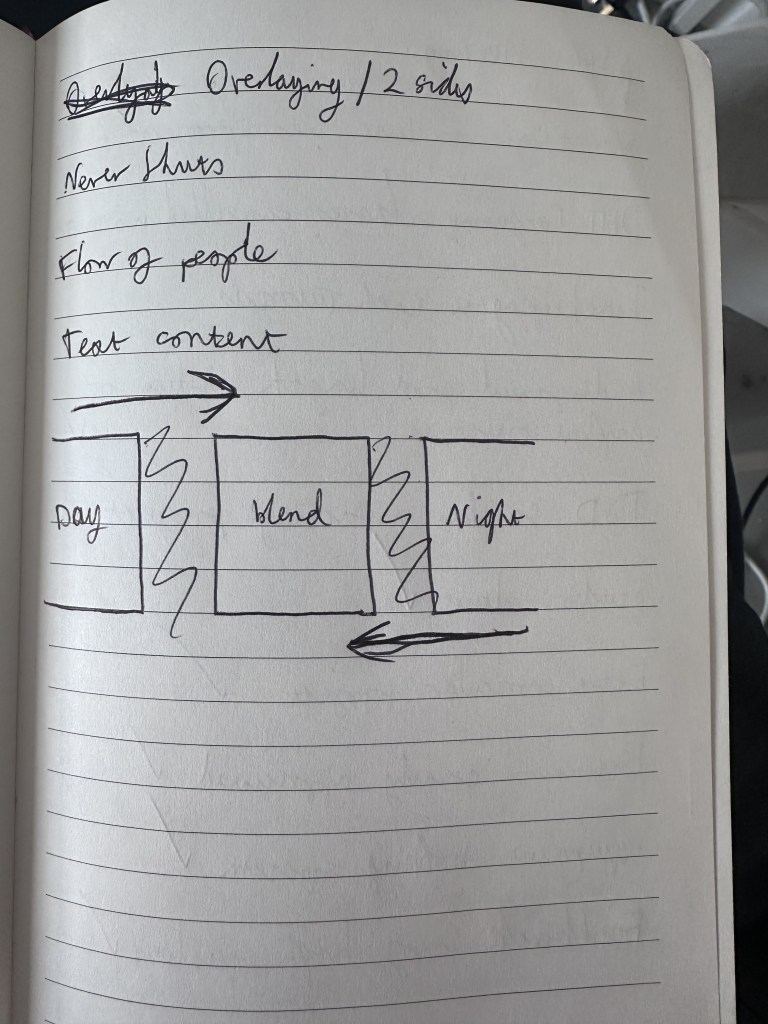
I then started thinking about how I would work this into my envisioned plan.

Lining up the edges of the projection and having it overlap with the screen is of great interest to me
This I hope, will add the slightly more interesting and dynamic feel to the more tryptic style of work I have been looking to create. This however did prove much harder than I thought, at least the thinking behind it
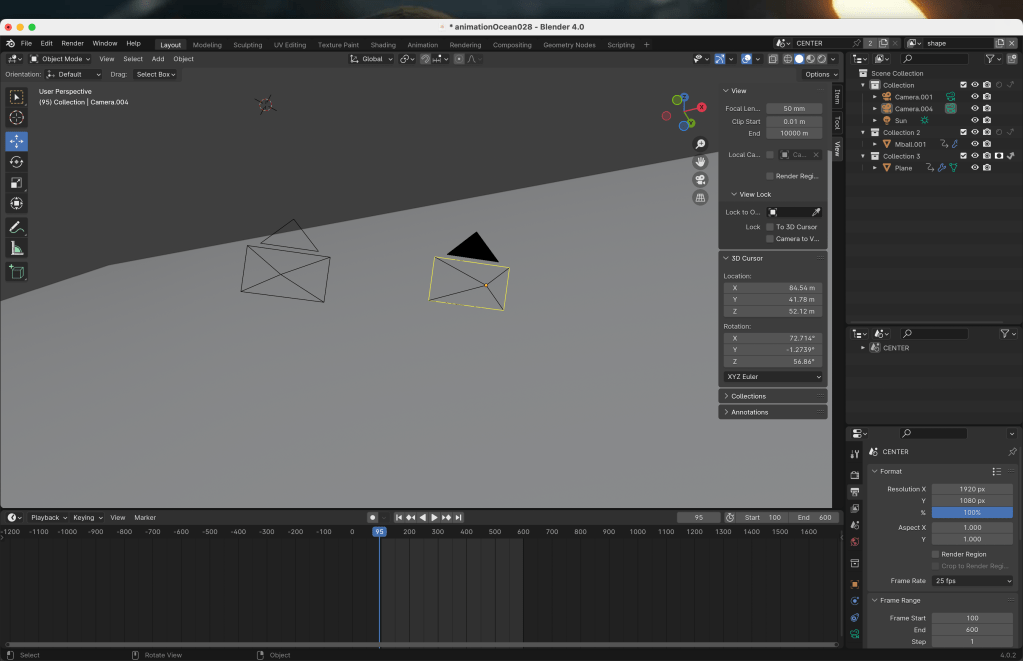
My initial thoughts were to create multiple cameras next to each other in blender, however with how the 3D software works, if you change one camera, they all change.

There was also this tutorial, however I felt as if it was overcomplicating what i needed, so I decided to go a different route.
My solution to this was to create an ultra wide camera in blender, then use various nodes in TD to format them for each screen.
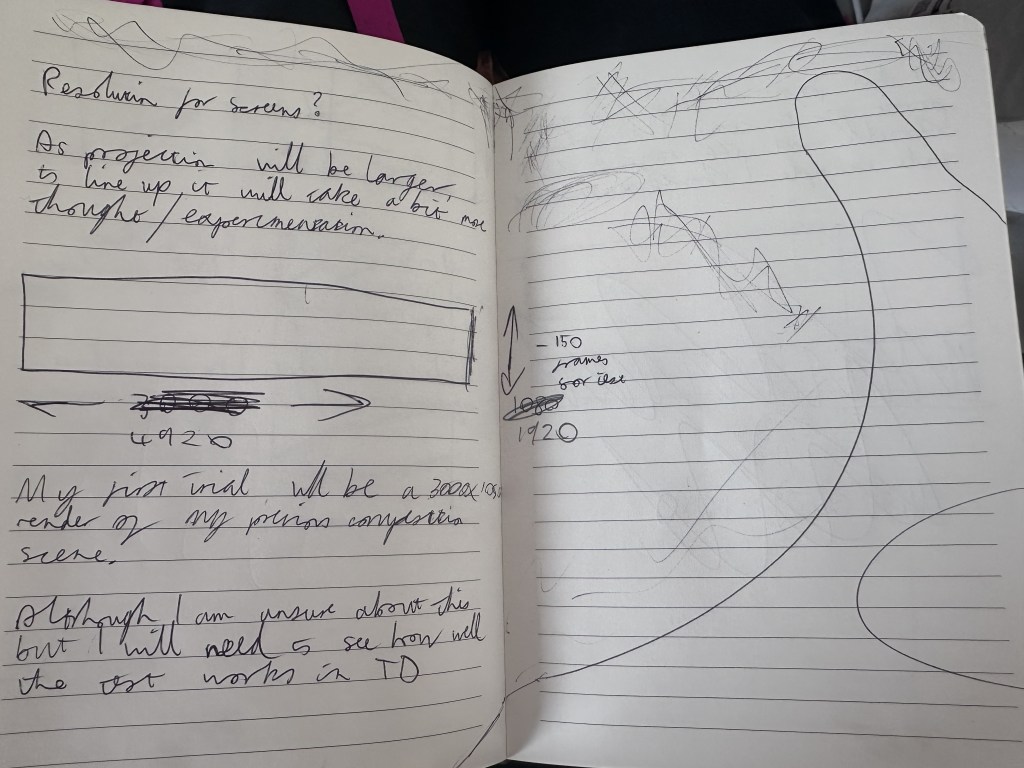
4920 x 1920 is the ideal resolution for now at least, this is adding the values of 2 landscape screens then one portrait (1920 + 1920 + 1080)
I later realised this means that the z shape will not be present, however there would still be an overlap over the landscape monitor.

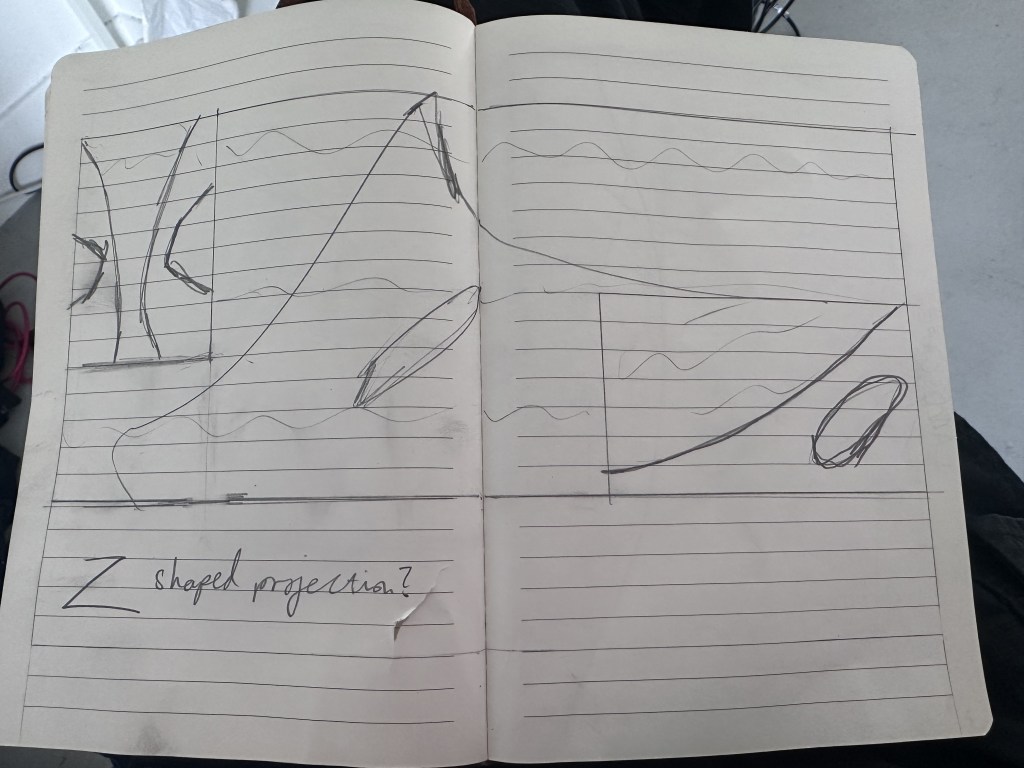
This stage absolutely wracked my brain as I could not figure out how to format the video for the mix of orientations present. Flipping through my notebook, I found a sketch from our 3rd year buchanan galleries project.
I realised, while looking at this, the idea of individual events and global takeovers, were also present in this. This spurred me on to create what I needed for this section of the project. For this we were provided an AE file with 2 black shape layers where there was no projection, this acted like a mask, I applied this thinking to my project.
Using illustrator I precisely measured out masking blocks for my screens, and areas I didn’t want present on my projection. Applying this to my ultra wide video allowed me to create the solution
This is obviously a very quick and dirty job for now, but I feel it is successful in showing off the effect that I want for my final piece.
The next stage here would be to start building in my interactivity, at this stage I am thinking about refining what I have as the videos will be harder for the computer to cope with. My motion sensor will be the first to go as it has very little impact on the scene.
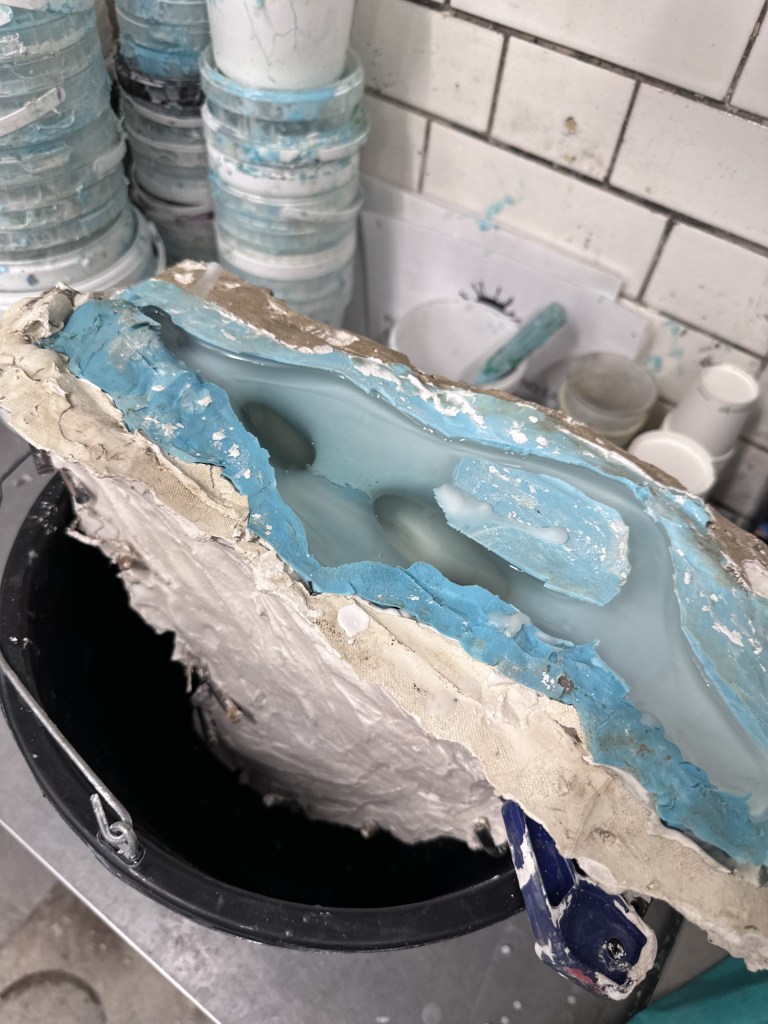
First Cast


As mentioned before my first cast didn’t quite go to plan, I didn’t use the plaster jacket as I couldn’t get the silicone back into the jacket. However, when trying to tap an air bubble out I caused a massive leak and the plaster fell out the bottom. I waited until the plaster had somewhat set and went back with more, this however proved overall unsuccessful, with the mould being misaligned in places.
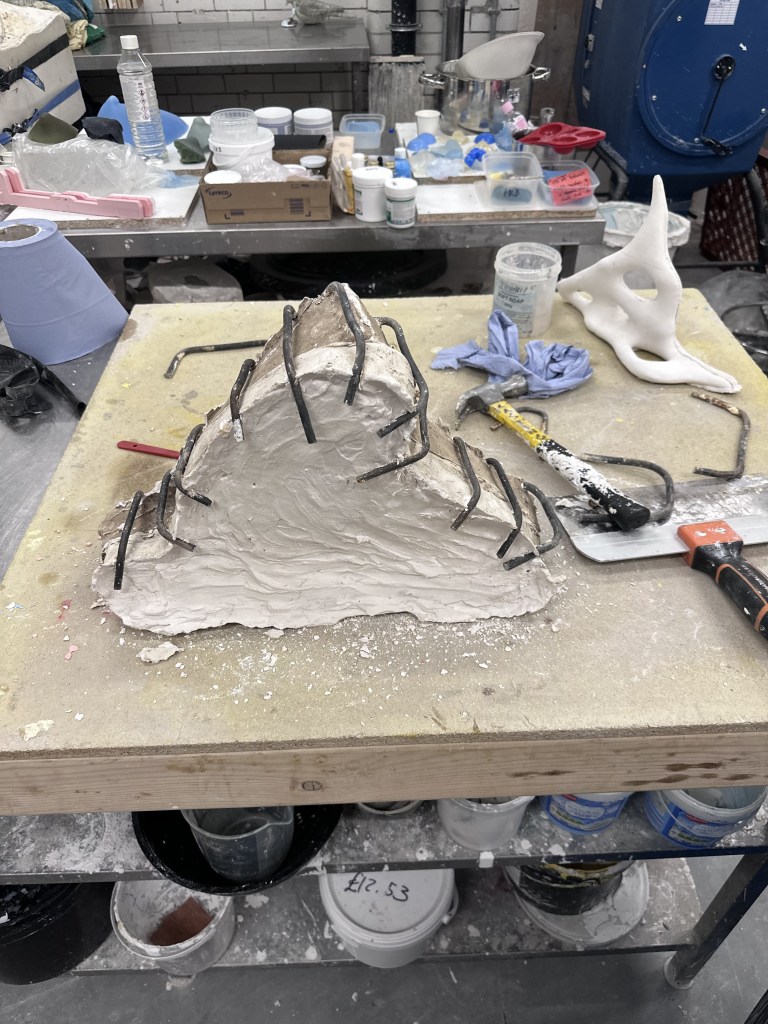
I decided to give the jacket another shot and made the other half, a quiet afternoon in the casting workshop allowed me to film parts of the process.
This adds a much needed rigidity to the very flimsy silicone, especially at the top portion.

I then took off the jacket, cleaned up the edges and did a second pour of plaster. This was overall quite a time consuming process but I feel as though it was worth it, as it will allow a process which is much less likely to fail. I also used some “OG” casting clamps that had to be hammered onto the plaster jacket, the only thing of concern here is that it chips away the outside of the jacket but they work very well. I used some inner tubes to secure the very edges of the mould just to keep the top part together as they were wider than any available clamps.
I did also come to realise that I probably should have made the top portion flat so I don’t need to balance it in a bucket to pour, this is something that I will take into account next time. I will perhaps make a second mould at a later date to be more efficient with my time, but I shall see how this goes for now.
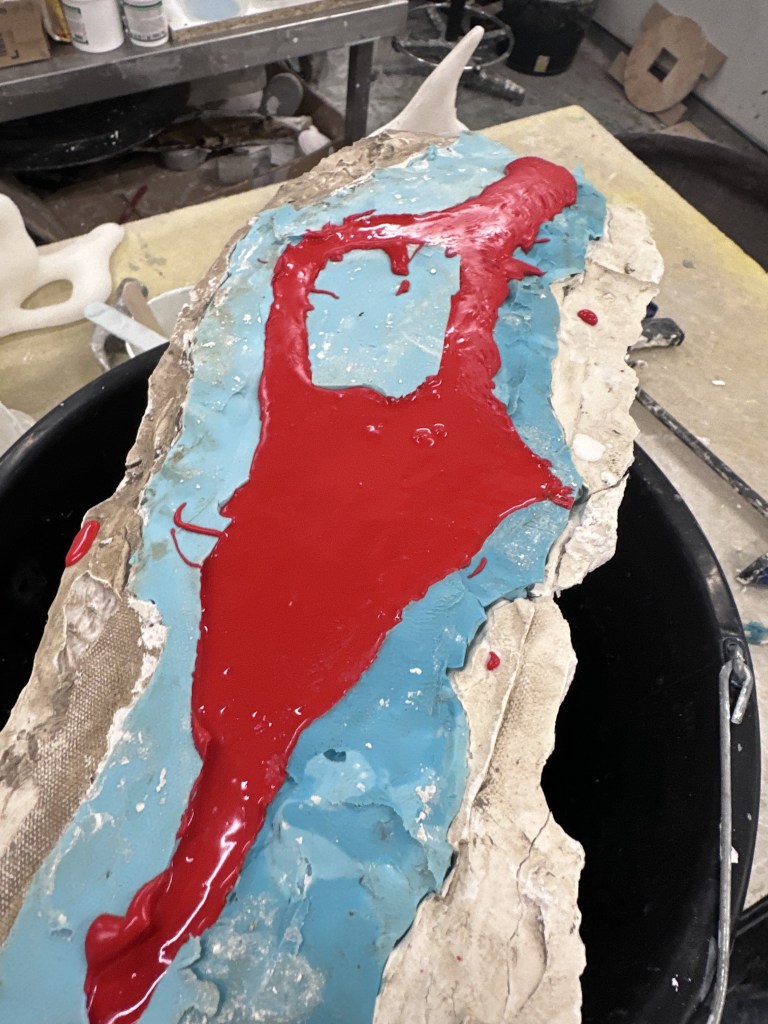

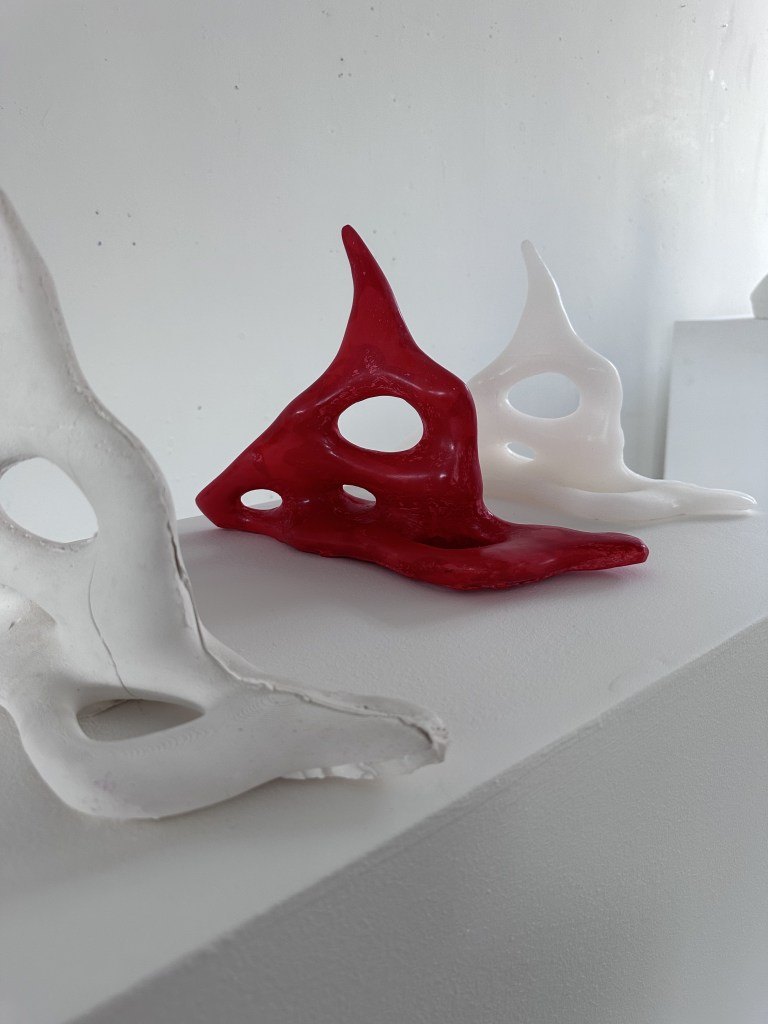
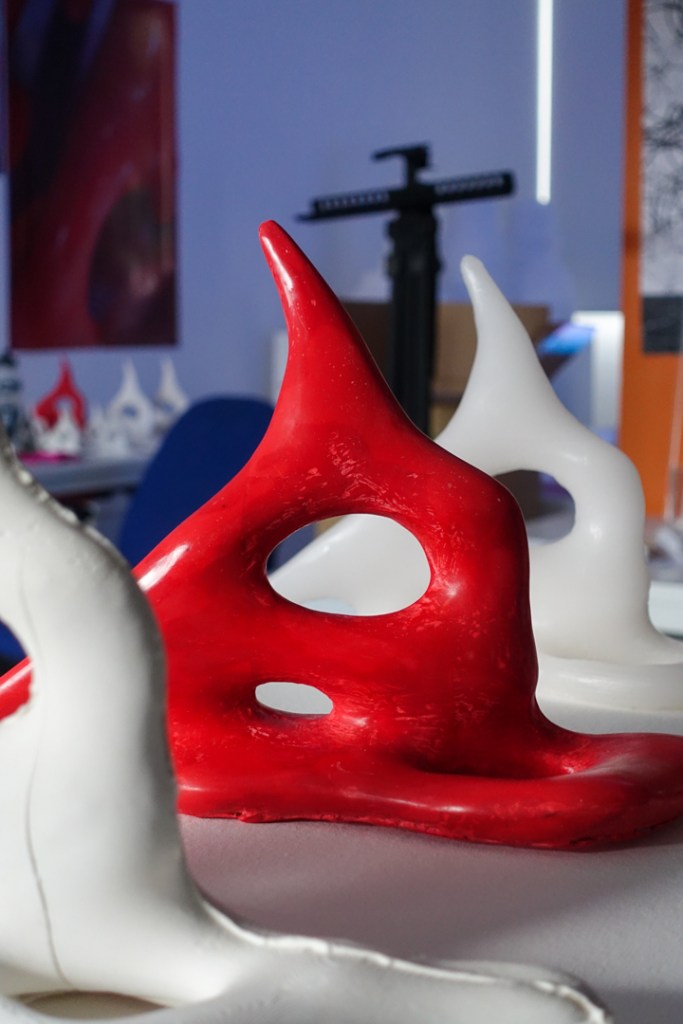
My second herculite cast came out much better than my first, however there was still a slight leak, so I decided to clamp the life out of it. I continued with another wax pour and this has been so far my favourite result. I decided to also go with a red jesmonite pour to match my renders, I feel like the 3D print texture on this will do well to communicate the noise texture that is present on the render. This is almost a reverse of the idea that Gillian suggested of creating something physical then re-creating it digitally.
Video Documentation / Honours Submission

This is something I will need to work quickly with to generate, the good thing is that I have the majority of my documentation on my external SSD and organised in a reasonable file structure, meaning that I will be able to quickly drop files into premier. I will use a mix of photos and my various video documentation to fill out this video.
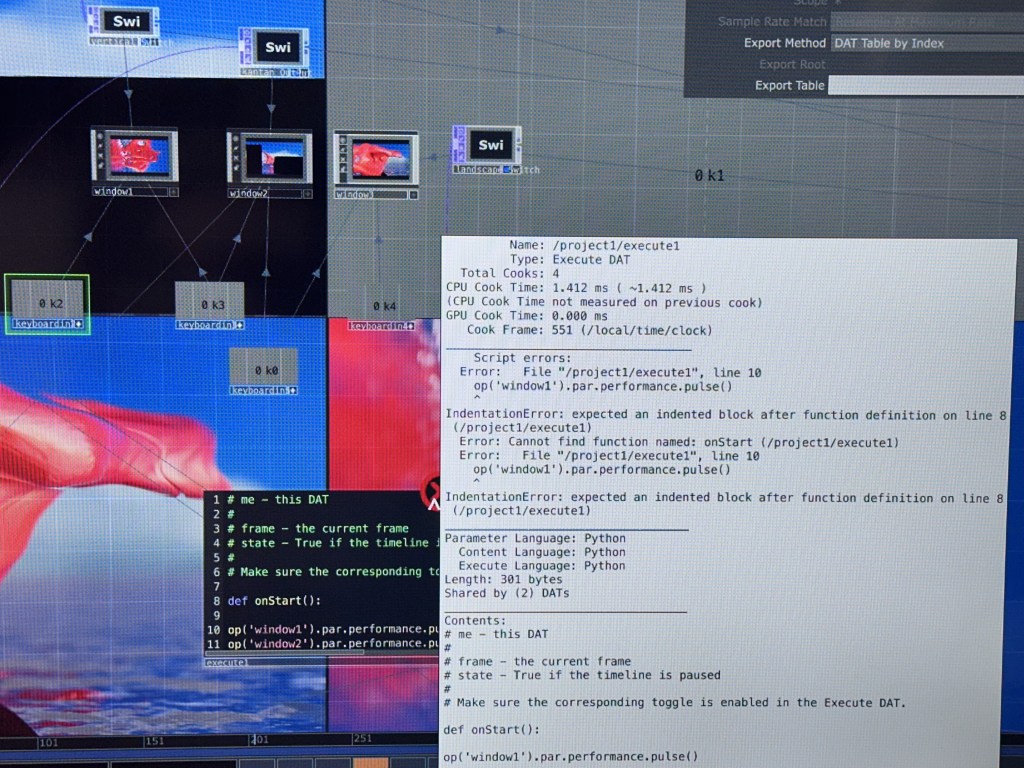
Touch Designer Comp
I initially thought that the comp TOP would be all that I needed.


However, neither order options worked which caused me a bit of confusion. However after a bit of trial and error, I found the Matte option to work the best for this. Allowing the black masking rectangles to be fully visible, with the distorted video in the background.
This is possibly the most significant development in my work, as it can serve as a base for my global interactions.
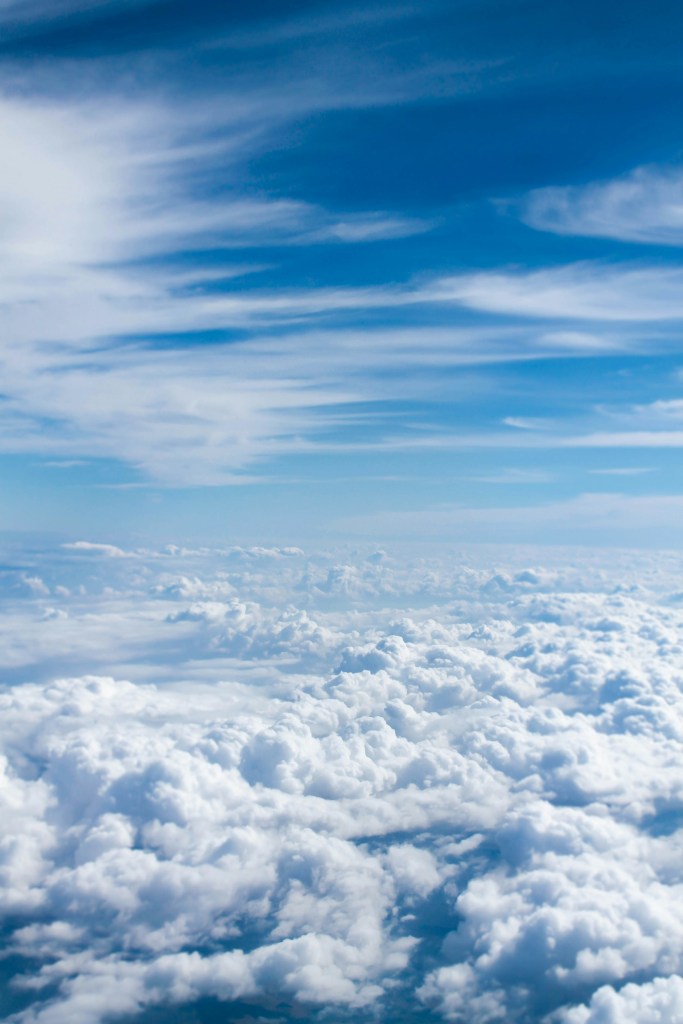

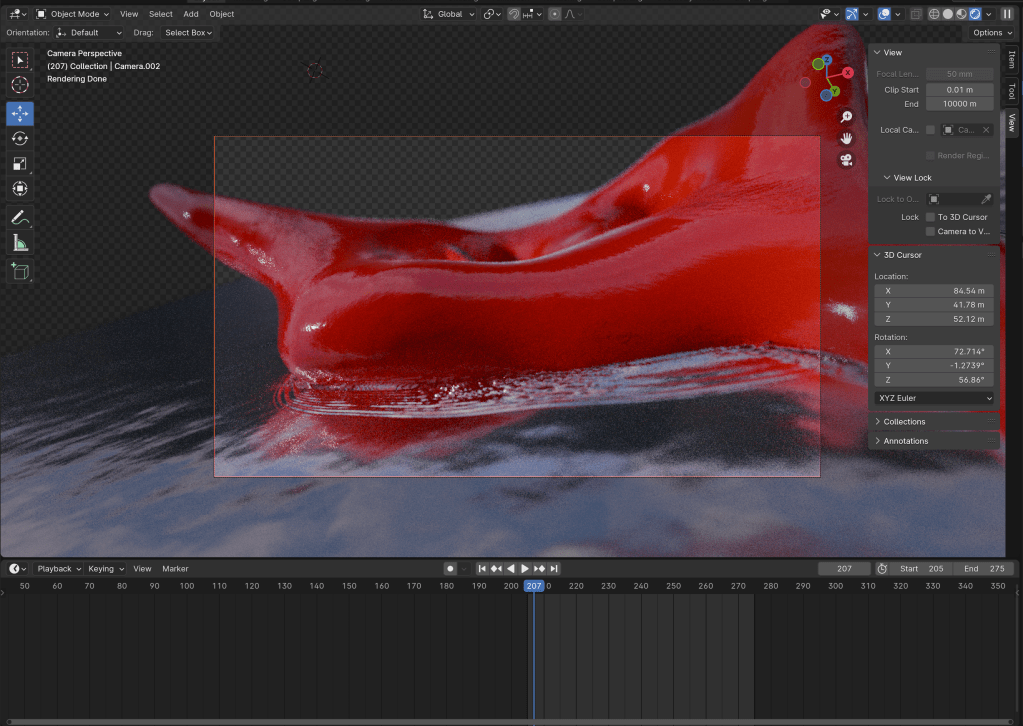
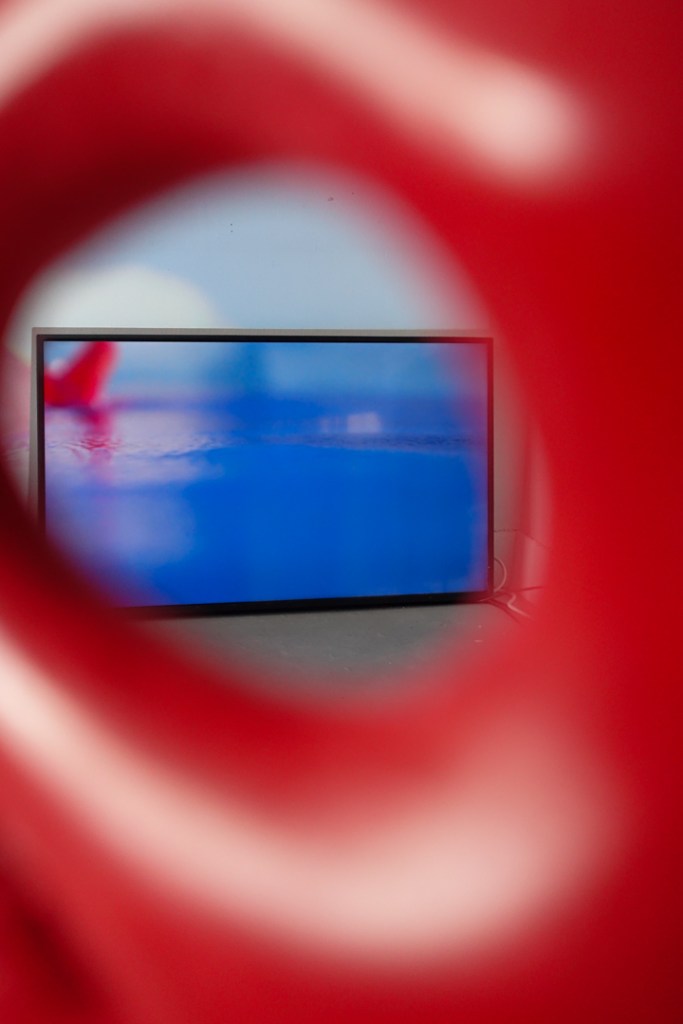
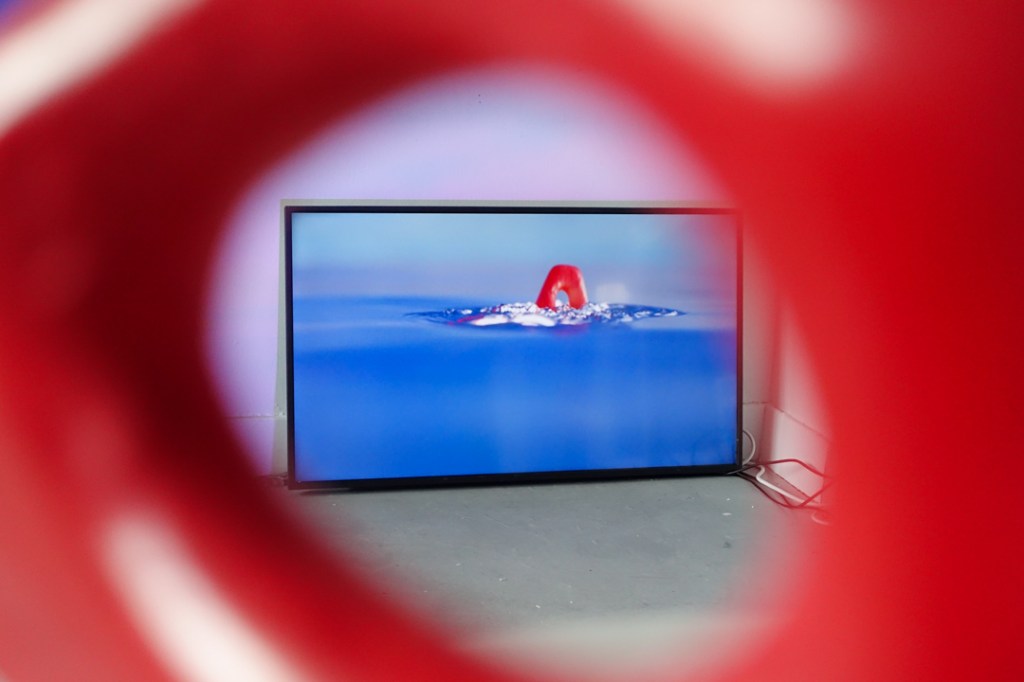
For my final I have changed my HDRI that I am using to this photo of an above clouds photo of the sky, this allows the reflections to overall be brighter than previously as there was a much darker section in the last HDRI.
Photo by Taylor Van Riper on Unsplash
Unsplash is a site that I have been using for some time, its a great source for royalty free images.


However, after one quick test I realised that this would not be what I needed, as the sky would be animated in time lapse form, but the reflections would remain static. I have solved this by using a trick of perspective, using my timelapsed video itself as an HDRI and an image texture. This should save some processing power as the water and sky can now be rendered as one video saving some resources during live playback in touchdesigner.

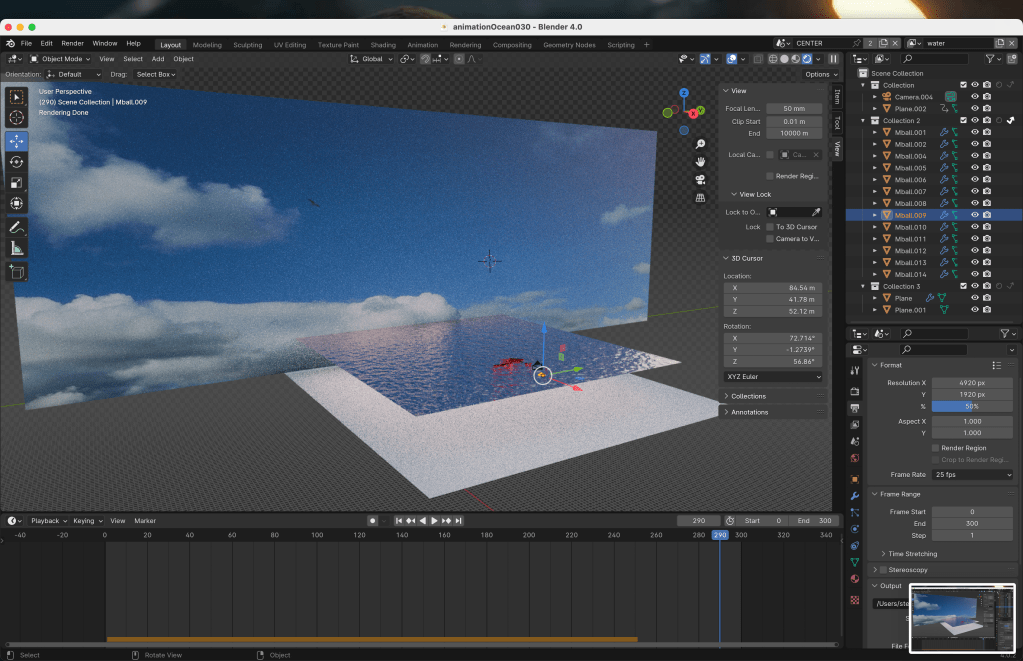
This allows for accurate reflections as the HDRI is now gone and a sky texture is in its place, this allows for accurate lighting and I can now use this file as a base for the other renders I produce this week.
This scene includes rigid body physics as well as dynamic paint for the ocean scenes. Even with baked animations, the water part of my render took around 7 hours to complete. I will need to make full use of my time to work efficiently as to not be waiting for the renders to complete.
The only things I’m not happy with about this render is the fact that the water is so still at the very start. I will remedy this by scaling the plane slightly and animating it slightly moving over the 12 seconds of footage and then the sudden stopping of the shapes with no looping. I tried to remedy this in the file with the plane below the water line to catch the shapes as they splash down. This may be an issue with the bake so I will re attempt this again overnight and see if the results differ.
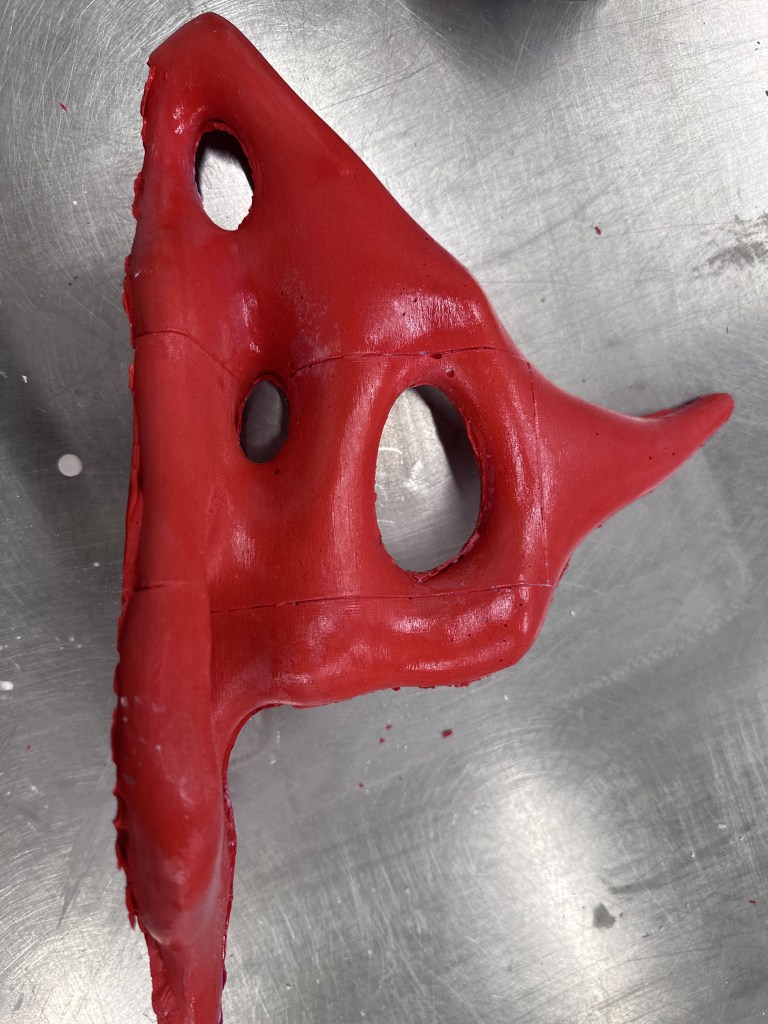
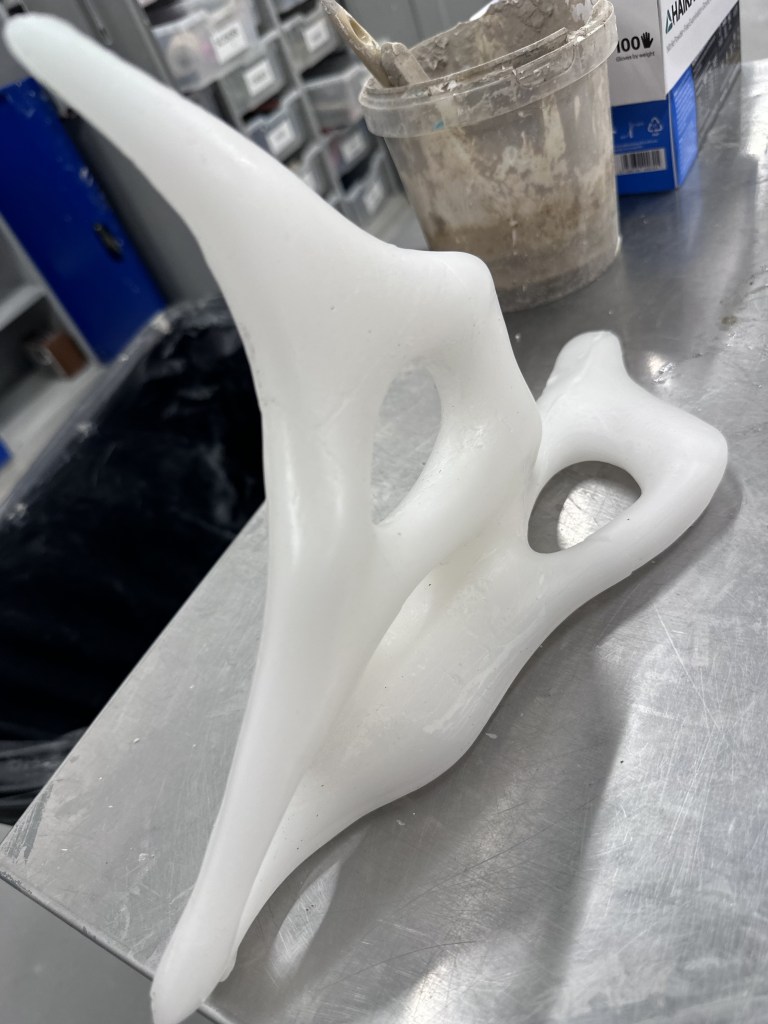
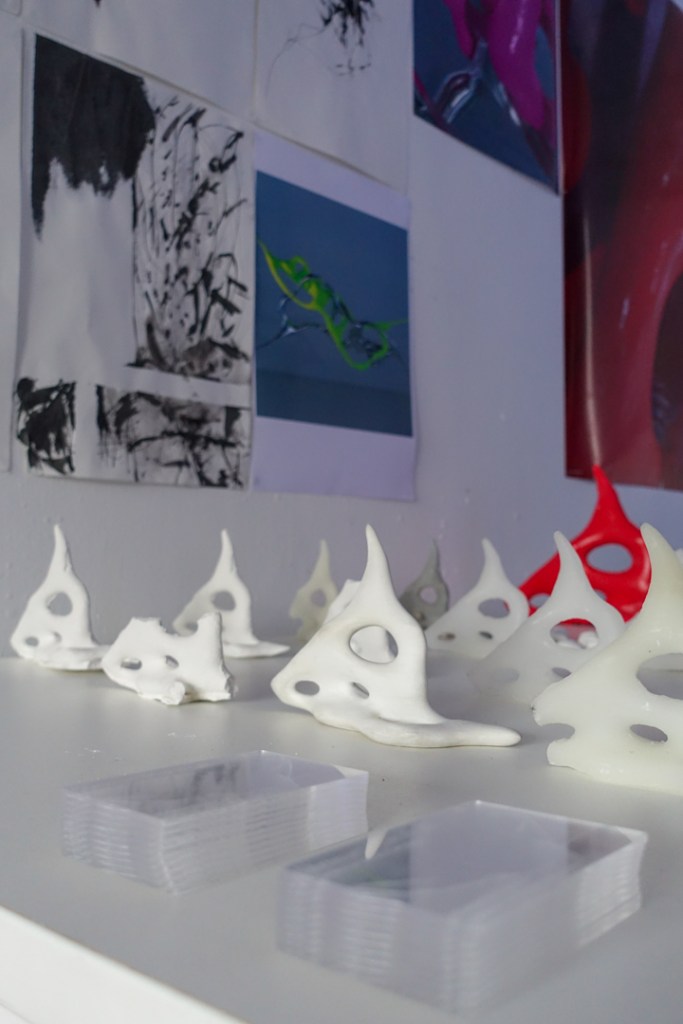
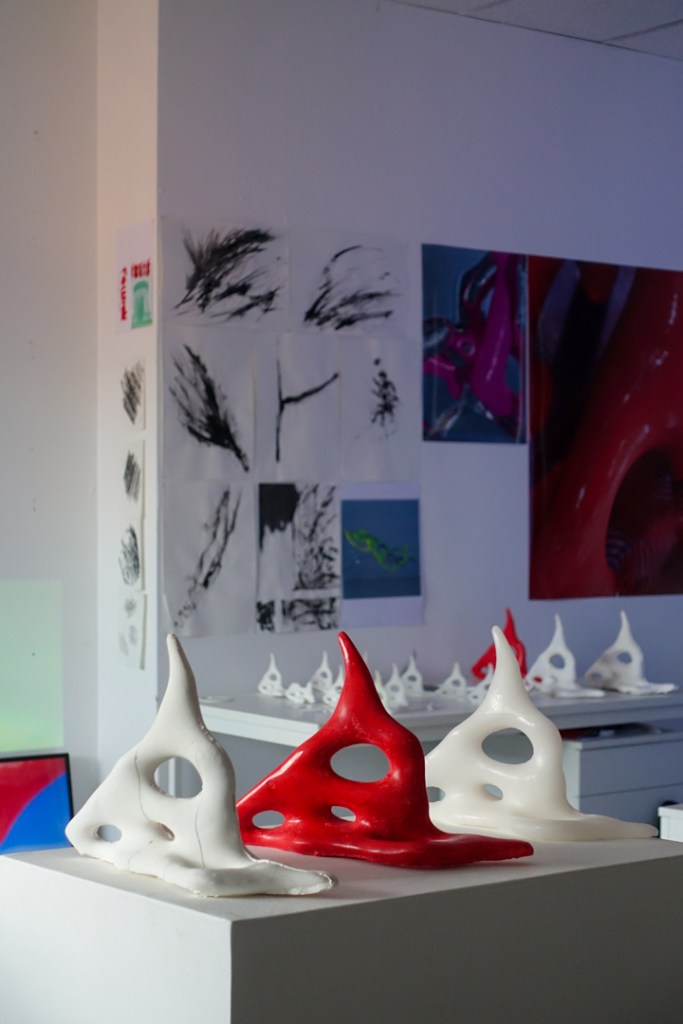
I used jesmonite gloss sealer to give the objects a shine similar to my renders. I did this with a non polished piece of jesmonite, however, I plan to create another jesmonite cast that I will sand that down with very fine sandpaper.
I also decided to sand down my 3d Print in cast I wanted to present it at degree show, however, it is a very timely process, and I will need to sand through multiple grains. I sanded the smaller 3d print to around P350 so I shall do the same for the larger one.
I then mixed up some very thick plaster in order to paint on smoothing out the 3d printed texture, however it went on a bit more rough than I was expecting but this shouldn’t be an issue with the sander going through the same process as the print itself.
I set up for another Jesmonite pour, here I decided to document the process.
This video showcases the process of measuring, mixing and pouring, this ensures

Mapping
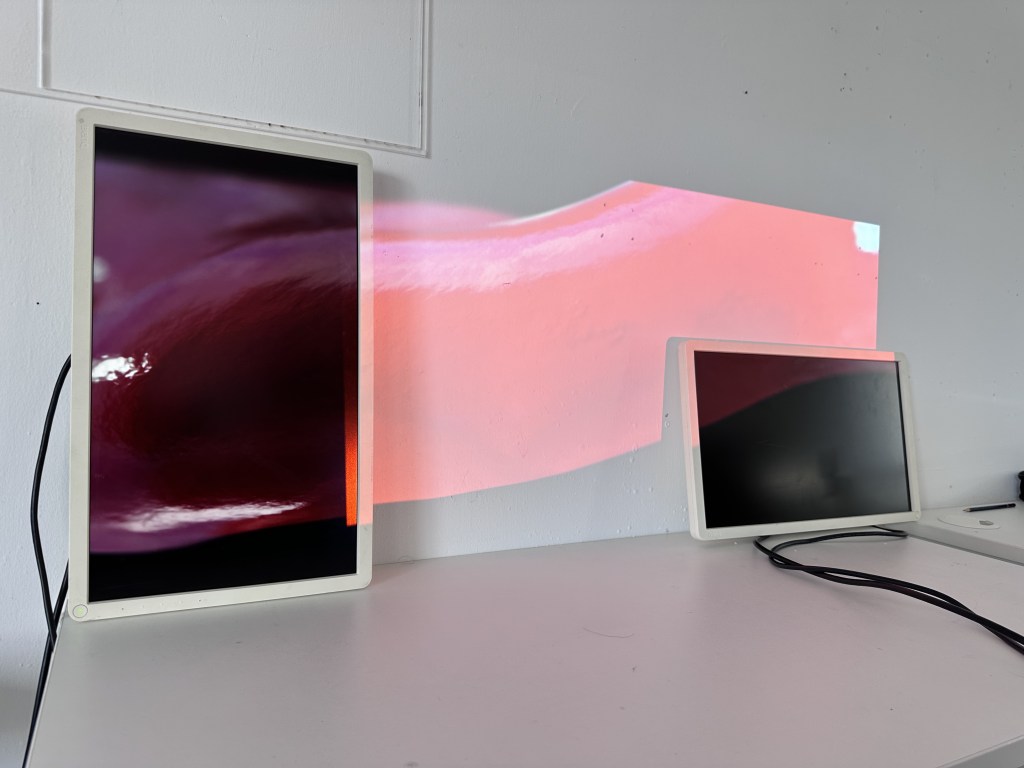
After changing some settings on the projector I managed to get a setup closer to what I desired in my initial sketches. However this required me to do a bit of rejigging with the mapping, this will of course need to be changed for the final installation. I used Kantan mapper to draw rectangles over the monitors, used the crop and fit nodes to line up the content on the other two monitors. This also allows for the distortions that were present in the wip show. This also means that once I get the setup mapped, I can drop in any video and it should work as desired.
My touchdesigner sketch is looking quite messy at the moment so I will need to organise as it is challenging to work with as I have been trying multiple things it is quite bloated with nodes that are no longer used.
My next step will be to have specific noise values equate to specific scenes. I aim to achieve by mapping said noise level to a specific value that equates to the same value of the desired scene in the switch node.
I am also trying to make sure that my videos are bomb proof for degree show. With the current setup only really being suited for my specific video.
I have also came to the realisation I don’t need my massively long video file, I can just use a 1920 x 1080. This will massively cut down my render times, and save resources on the mac mini.
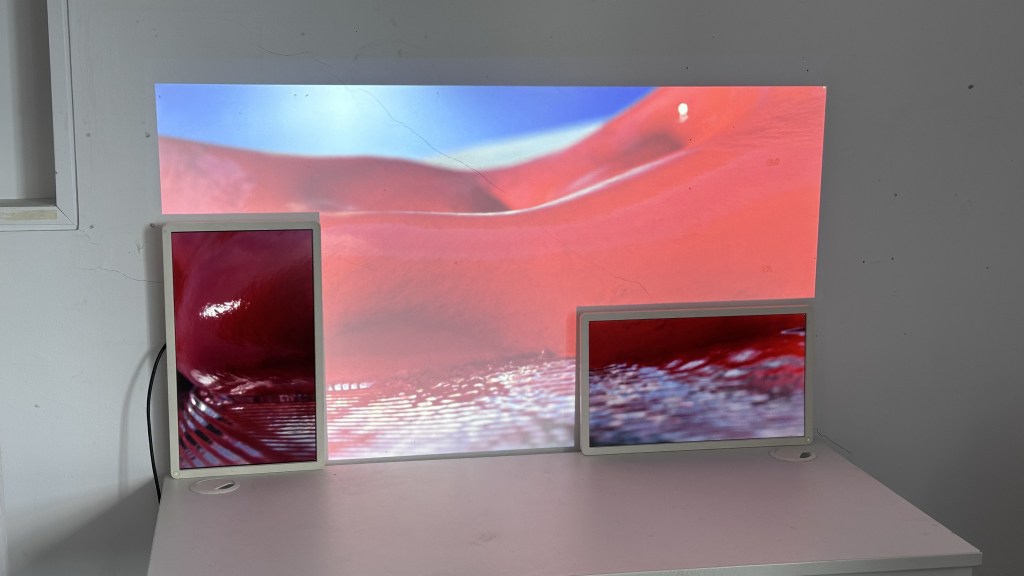
I have managed to get a scene working for now with 1080p video, I feel like once I get my hands on my larger monitors it will be easier to map for install, thinner bezels and better picture quality will go a long way.
I also took the time to transfer to my exhibition machine, the same M1 Mac mini I used for degree show. It is currently running at 60fps in the edit mode with all the preview windows off, this is ideal as it will be the closest to perform mode, I shall discuss the splitter method with paul to save any undesirable cable setups. I will however need to refine my scenes with this as I am on a fine line with the performance. I am still yet to test with the camera and mic but it should with the same reliability as before.
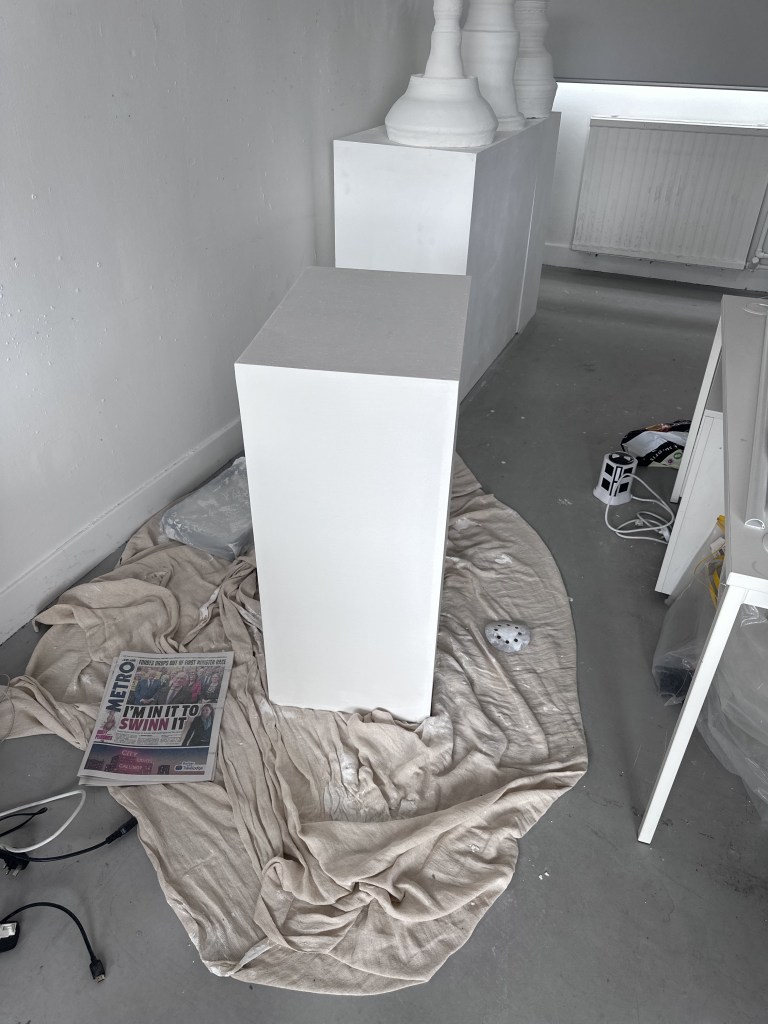
I also created a new plinth over the weekend, the one I used for wip was looking a little worse for wear, so it was best to fabricate my own. This will be used to hold my sculptures. I planned on making a new one in the wood workshop, however after discussing this with my stepdad, he said we could do it the next morning, so we did.
Picking up the wood on saturday morning and finishing it by 12 was probably the quickest turnaround on any piece of work I’ve ever had, I am very grateful to have such a space as our workshop and tools available to me. Meaning that even in days where attending workshops at GSA aren’t feasible, it can still be done.
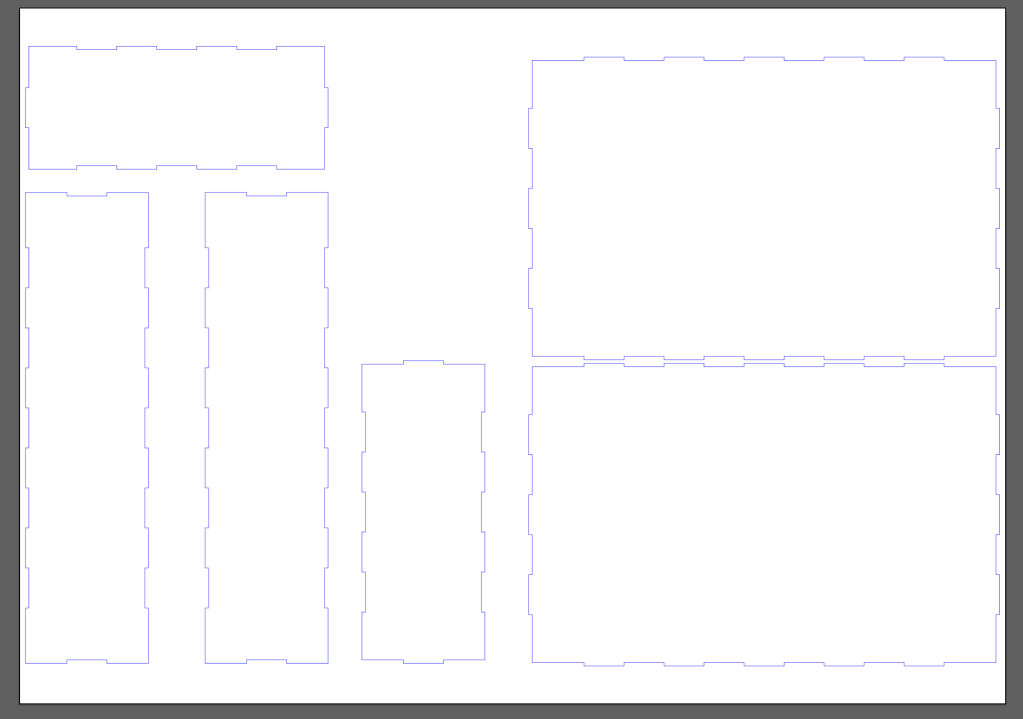
I also got a box laser cut for my mac mini, however I am unsure if I will use this or the offcuts of wood I have from my plinth.
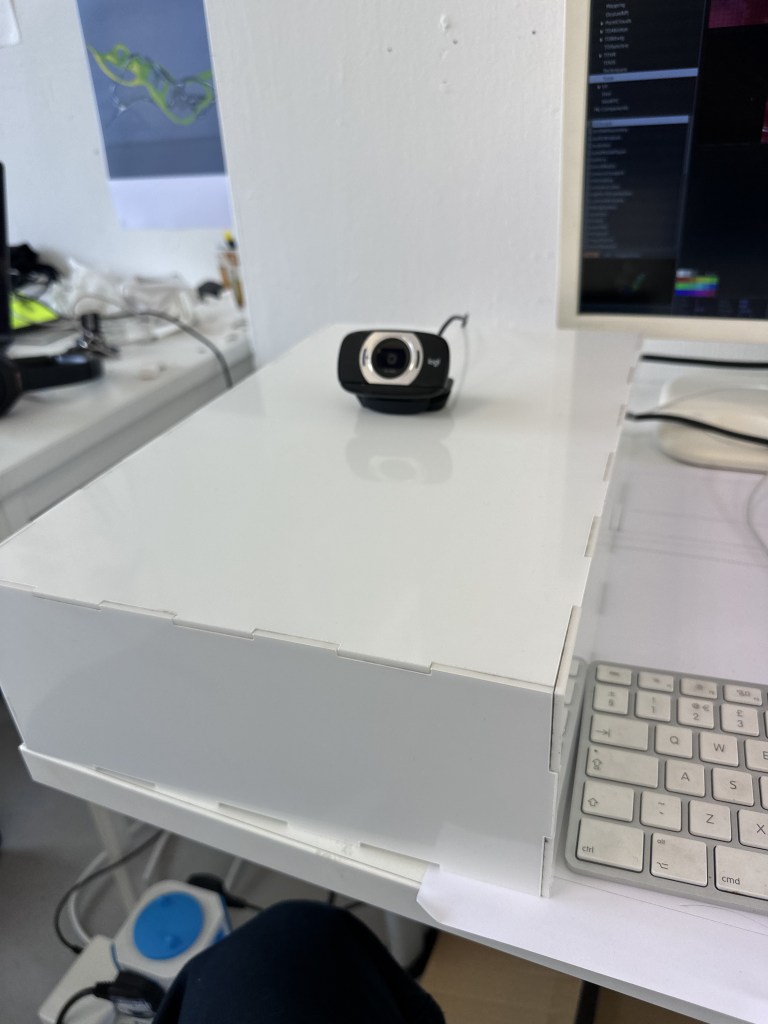
I still need a way to hide the camera, however I can hide it in my plinth with a USB extender or something similar.
Documentation Video
Throughout this year I have made a very conscious effort to document my process, as taking images and videos of everything of note during my time undertaking this project, ensuring all is backed up between my machine and an external SSD.
And I do mean massive. This mass of documentation however has made it much easier to create my documentation video. Nearly everything that will be included in the documentation video I already
After picking up my degree show equipment, I set it up in the garage space, after a slight remapping due to the different setup, I quickly documented the process.
Touchdesigners node based layout, although unaccessible at first, allows for great tweaking and fine tuning towards the end of development. Changing some values of some sliders allowed the map to line up with the video with very little issue. Having this allows for much easier installation.
Since I am also happy with my current build of touchdesigner, I decided to think about automation, the problem right now being that as I have 3 seperate window outputs, there isnt a way to have them spread across all 3 screens with one perform mode, as they are technically different resolutions. So it wont automatically launch, there may be some workarounds with scripts but for now, when a keyboard is connected, whoever is setting up just needs to press 1, 2, 3, 4 on the keyboard.
1 resets all videos to the beginning, ensuring the compositing aligns correctly, 2, and 3 activate the “open as seperate window” option on 2 of the screens then 4 activates perform mode on the final screen. I had all the commands on one button but the program froze every time the button was activated, it would resume but to avoid any complications, there is a separate button for each function at this stage.
Looping Video
One thing that has really bothered me about my renders is that the water doesnt lend well to looping, I am currently trying to amend this so that it is as close to possible to a perfect loop, I dont think ill get there purely due to the nature of how I achieved the renders, but it will be as close as possible to my desired output.

a current test I am undertaking is animating the noise texture on the waters rotation, having this match up will fix a great deal of the issues that were present in my renders.
This needed some tweaking but I feel this is the best way to get the water lined up.
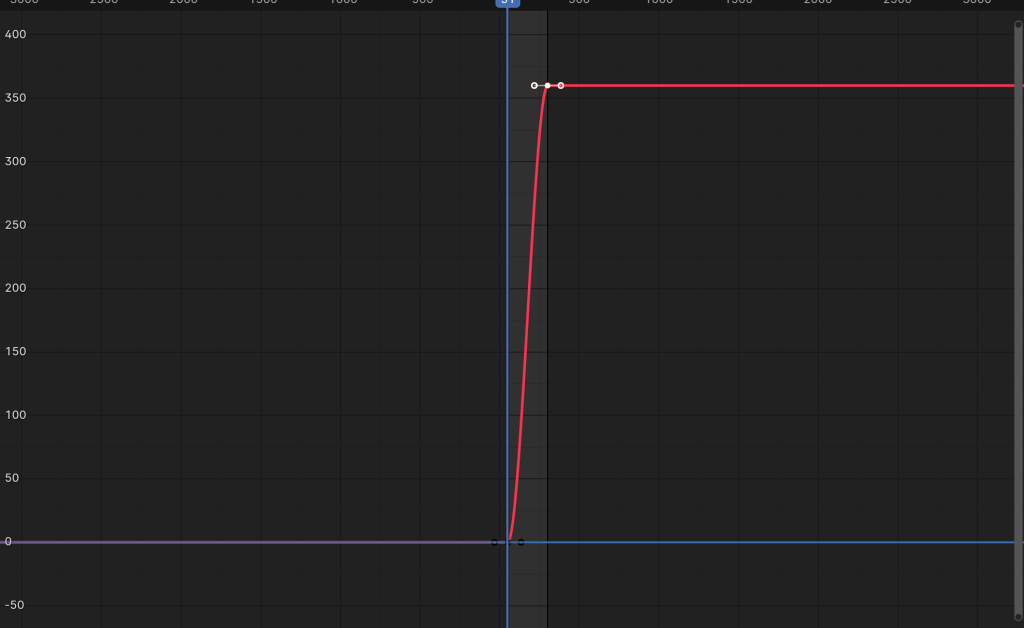
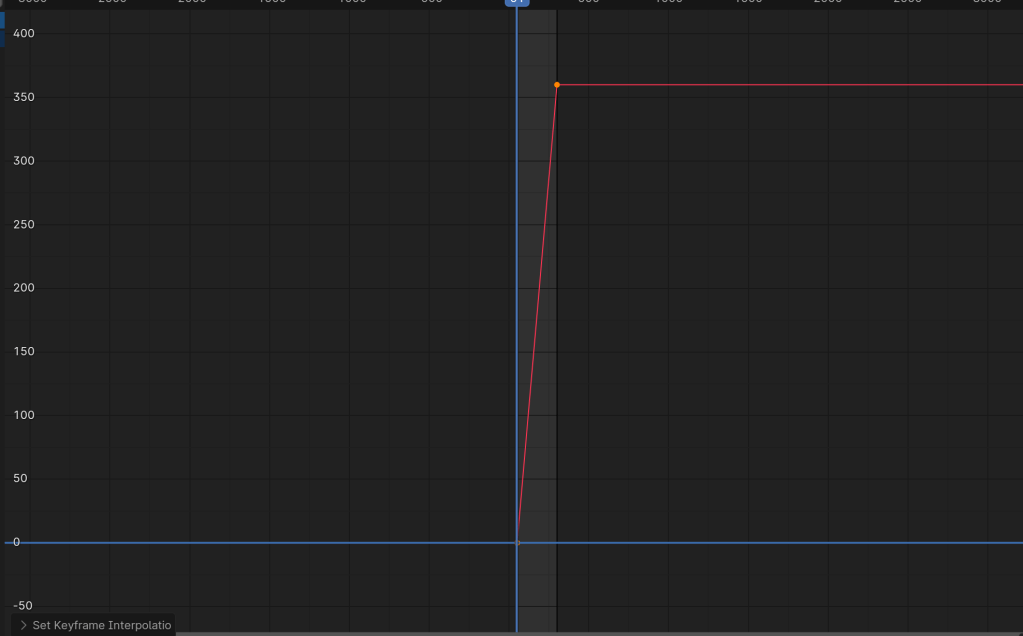
One thing to change was the fact that blender automatically adds curves in the animation graphs, under normal circumstances this would be totally ideal to have a more natural start and stop animation, however as this is looping, this causes more issues than it does to help, changing the interpolation to linear, ensures this is no longer an issue
I also during the bank holiday weekend, took the plunge and installed an NVME ssd with windows 11 in my windows computer. This means that I can run renders extra efficient, having one do the reflections and one do the solid shape. With the PC being the faster with rendering I transfer the most complex render onto it usually that is the reflection and water simulation.
Interestingly, the baking process is faster on my Mac this must be due to its processor being better than my pc but my dedicated graphics card will outperform the Mac’s graphics capabilities. However they are both roughly the same speed so splitting the render is the best way to go.

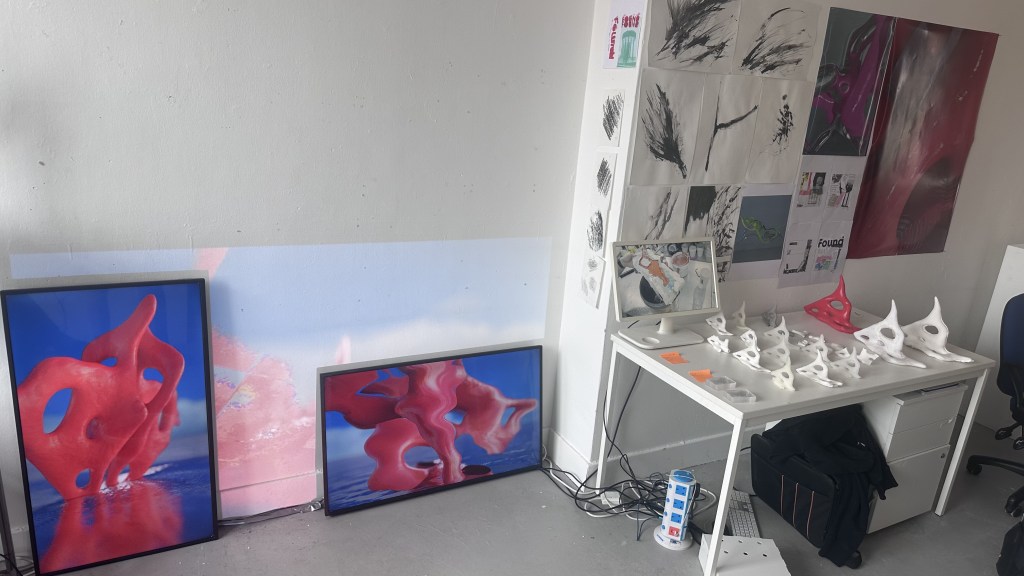
Preparing for submission I have also made use of the photography printing service on connect2, with a consultation on Wednesday, these renders will be placed on the wall in my space for submission, showcasing key points in my process for the renders, such as depth of field and my final texture study. Depending how the turn out this will lead to more being printed and hopefully sold at a later date.
I have had a slight setback in terms of my sanding, the charger I have been using for my drill has died, I’ve ordered a new one but this shouldn’t be too much of an issue.
This last week will be mainly sorting out finalities. I am happy with my touchdesigner file for submission as I need to find a balance between performance and function. It seems where i am at for now is the best. There may be some things I need to change for degree show but so far I think I’m fine. I am now just focusing on fixing up some renders. I also decided to not include the idea of certain scenes being set to a specific noise level as I didn’t want there to be aspects that weren’t seen, if it was a quiet day there could be chance that some scenes wouldn’t reveal themselves, the chaotic nature of the constantly changing scenes, reflects my portrayal of emotions after these traumatic events more successfully than otherwise. Where it is a constant cycle of disruption and reflection that can be at a small or much larger scale.
I have started painting my plinth in the studio and sanding between coats, this will hopefully mean that I can get it as smooth as possible and look like one uniform piece of carved wood, or at least, as close as I can to that.
Sanding my jesmonite has been a bit of a process, going from 60 to 10000 grit sandpaper to get it as smooth as possible, however i still wasn’t happy with the finish.
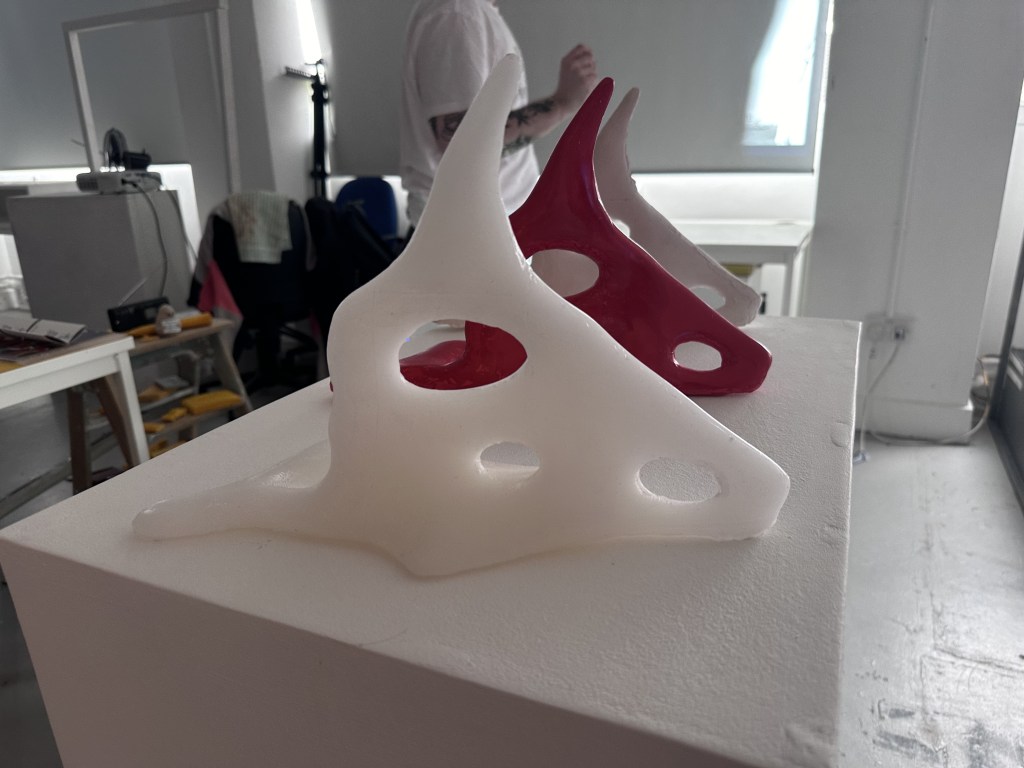
Going back to casting I consulted Amy about what would be the best approach for this and she suggested briwax. Buffing this out with several coats provided the object with a brilliant shine, that catches the light brilliantly.

I also did the same process with my wax cast, this time with white spirit.
As white spirit is quite hazardous, extraction was required, but once it was finished it again gave such a nice polish and smoothness, with almost semi translucent look.


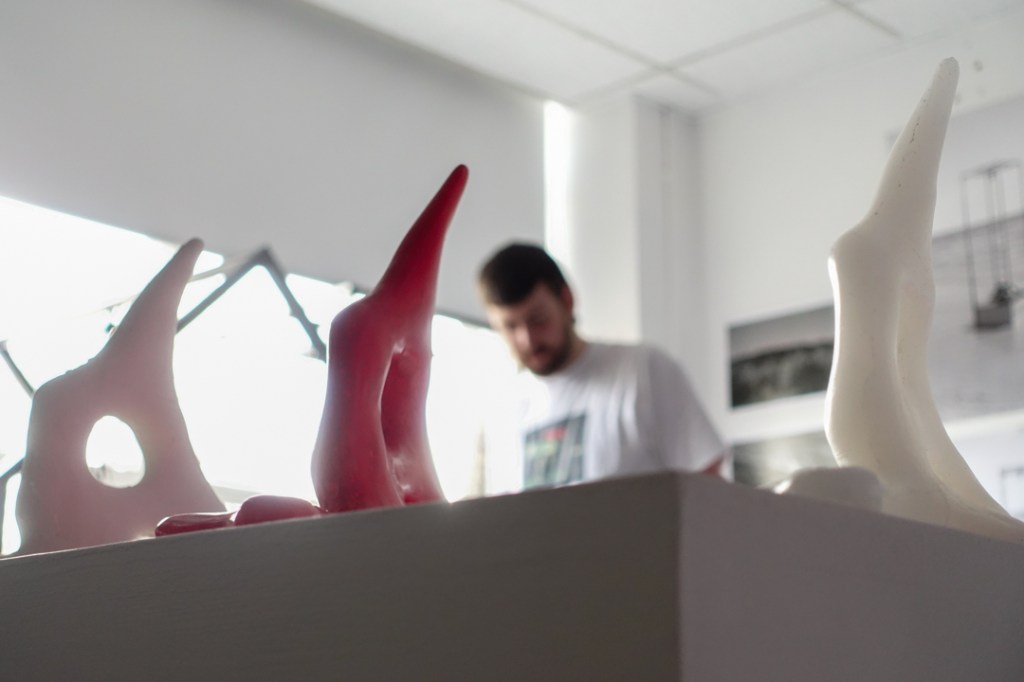
Packing up my 4 best casts and taking them back up to the Barnes. I managed to get a box for safe transport as well so they will live in here while not on display for assessment.
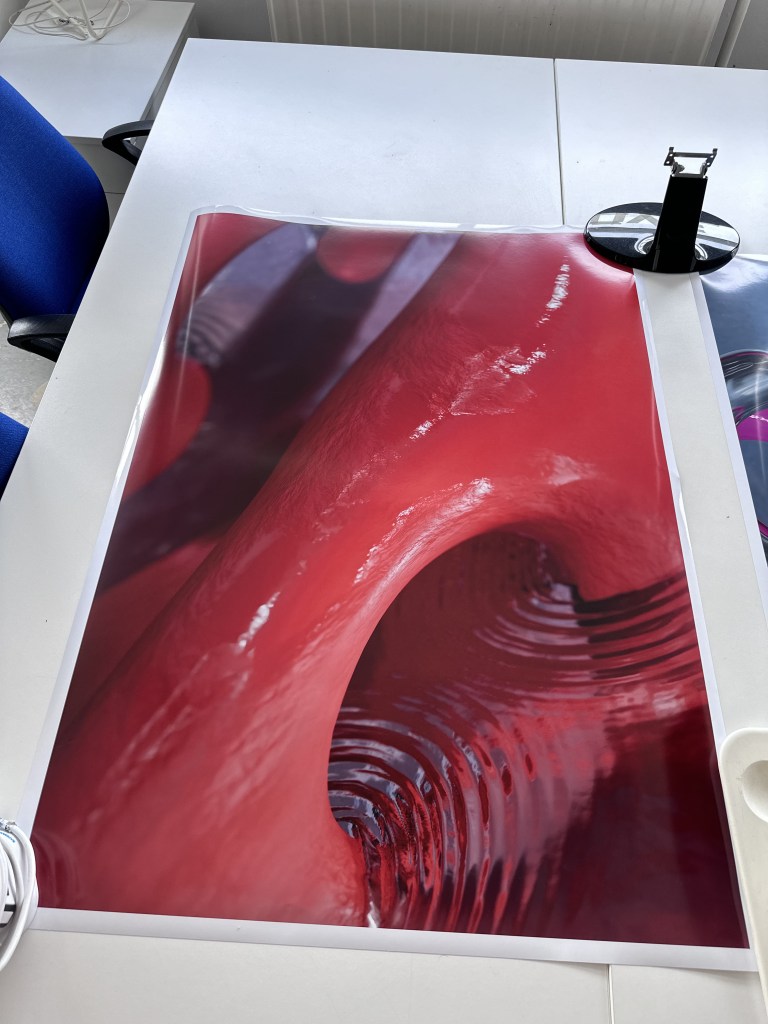

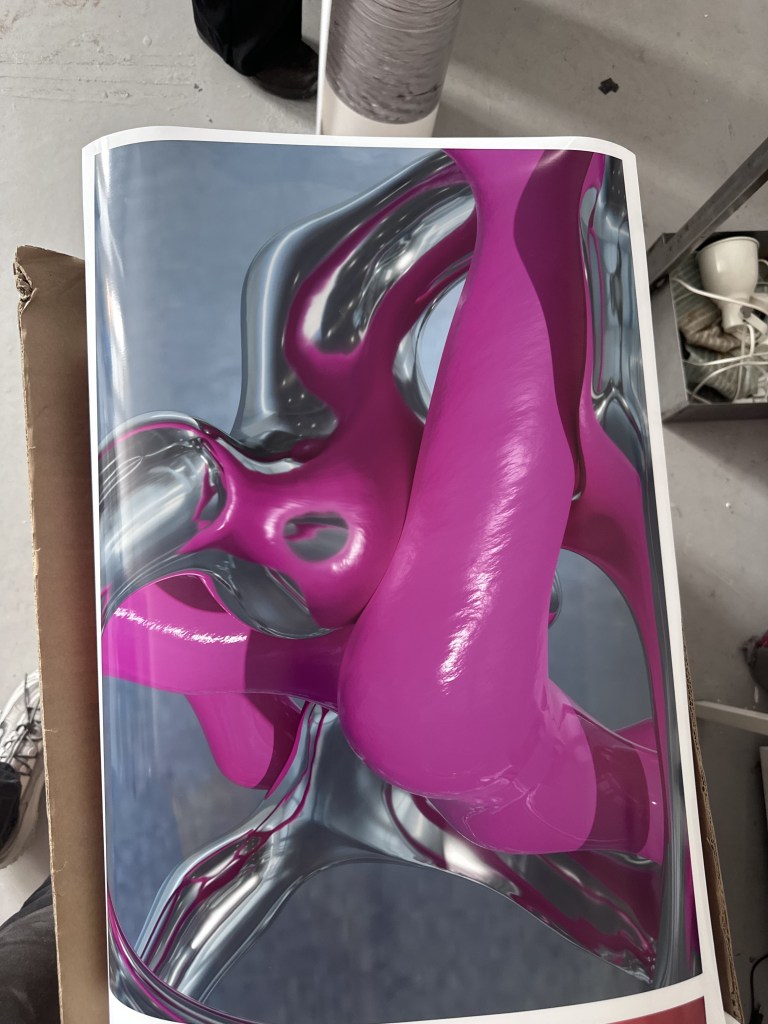
Making use of the photo printing facilities in the stow I also managed to get some really nice prints of my renders done on Wednesday. They both display key parts of my process so will be good for assessment, the giant red poster was my first successful use of water and Depth of field and the pink and metallic was my first successful use of texture that I used in my final renders. This allows anyone viewing to really interrogate the work, things that wont come across in the videos.

I also got another box for my mac cut with holes on the side and top for ventilation and at the front for the webcam.
Extras
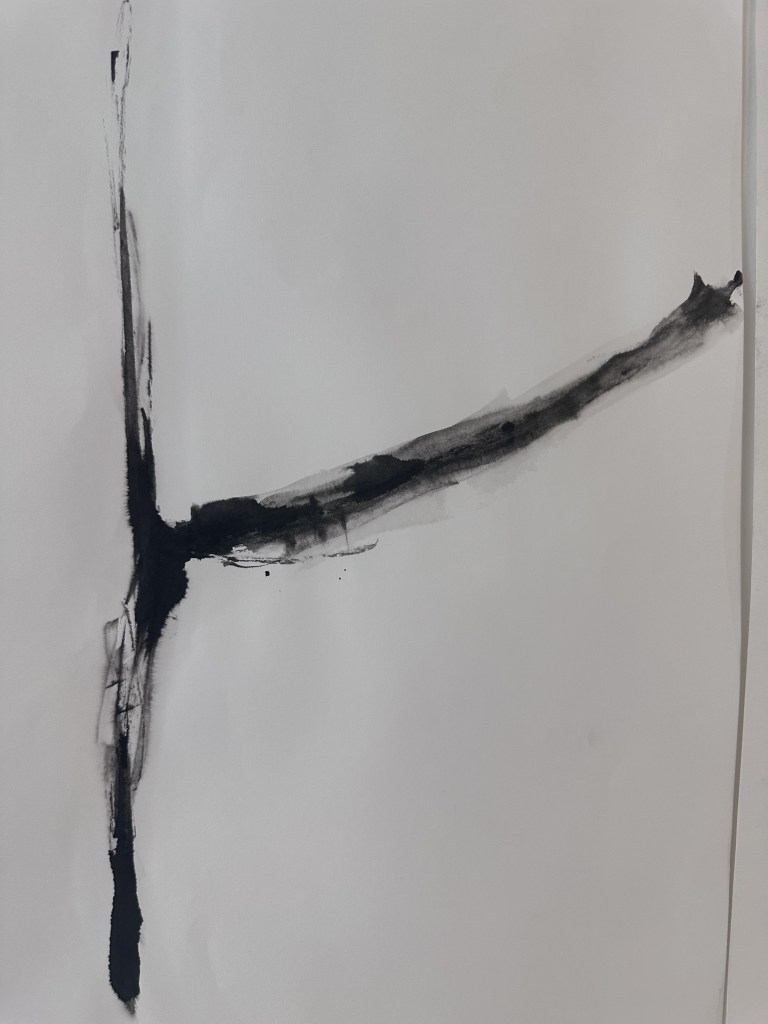
I also took time over the course of the last few weeks to develop a business card for Degree Show and ND. This was based on one of my initial marks. Simplified down in illustrator and turned into a vector drawing. This then allowed me to send to Andy at lasercutting, he suggested a few changes and it ended up being exactly what I wanted it to be which was fantastic.

Studio Setup


The subconscious is a strange thing.
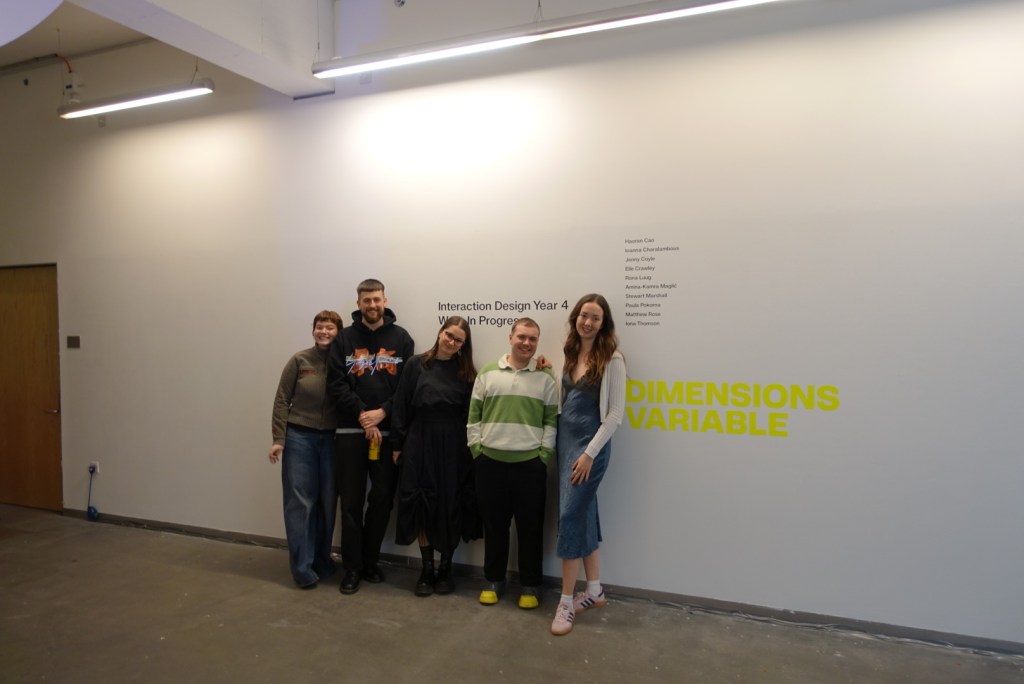
On Saturday I made sure to bring the final few things I needed for submission on Monday. Setting up my desk area with some material studies form wip and more recently with my larger objects, as well as this I included my prints and initial marks from the start of the year. Special thanks to Kamra for the photos.
I also attempted to make an auto start script to remove the need for the keyboard, however this requires more time to develop than I currently have. Hopefully i will have this functional for degree show.
my final setup for submission. With my own raspberry pi that i flashed last night to show my various videos.
Final Reflection
On the final day before submission, after curating my file for submission, it almost doesn’t feel real. However looking back at the work I have created throughout the year, the amount that I have learned not just this year but at my entire time at GSA has been amazing. The opportunities to learn techniques from both course curriculum and external facilities such as woodwork, metalwork and casting is truly and amazing opportunity and I am only disappointed I didn’t take them up sooner. With nearly every technician being extremely excited by our course if they had seen our work before or eager to help once they found out what it was.
Not only was the course and school in general a great help (albeit there is always room for improvement), I found an amazing new group of friends in Matt, Iona, Jenny and Kamra. Over our time on the course pushed each other to do our best, helping and organising when nobody else would, being key players in open share exhibitions, right up until wip, submission and no doubt degree show and New Designer. With the work we have all produced this year I will forever be proud to have studied Interaction Design and will always look back fondly at my time on the course. I have learned so much this year, having to teach myself a great deal of techniques, bouncing ideas off of lecturers and friends made this year special having real control in where you take your practice is so empowering. I feel as though I have now found myself as an creative, making things I truly enjoy and am proud to show off.
Thanks to;
Miss MT
All my friends who have made this year so much easier
My parents
Stow Casting Department
Gran Jean
