
The thing on the front of my mind this month is the WIP show. Starting to feel like crunch time.
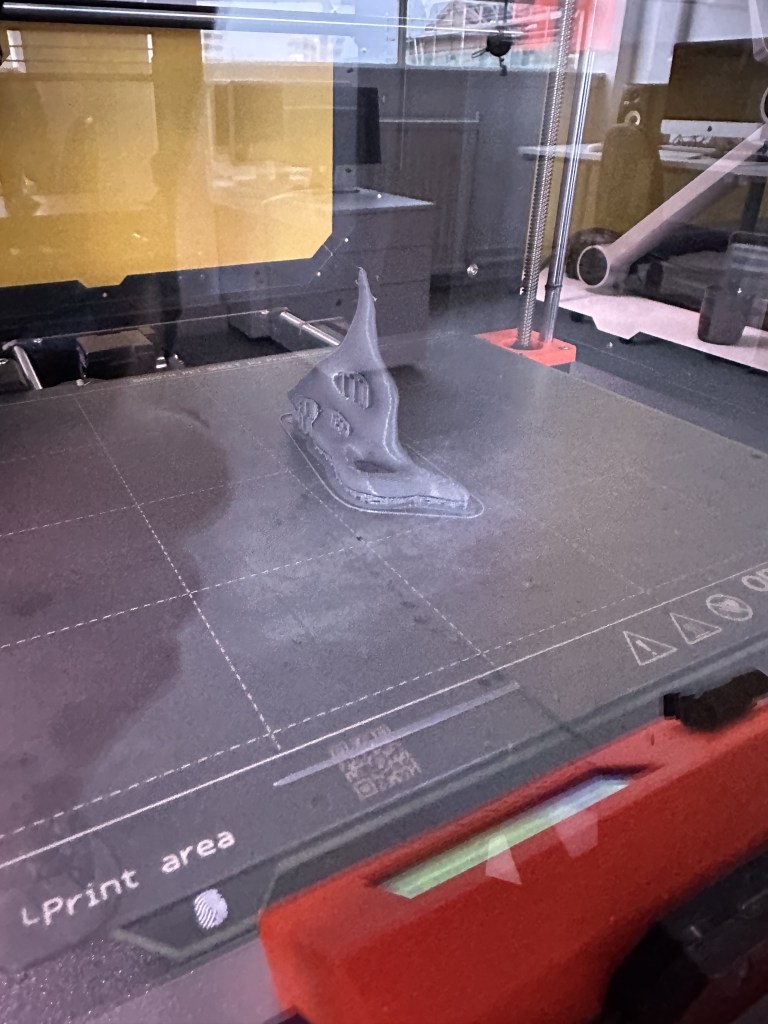
I have had some recent success with the printers printing a small scale version of my piece.
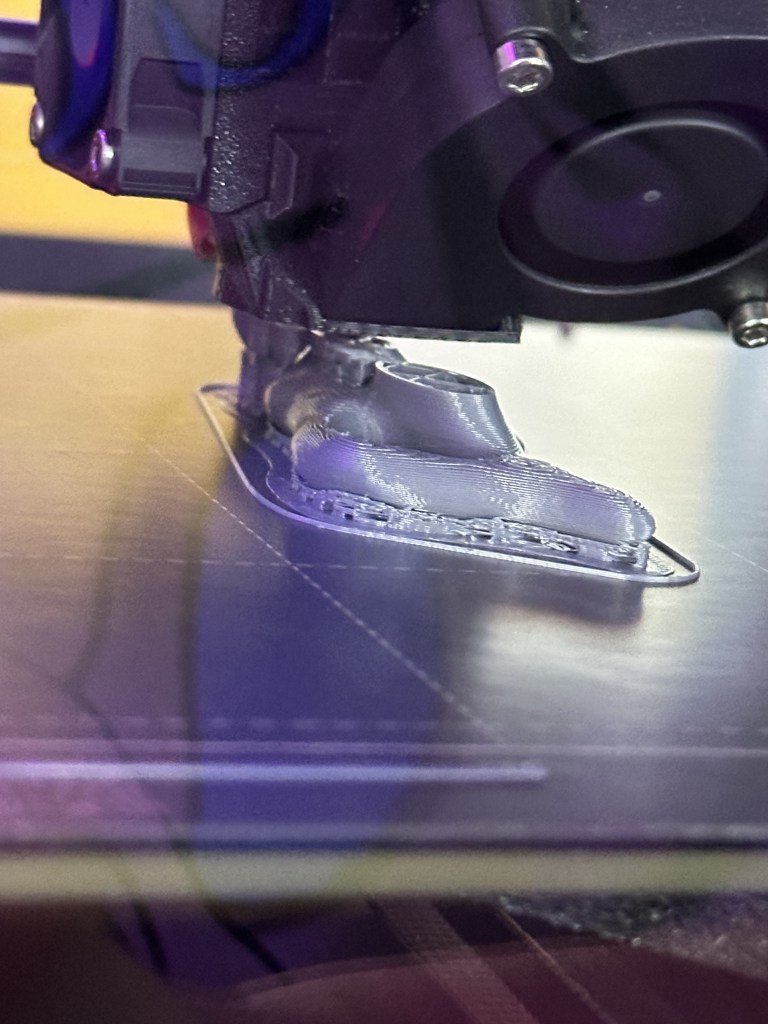
After talking to Gillian and Neil about it I put a larger brim on the print in the prusa app and it seems to be working fine.
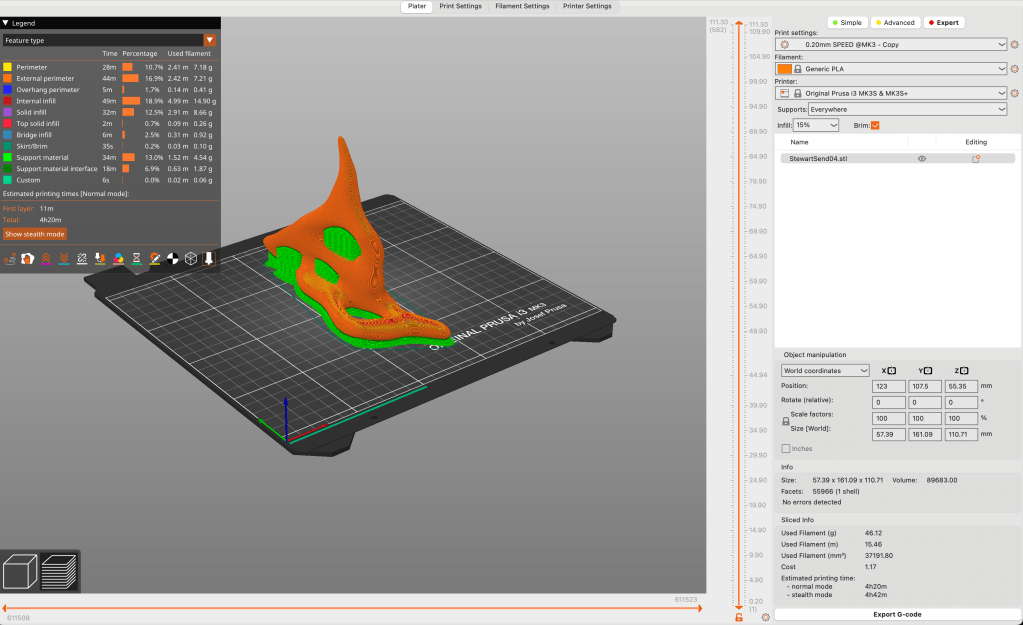

As can be seen a larger print the same size as the one I got from the reid building will take around 4 hours.
Being able to see the print in action I have realised the infill could probably be toned down as it is quite solid turning down the infil settings can reduce the overall time to print by around 30 minutes down to 3hrs and 56mins.

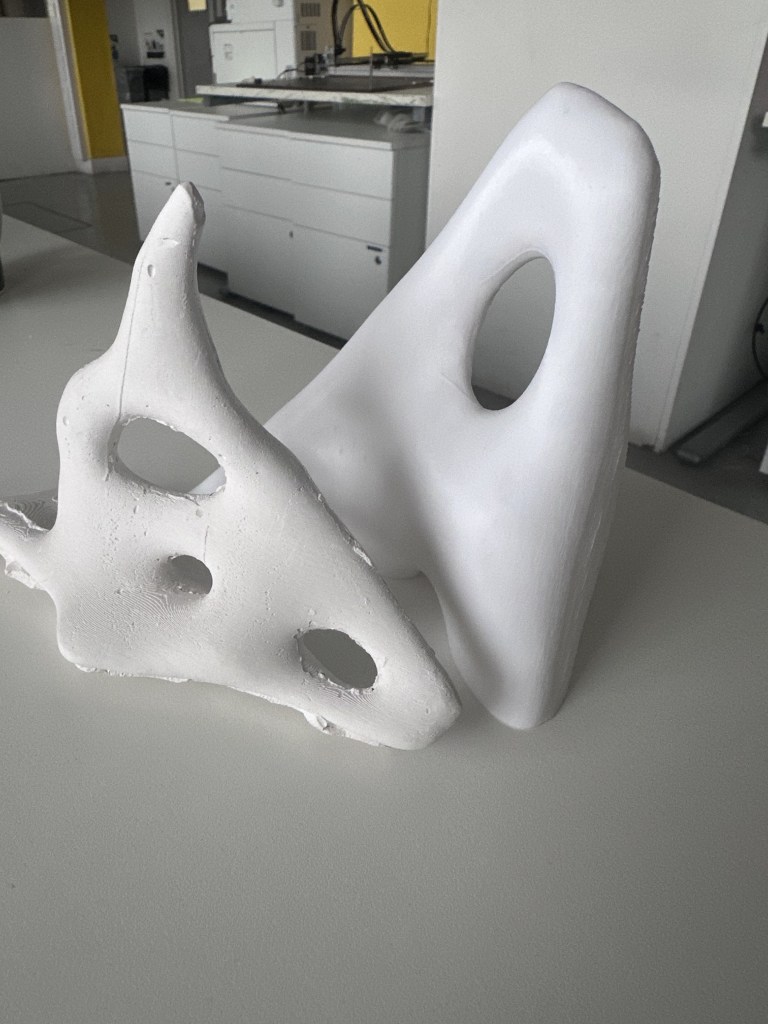
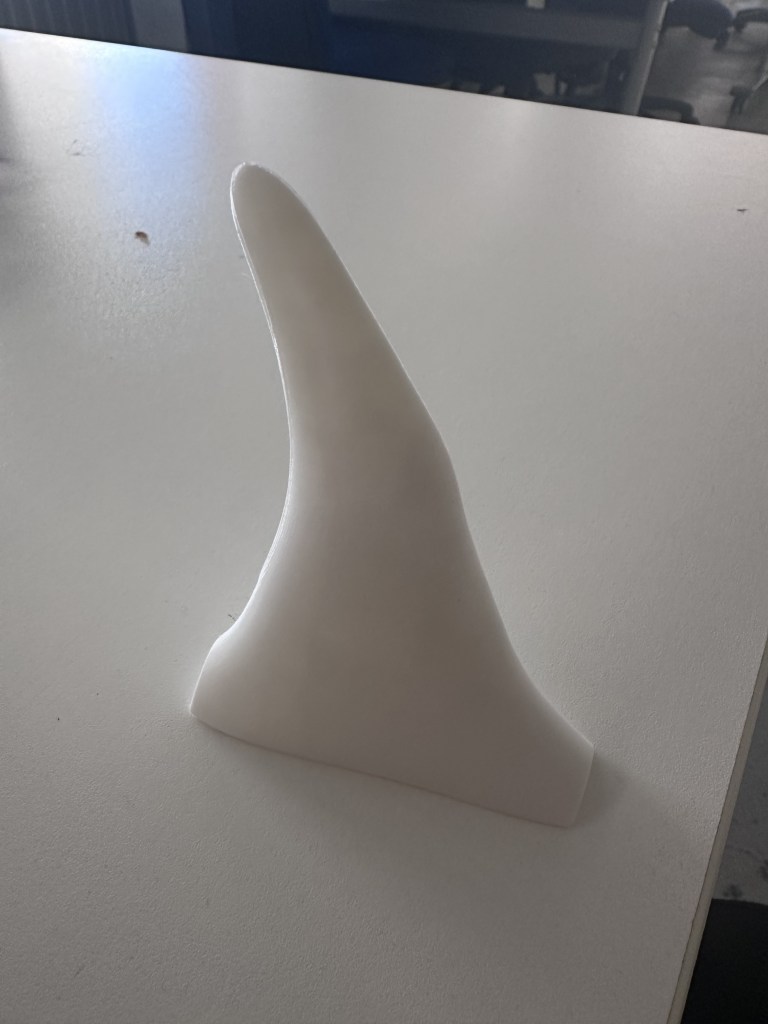
The final result of the print is something I am very pleased with. It is smooth but some of the quirks of the medium are still present I am going to keep this one as it is for casting and sand down my print from the reid.
TouchDesigner Workshop
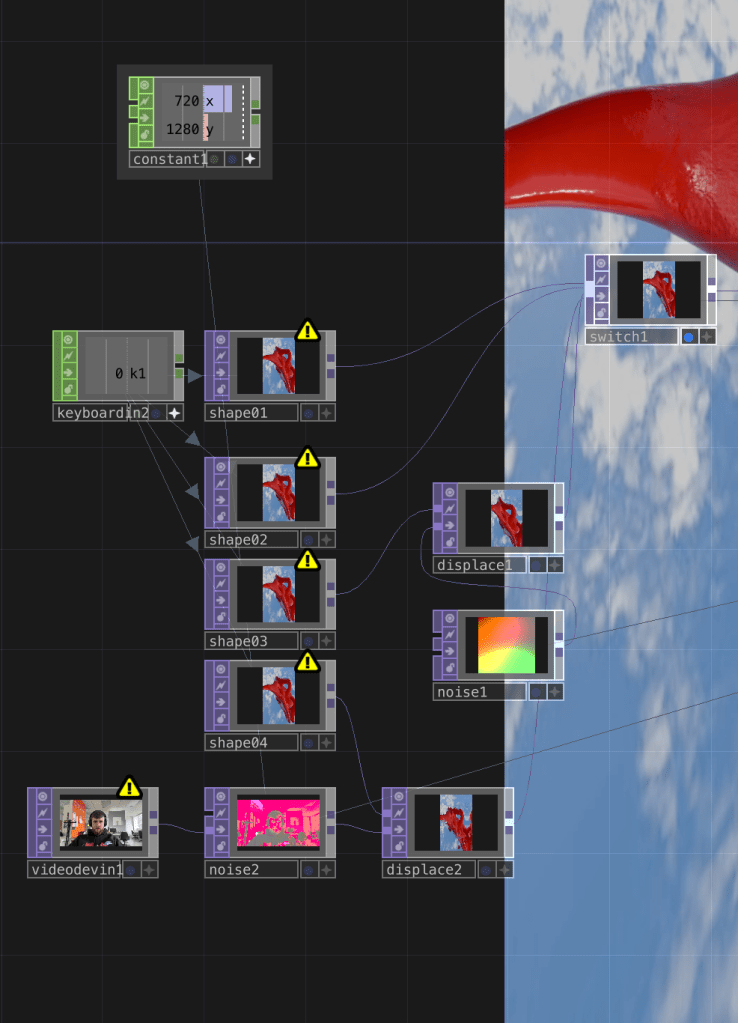
On Friday while I was keeping an eye on the 3rd years TouchDesigner workshop, following along where i could. It was a great insight into the workflow of someone who frequently uses the program, a great change from following youtube tutorials. One of the things I found I took from the workshop was the use of the switcher node.

This allows multiple inputs to be linked up and cycled through. These inputs were cycled through by audio.

By isolating the amplitude values it allowed the switcher to be based on the kick or equally loud part of the audio. This allows the program to showcase a different video, picture, etc in a rhythmic fashion
The workshop audio provided can be switched out for any audio file, there just needs to be some adjustment in the limits node to get the desired effect.
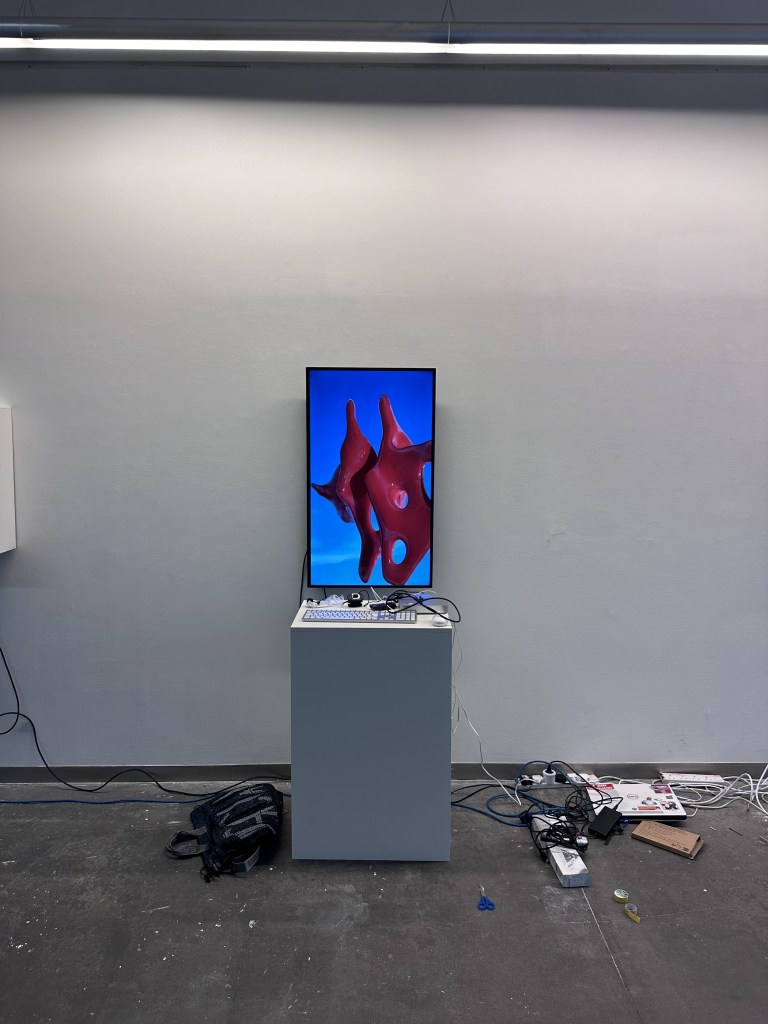
One thing that I have realised is that there may be some issues with the audio switching segment if this is in a gallery. Mathew suggested an audio sensor from arduino that is set to be triggered when someone speaks directly into it to advance the animation / scene, however I am still unsure. First I aim to format my animations for the vertical format I have discussed in the WIP show meeting and group feedback session. I have made sure to include the same shape as I have 3D printed to keep everything unified.


The vertical nature of this video means that I can take it directly into touchdesigner without making any changes. I hope to have my work on a vertical screen for wip as it gives a more similar idea of scale to the piece, where the viewer can look up and down at it.
I have imported the footage to touchdesigner using some inspiration from the workshop we had last week. I am however still on the fence about touchdesigner. I feel that it may be better to use processing for some of the interactives I have with the program. I have been using the microphone to advance the audio but i have been having fun with VB cable to use computer audio to see what different songs bring to it.
I will more than likely need to test the sensitivity of the microphone in a busy area as it will be hard to judge. The good thing is the patch that was talked through in the workshop with us it is easy to see the values that need changed.
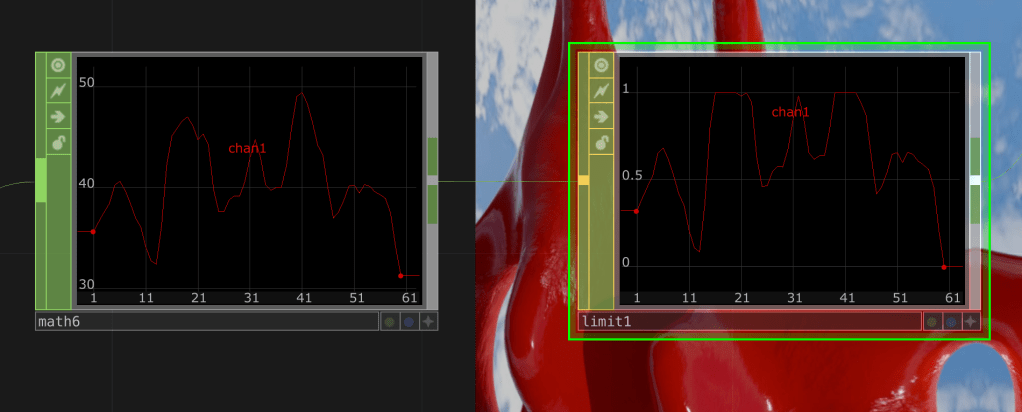
By observing the peak values in the math node, it can be seen where the min and max values lie, these can be adjusted in the limit node
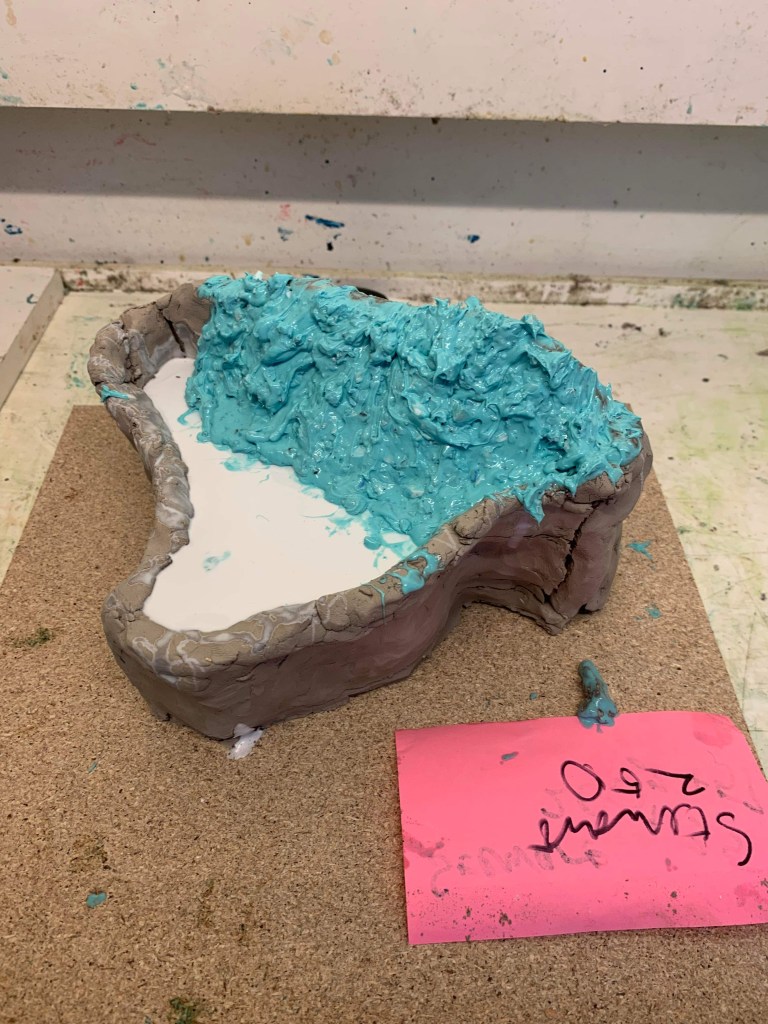
Casting First Pour

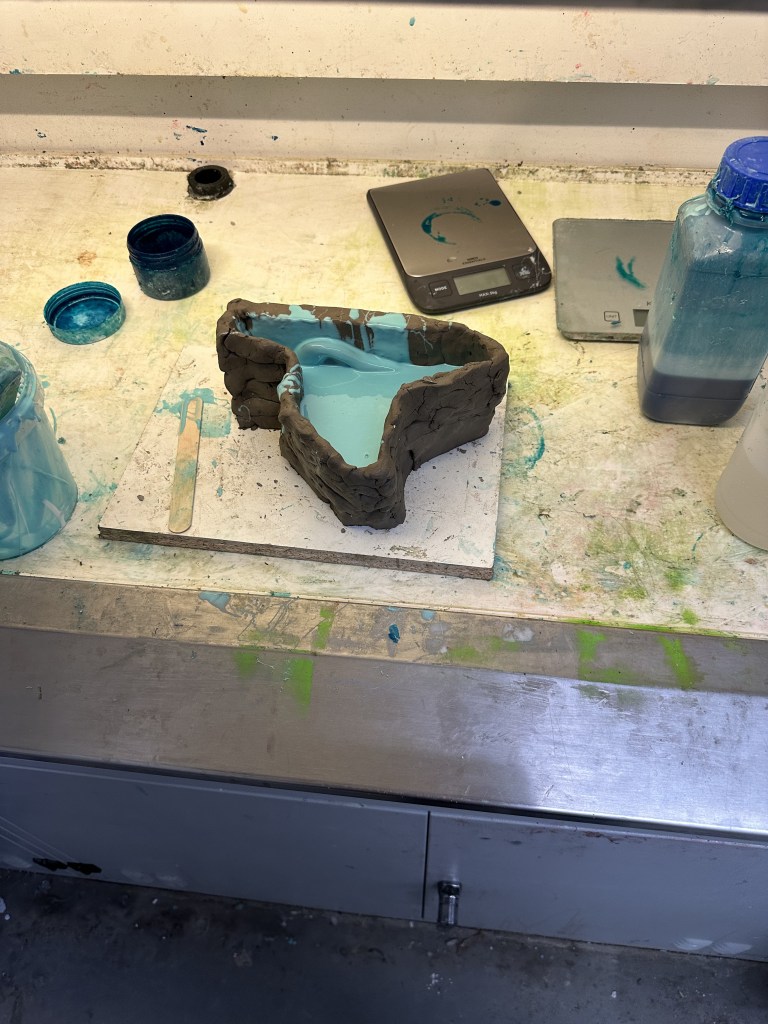
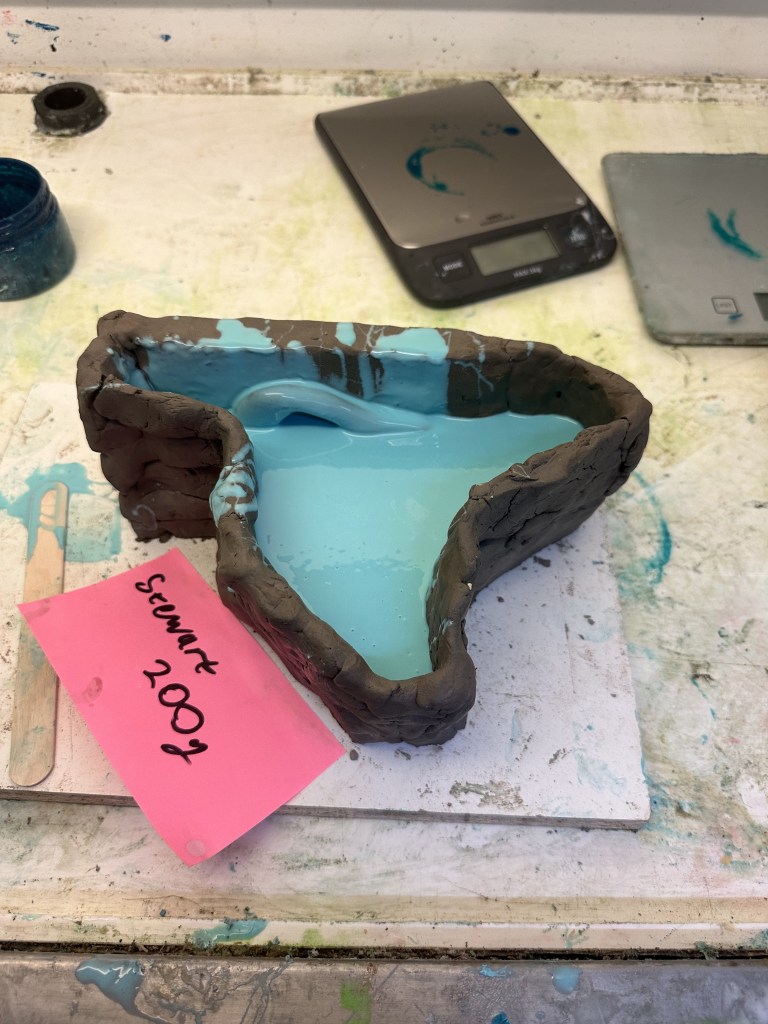
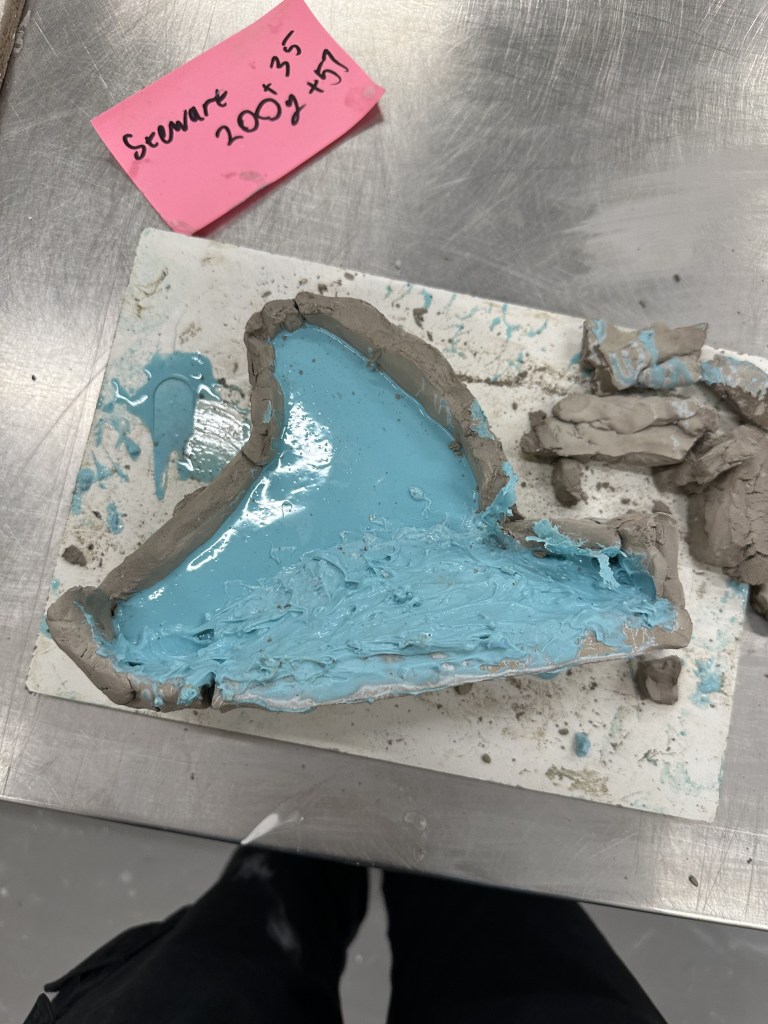
Finally following on from my casting induction I managed to get in and try it out myself. I have booked in another appointment to finish the second half with the other pour using some recycled silicone to hopefully keep down the cost. Although with the deft hands of my colleagues I underestimated how long it would take to complete the mould so I will most likely be back a few times to complete it. Im glad however I have found this out now and not later down the line closer to the show. There is also an equal chance the cast doesn’t go well, but the good thing is the idea of errors or mistakes in physical processes is a key theme in my research so anything that happens can be taken forward without issue.
Casting Second Pour
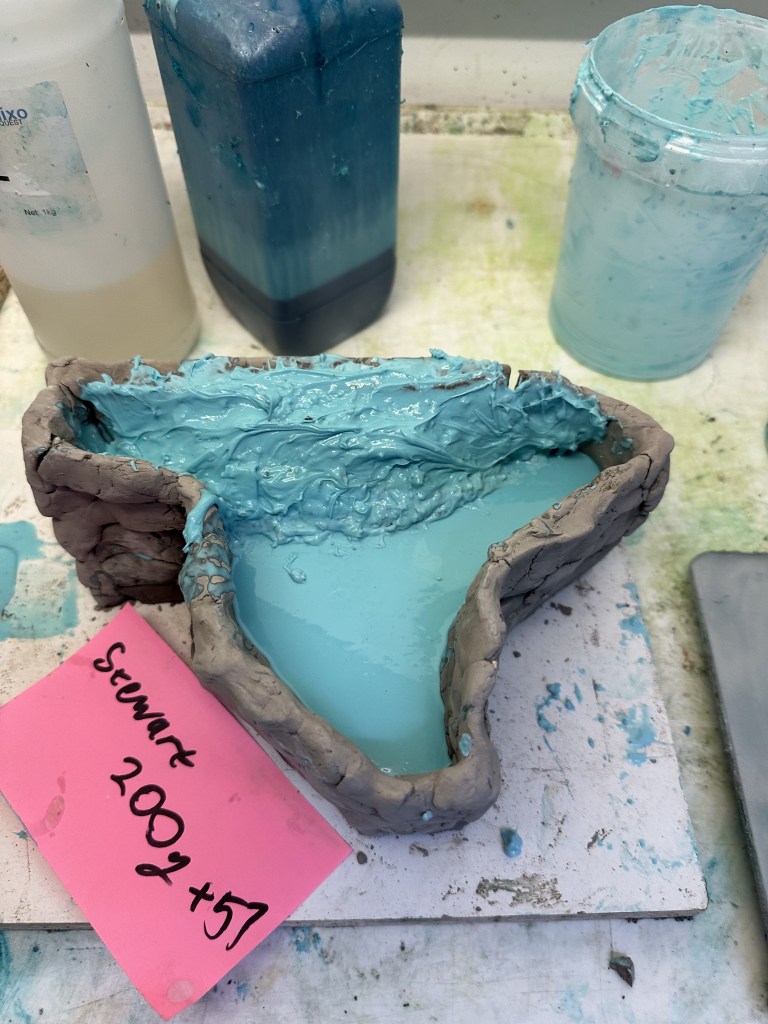
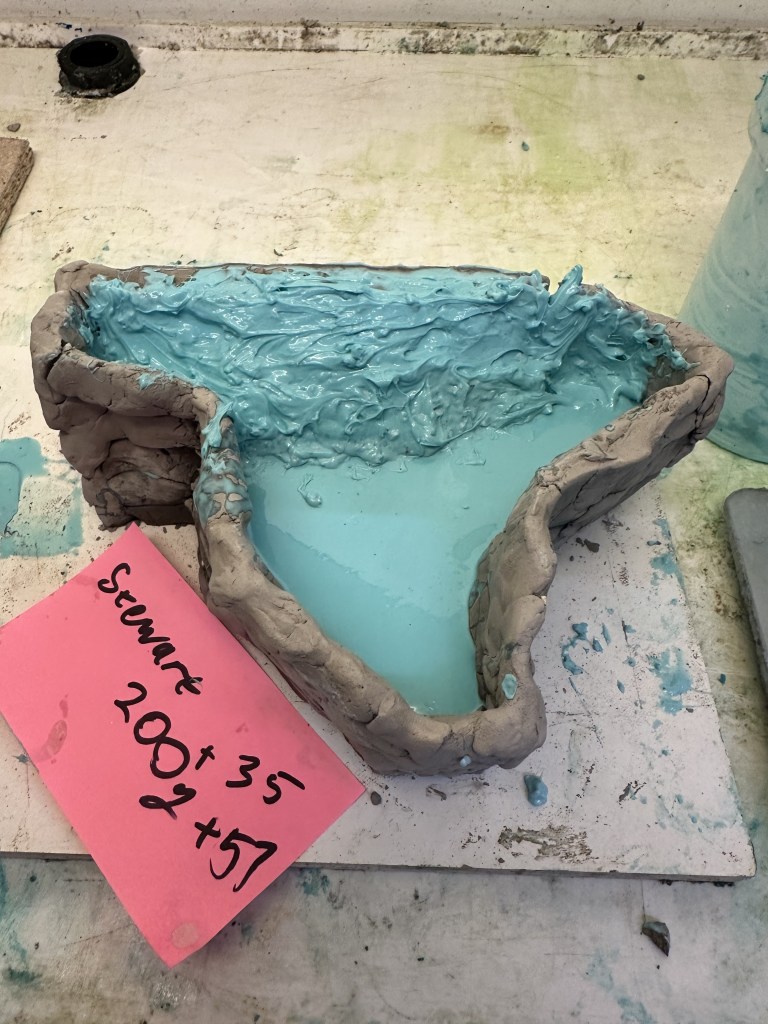
My second time in the casting workshop didn’t take nearly as long as before. Using a mix of raw silicone and recycled cutoffs I bulked out the final part of my mould with advice from both the technicians and matthew I was able to get this done quite quickly.
Spoken Word

Revisions
In my individual tutorial paul suggested some changes to the background.

Rendering my sequence out with transparency will allow me to generate a background that isn’t as flat and static as the HDRI map that I used previously. This also allows more freedom when compositing that I can use a totally different background if I later decide to. Future proofing, if you will
Paul also suggested to mask out some of the distortion in my work so it is only the objects being distorted not the background. I will try and use this tutorial to mask out the areas of the video that I need removed. However I am unsure how well this will work but I would like to see the difference.
Loops
I took multiple timelapse photos of the sky after my tutorial with Paul in an attempt to create a looping video for the background of my blender animation instead of the flat static HDRI map I am using at the moment.
Using a bit of a botched setup with my phone I recorded clips of the sky at different points throughout the day.

Both clips last around 30 seconds or so and have different types of clouds rolling by. Some also had various unintentional characters included in the form of birds flying by which I will need to remove as some are unnoticeable but some may become distracting
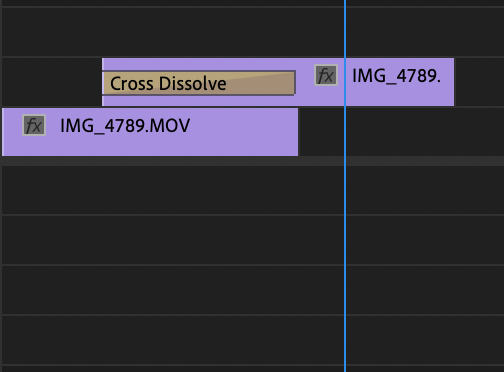
Using a technique I discussed with Paul, cutting the footage and then fading them into each other provides the desired effect that I wanted to achieve.

I also used the transparency function in blender to re render my animation with a clear background. This allowed me to still ahve the reflections I needed present but with a new background that I will composite in after effects.
After re rendering my animation I realised that it wasnt a perfect loop which caused some jumping I resolved this and also optimised my render to take much less time than prior by reducing the samples all the way down to 45 by process of elimination, rendering frames and seeing where noise begins to develop, I found this to be the sweet spot. I also reduced the scale from 150% to 125%. This allowed me to cut the time needed to render by over 20 seconds, decreasing the overall time needed to render by 1hr and 30 mins and still have the desired quality of my final outcomes.
One of the ideas Paul suggested was the idea of this thing being actually present, on the screen with a sense of scale. Therefore the background would need to be blurred.
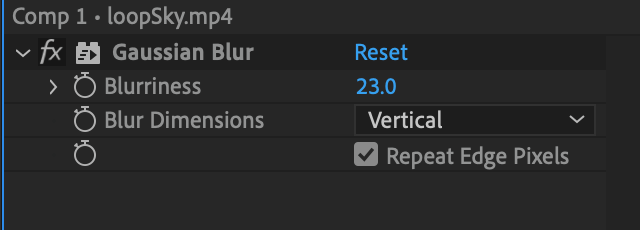
Using Gaussian Blur I had to find the threshold between having a noticeable blur effect and for the user to still be able to recognise the fact that it is the sky, I found this to be the ideal amount.
WiP Thoughts
We had a visit to the Reid Building to scope out our space for the wip show. Spending time to lightly allocate space to everyone that can be changed if needed depending on what we need. As I likely only need 2 plugs for my installation, I was quite flexible for where I can go.

I enjoyed the idea of going in this place as the video display worked well in the space, however there were a large amount of people in this one area and I feel like it would flow better if everyone moved up but we will see closer to the time.
Gallery Ready Content
One thing that I have been thinking about is the quality of my video. I have spent quite a bit of time getting this to a high standard, the only issue with this is that with the non commercial version of touchdesigner videos are compressed down to 1280 x 720. Touchdesigner also does not have a way to export files as applications like processing can

It has its own sort of workaround with the touchplayer so I will experiment with that for WIP, which allows you to drag files in and it will automatically play them in performance mode, this should ideally save some resources from the computer as it runs just shy of 60fps on my old laptop.

By disabling the viewers on the nodes it allows more resources to be directed towards the output, when this is in place at wip it would be ideal that nothing else, or very little else is on the laptop so it runs optimally.
I am still debating weather or not to use touchdesigner for wip or use processing. As I feel that touch is a great peice of software the finality im looking for is locked behind a paywall. I will disucss this with the lectureres when I return to the studio as I have annoyingly yet again tested positive for covid. I also have booked a metalwork induction for Tuesday so hopefully I will be well enough to go for that as I feel it will be of use by the time degree show rolls around.
Spoken Word
Another idea that I have been toying with is the idea of using spoken word. I have been discussing this with those in the studio and have been lsitening to different artists that produce spoken word music and I have felt very inspired to use the text from my booklet that I made at the start of the year. I may try and find a way of obscuring even more of the details and distill it down a bit more to lend itself better to what I feel is right for my work.

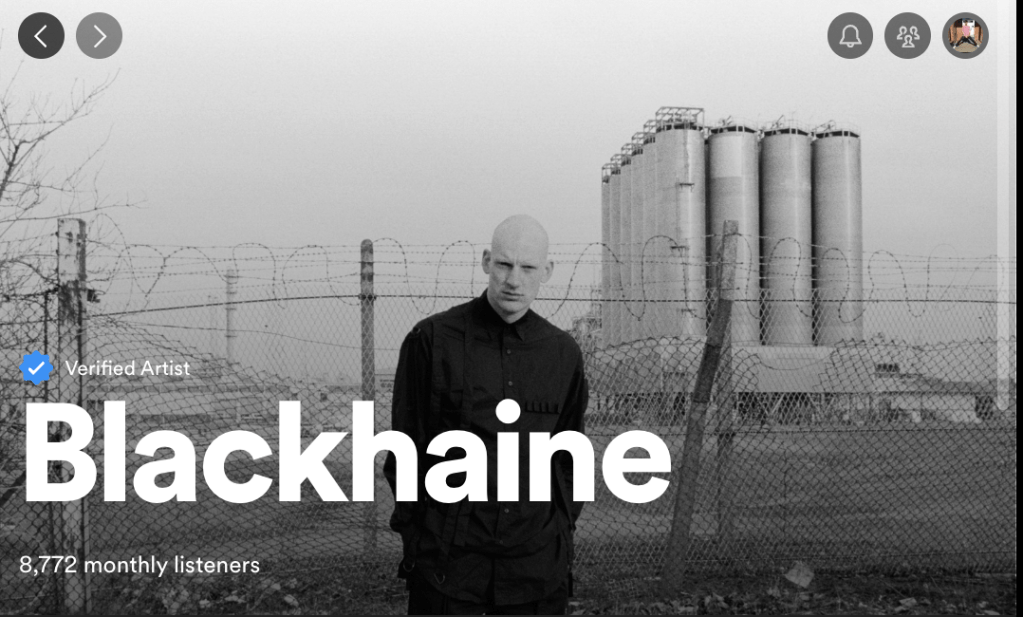
These are two artists I have been listening to regarding this. With Kae Tempest’s music consisting of storytelling aspects telling tales of their own experiences in life along with character driven stories. Blackhaine’s music seems to be raw, with his style seeming to stem from writing about what he sees at that time, as well as expressing his struggles with working low paying “dead end” jobs.
Blackhaine is also a choreographer, he practices a form of expressive movement that is based on his own subconscious and brings it to reality through his movements.
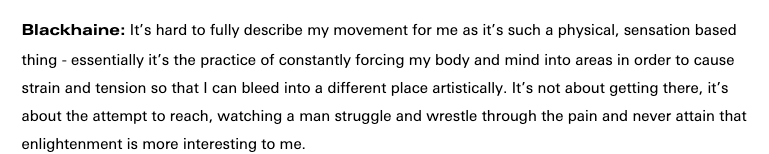
This is another video of his, which I find actually difficult to watch. I am unsure if it is partly because I’ve never really been interested in dance in general but I also feel like his movements look so unnatural by choice that it generates this feeling of discomfort. Seeing him contort his body into different shapes that is so hard to predict, going from rigid fast to slow and fluid creates a sense of unease that you even begin to question his health at times. These movements are so visceral it is almost an extreme version of my mark making experiments at the start of the year. I am by no means thinking about performance art for my work but there is defiantly something to be said about how tension plays such a large role in his creative process and it is directly expressed and felt in his work.
Autostart
I have been looking into how to get this touchdesigner sketch gallery ready so that I don’t need to worry about it closer to the time.
I spent a little bit of time looking into scripts for TD, they are written in python and can be used to reset parameters when a file opens. I for whatever reason couldn’t get it to work so I abandoned it and consulted google for some advice in the meantime.

To my dismay, this is built into the application already, all I had to do was click the box at the top of the window placement section to start the file as if it is an application. This combined with automator should allow the seamless opening and running of my TD file.
Expanding
There has been a bit of disruption as I managed to catch COVID again. So I haven’t had the chance to get into casting to finish my mould. So I decided to go back to touchdesigner to further refine my
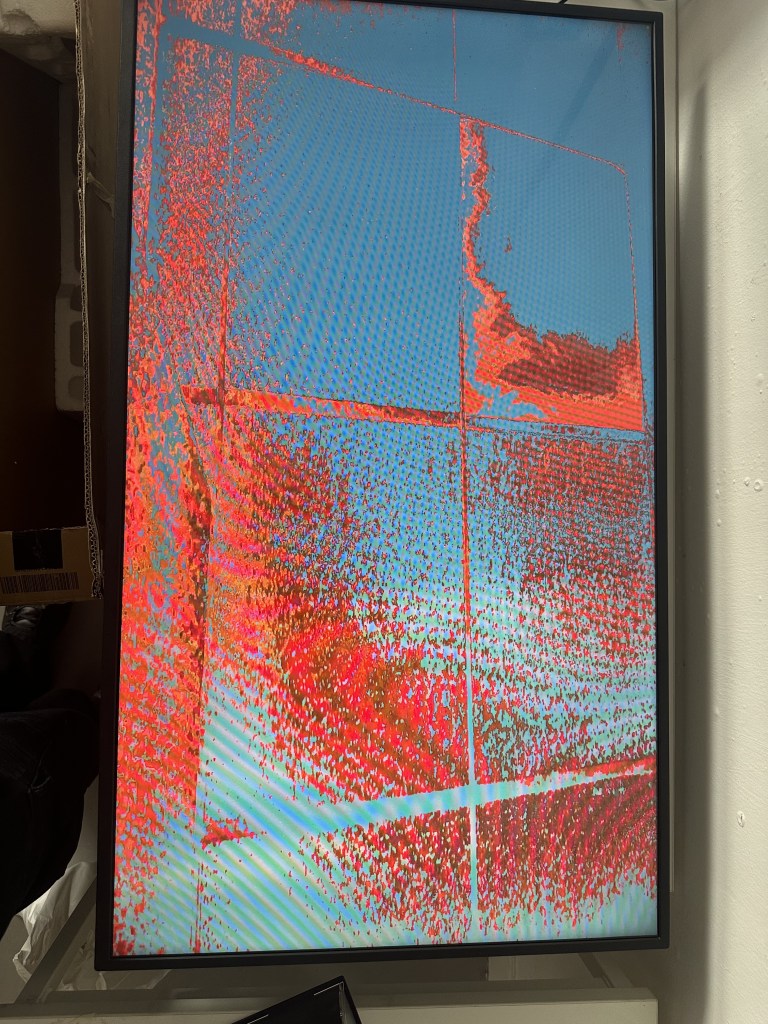
Using touchdesigners optical flow node I managed to create a way to track motion. Optical flow works by tracking pixels going left to right using red and up and down using green. This can be used to create a form of tracking that does not require any specialised equipment, however it is very unreliable as it is dependant on lighting conditions. IR tracking such as of use with the kinect or PSeye would greate a more reliable form of tracking, however this is a good way to test without that equipment for the time being.
It’s a bit of a distillation process to get the numbers created by the movement to be anywhere near manageable, using reorder to split into two sections one to detect movement left and the other right this can be seen in the two analyse nodes. Movement to the left creates a negative value these inputs are then combined with a subtraction to give manageable numbers, these are then further distilled by various filter and logic nodes to remove any noise.
As can be seen when the filter is toggled the values rise and fall at a much smoother rate. This allows the motion tracking to be more accurate and smoother to translate better to the viewer.

I also sought ways to further optimise my touchdesigner file.

By reducing the amount of video present, instead linking everything to the one video of the blender render. Then using a blur and comp nodes I re created the original video within touchdesigner. This allowed me to distort the shape but keep the background intact.

Using various Comp nodes I managed to do this for every scene in my sketch.
Metalwork
After an improvement in my health I attended a metalwork induction with Kamra
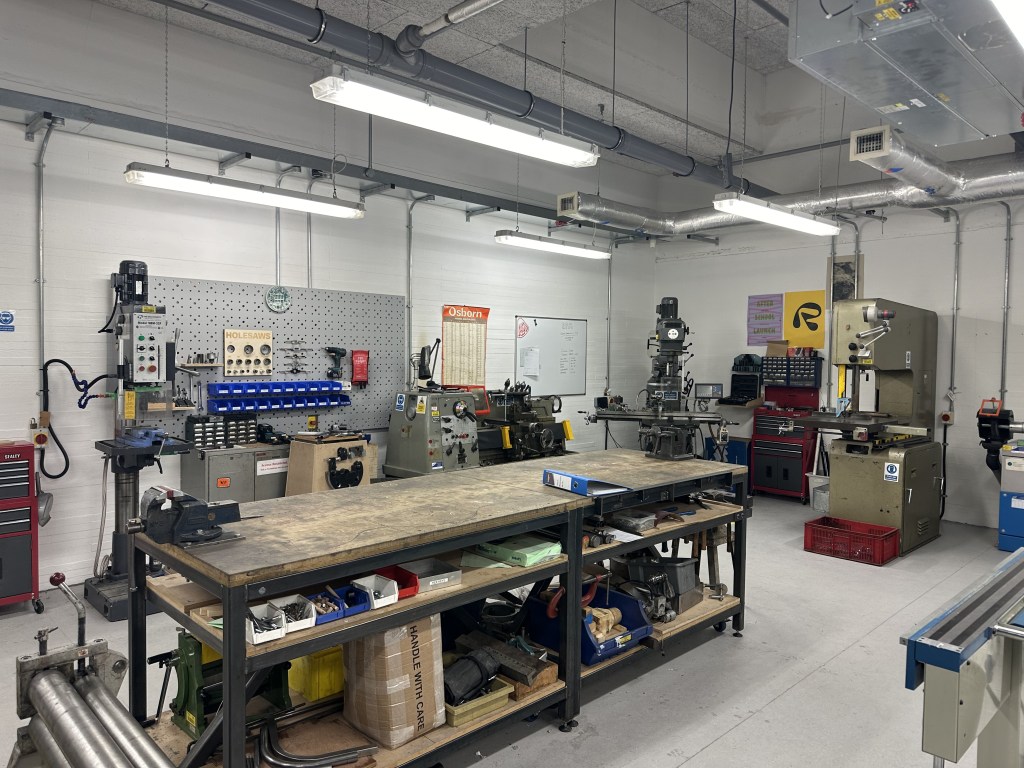
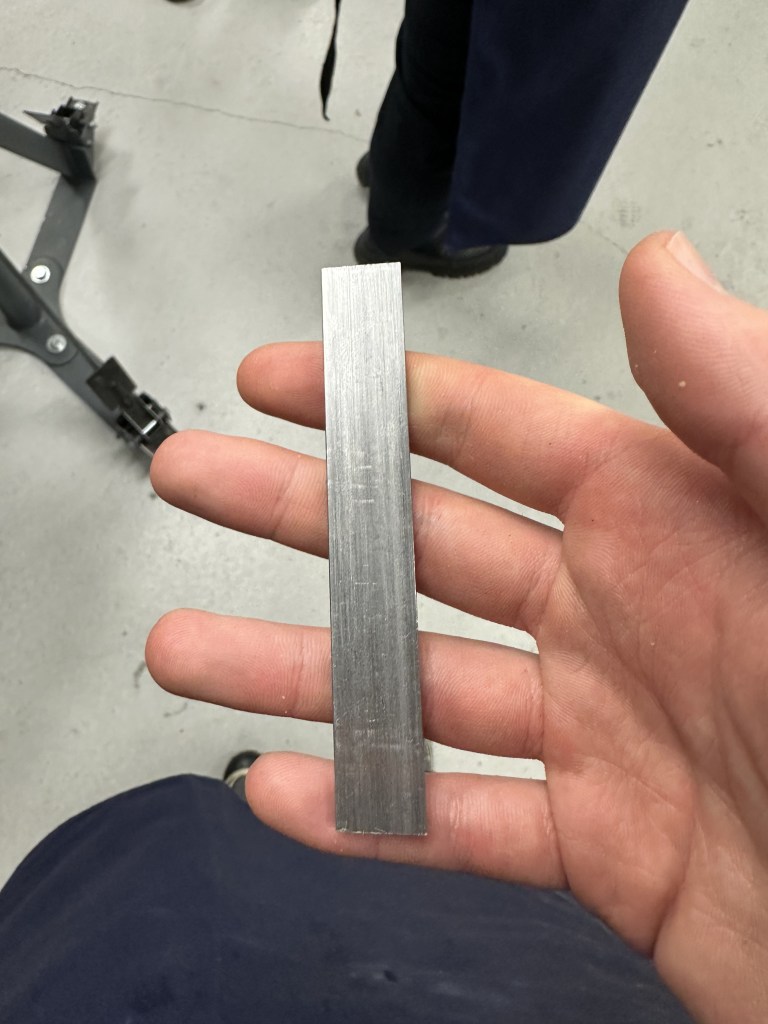
I found the induction really useful to get an idea of working in the area, getting a feel for the space. As well as the basic processes that are involved in the metal workshop. I also found this more interesting than woodwork. Im usnure if thats to do with the material or the sparks flying everywhere but it was great to do things that I’d never done before.
Guest Lecture
Prof Atau Tanaka.
Sound as a material is a concept I find very interesting.
His work is highly gestoral in particular his work focusing on yoga. With the relaxing movements being juxtaposed by the booming sounds of his heartbeat and the crackling of his muscles.
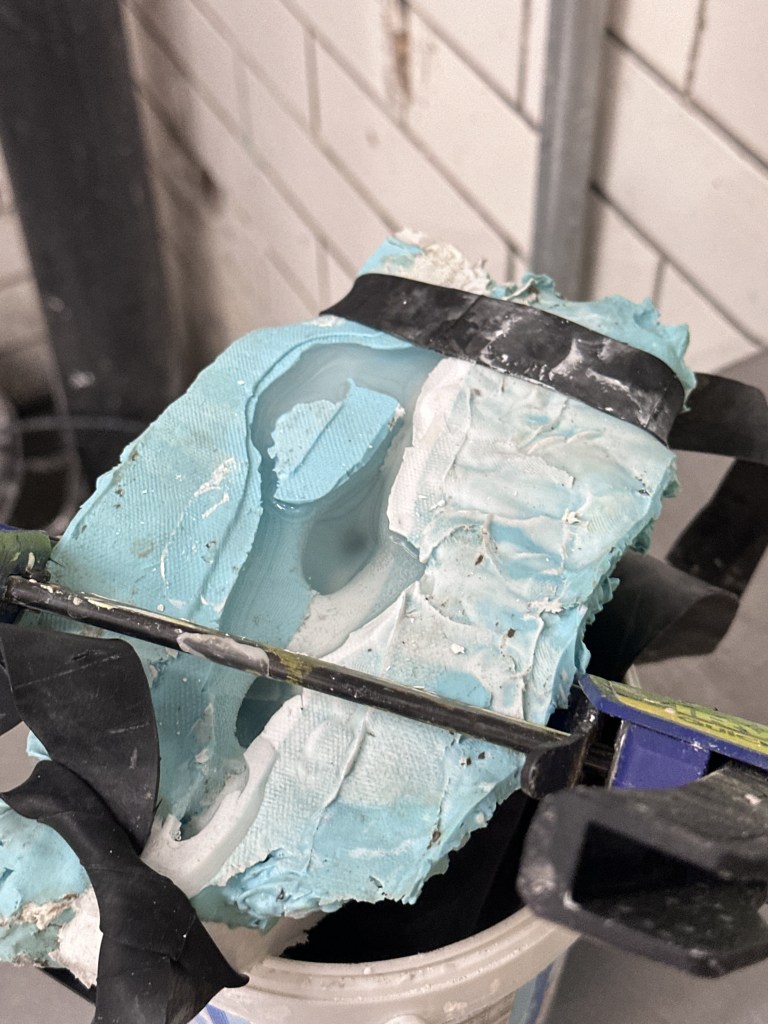
Casting Part2?
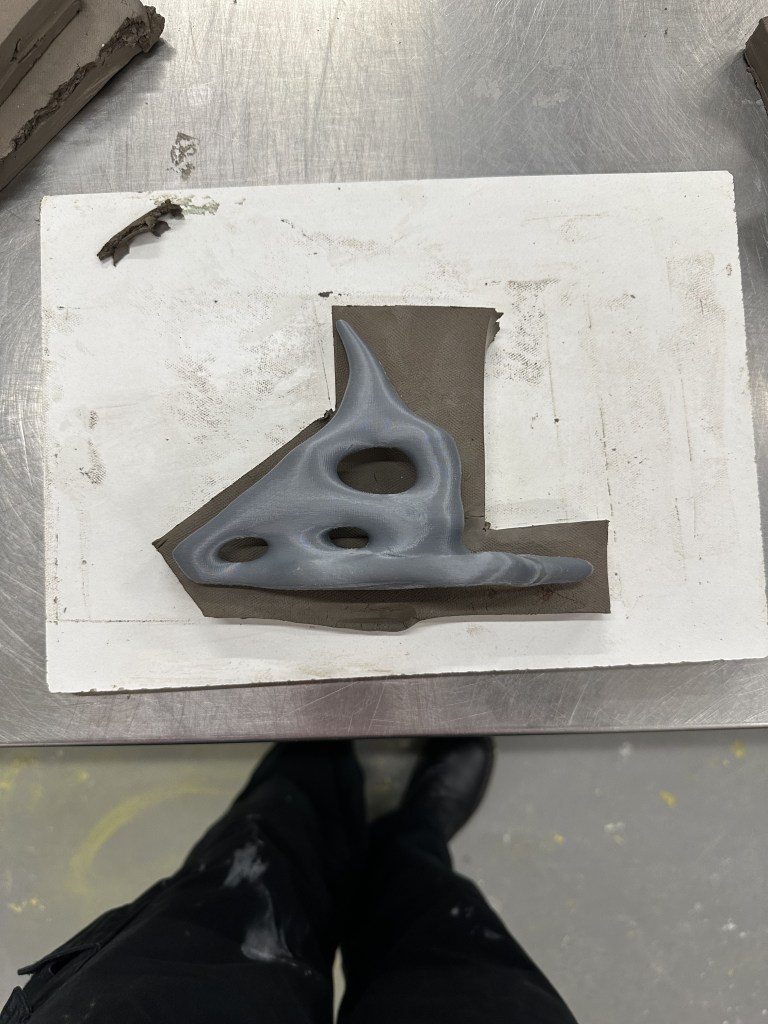
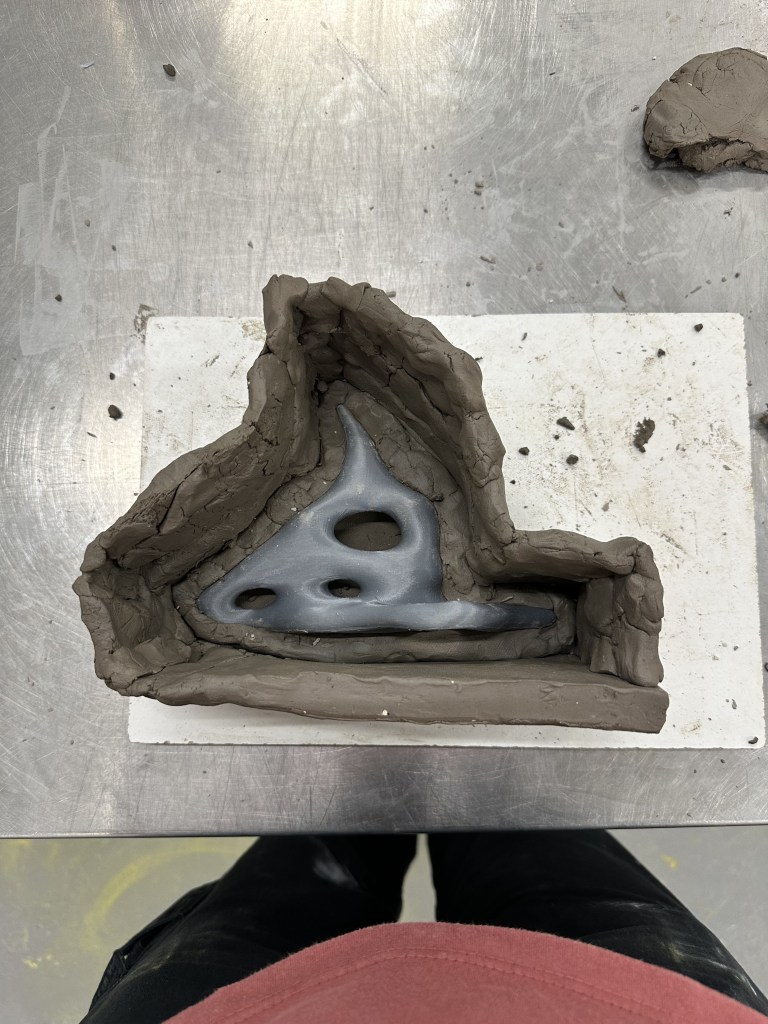
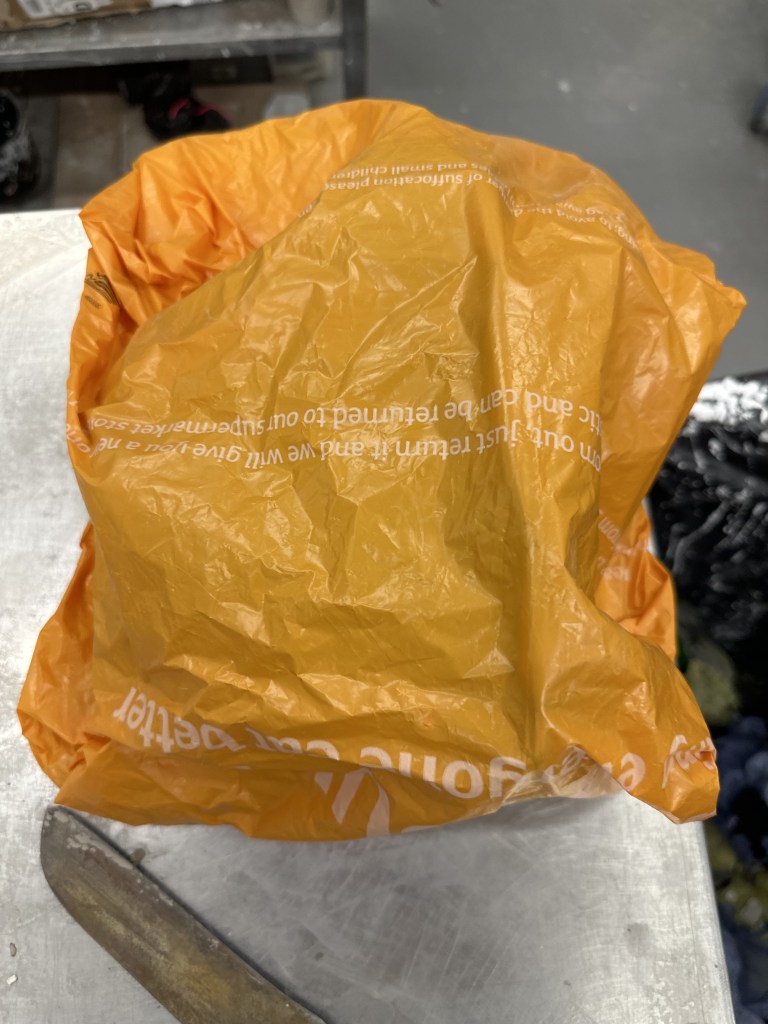
I booked an evening slot in casting to hopefully do a pour for the second part of my silicon mould. However I didn’t realise you couldn’t do this at night. So after building my clay walls I wrapped the full thing in a plastic bag to hopefully preserve what I had made. Hopefully I’ll be able to get in Friday afternoon to do my pour if its not too busy and the clay is still moist.
I managed to do a first pour of the other half of my mould. I will hopefully be able to quickly do the second half before the next show and tell.

There wasn’t any of the same catalyst left at casting so I had to use another slower reacting one, I’m hoping there will be no issues with it as I feel like time is progressing very fast and I need to make everything as efficient as possible.
TSD
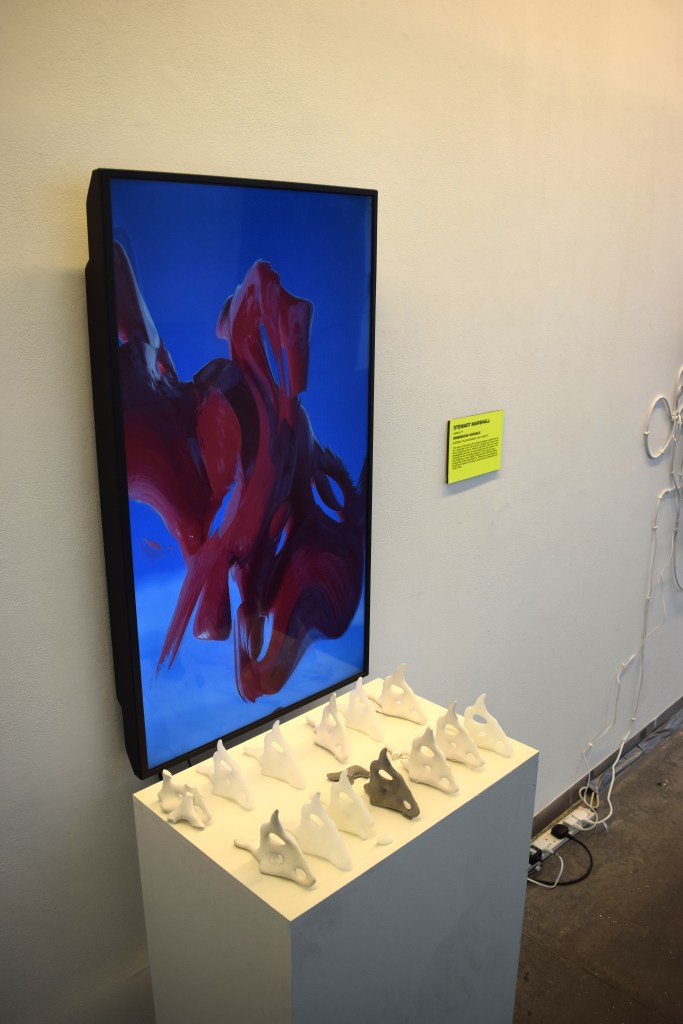
I have also booked out a 43″ and 32″ TV monitor from the media studio which I am picking up 27/02/24, this should hopefully mean that I have time to test whichever display works during the week with my TD file then return whichever I don’t need. They also both come with the wall mount I need.

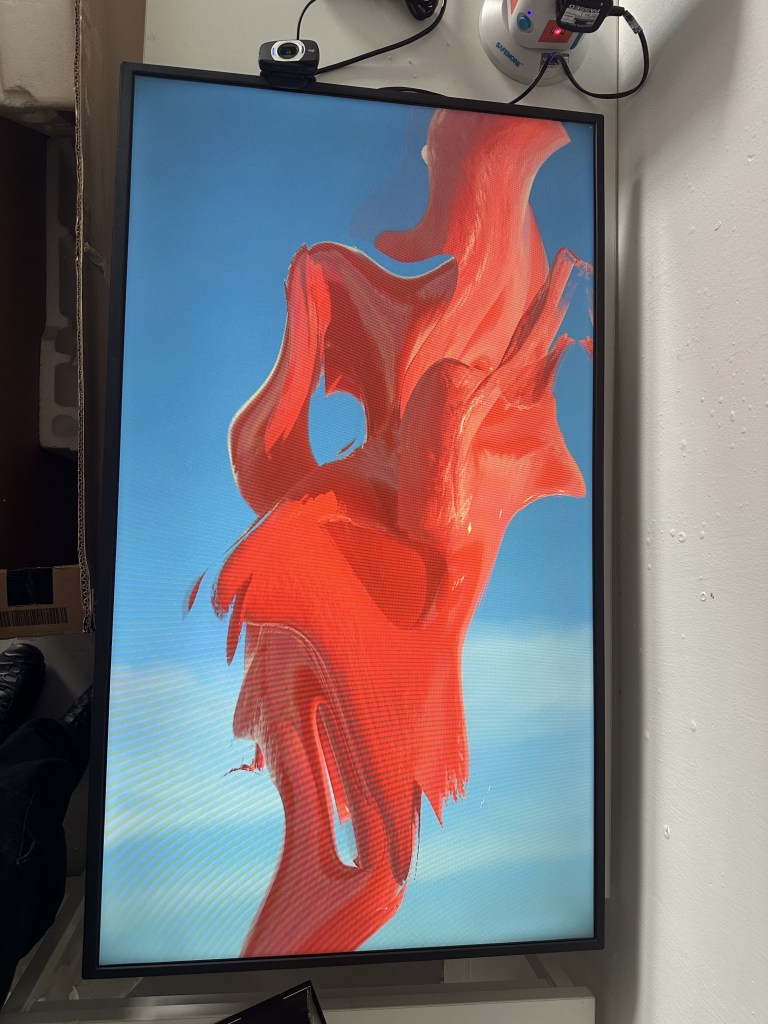

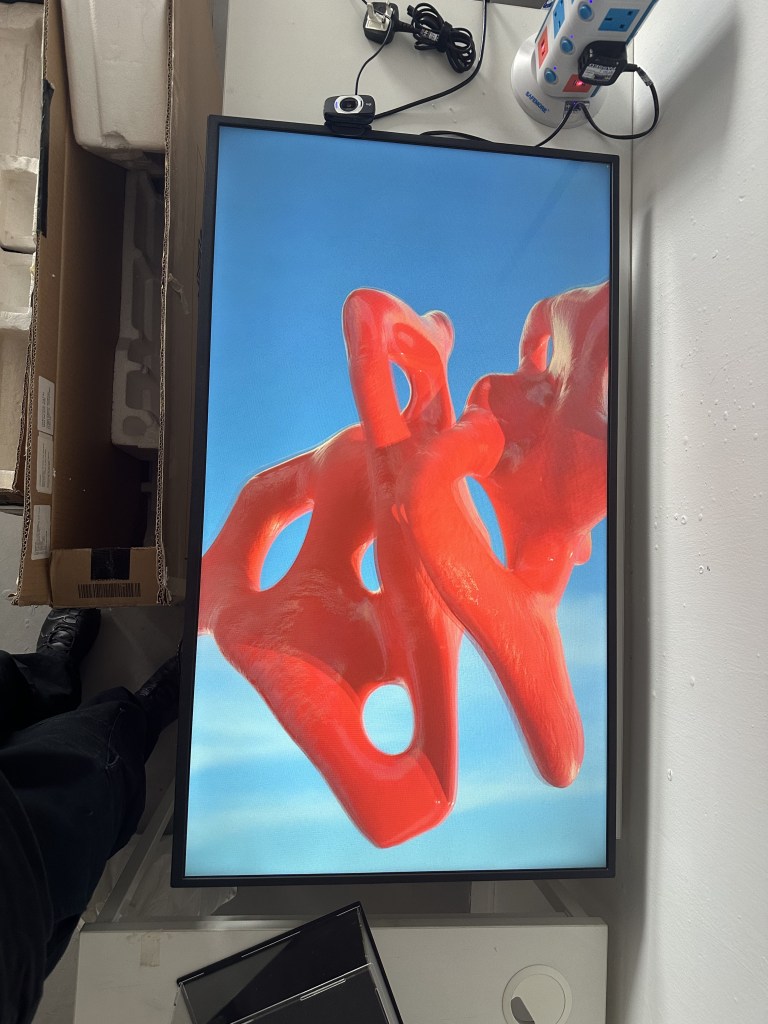
Seeing the work on the big screen is so much more refreshing than seeing it
Welding
After my metalwork induction, my stepdad who is a welder by trade decided it was time to teach me in case I needed to use it later on for degree show as it may be a bit late in the game for an induction.
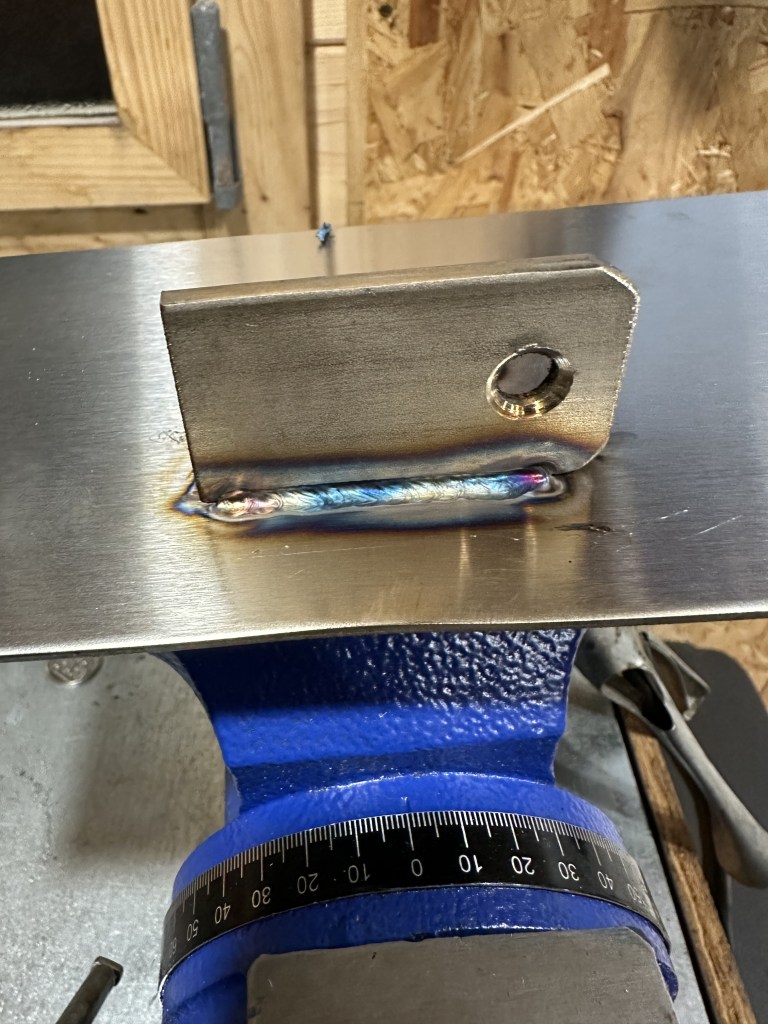
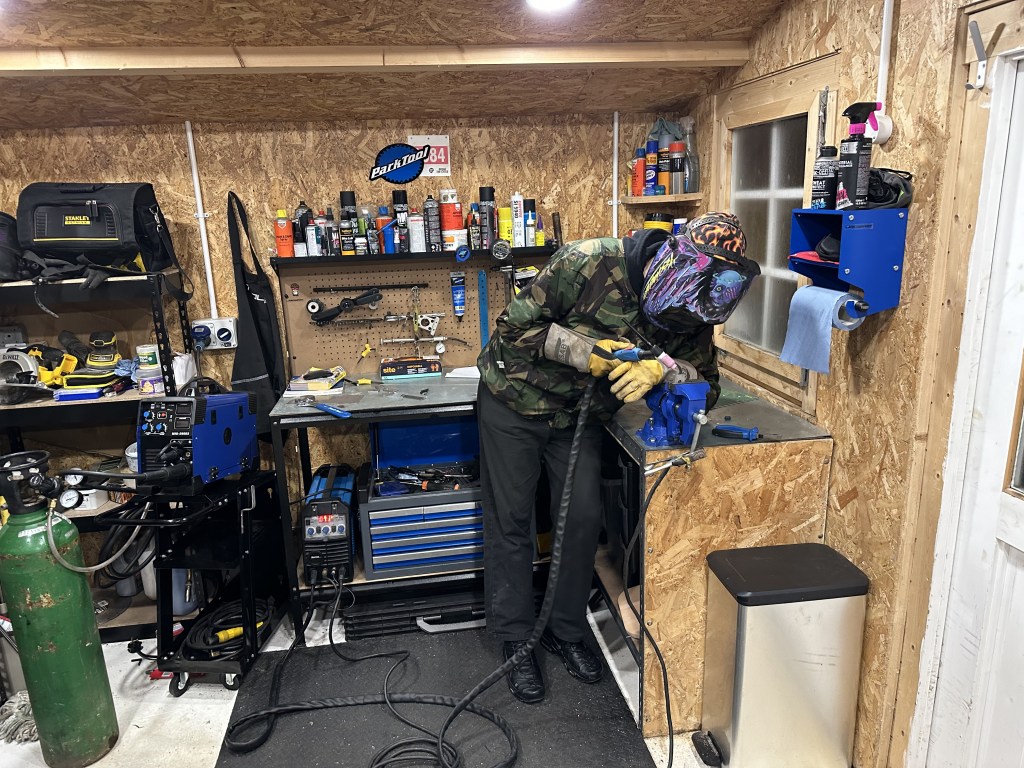
I welded a few things together but also did some more complicated welds such as this fillet weld. This is TIG welding which allows for a more precise finish. Although this isn’t being used at the moment this is a great skill that I can hopefully put into action by the end of the year.
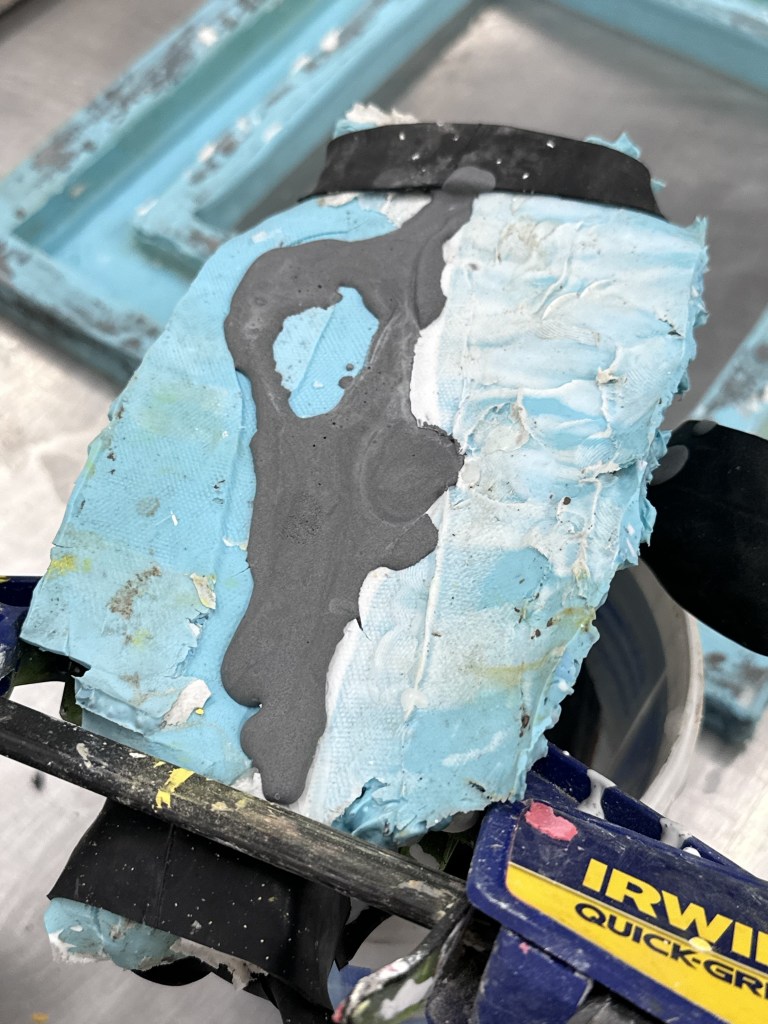
Pouring

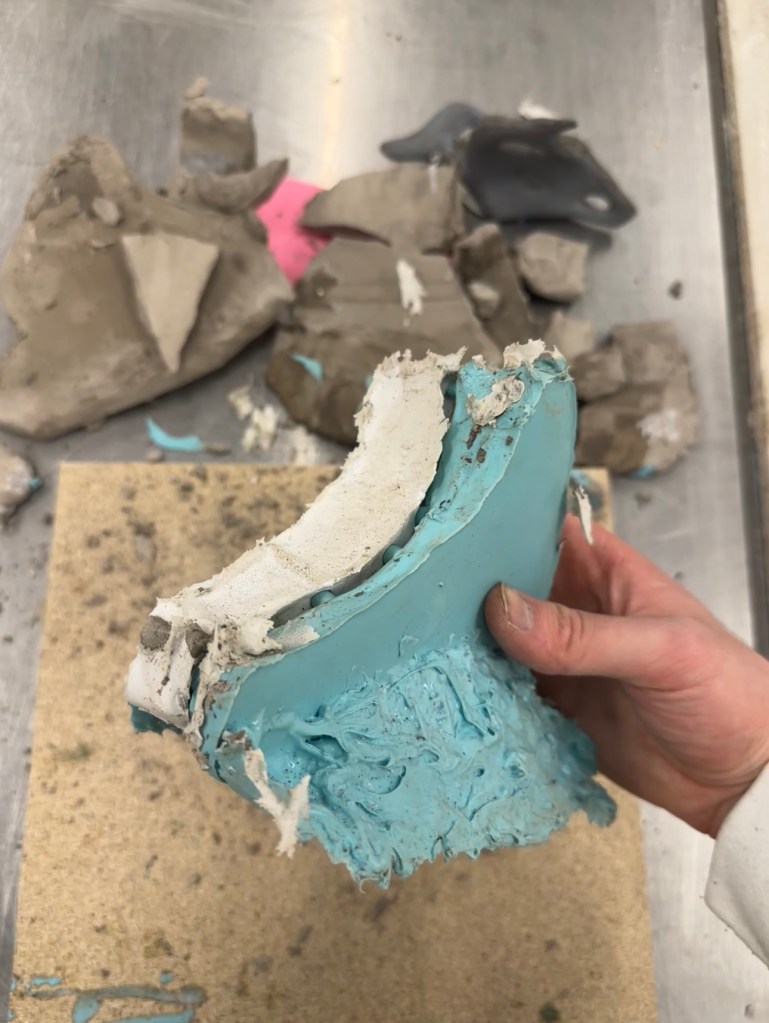

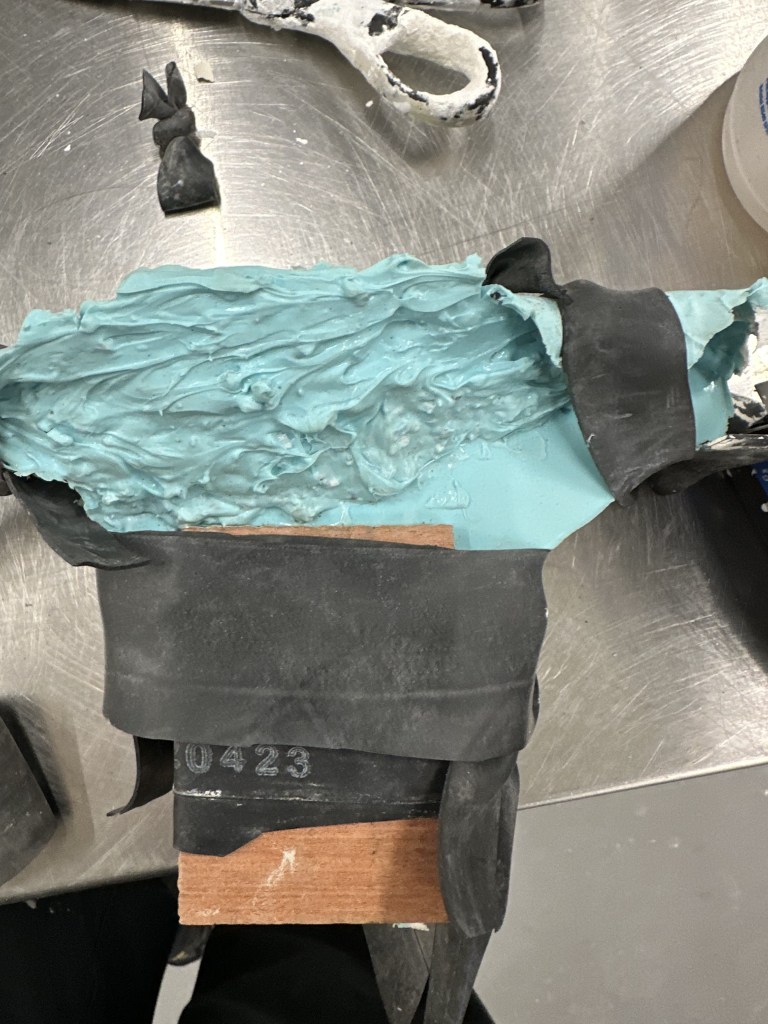
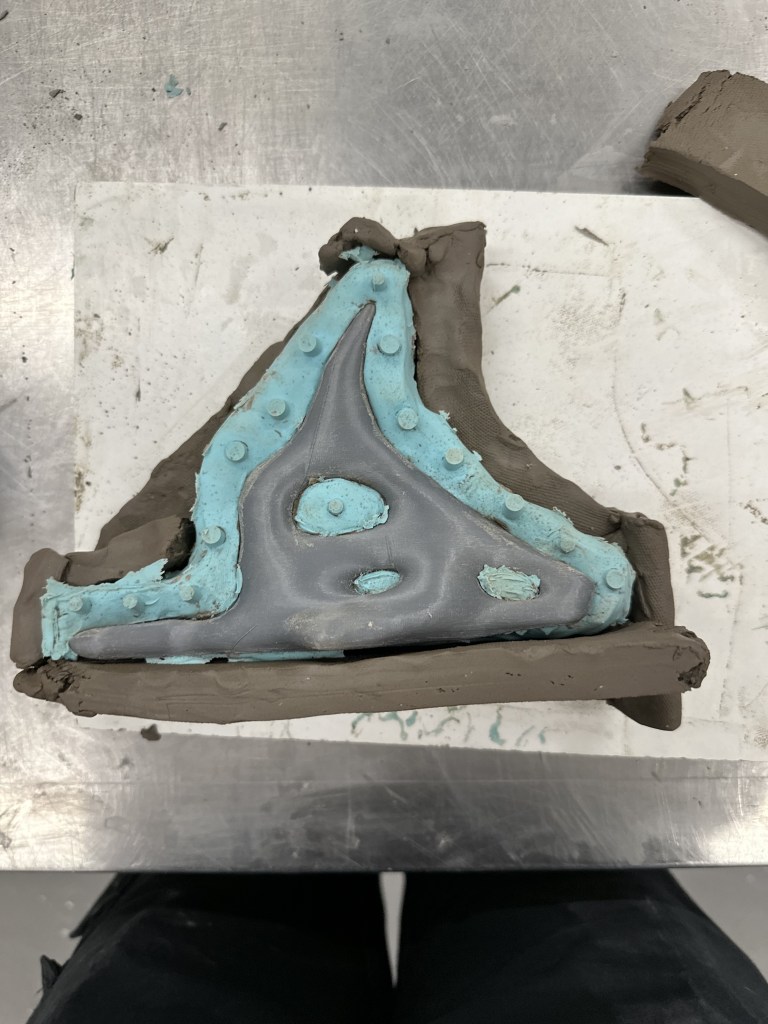
After my 2nd pour on the opposite side had dried, it was then ready to be cast. I freed the original from the mould and began work to make it as secure as possible. Using as many bike inner tubes and a clamp I secured it all together.
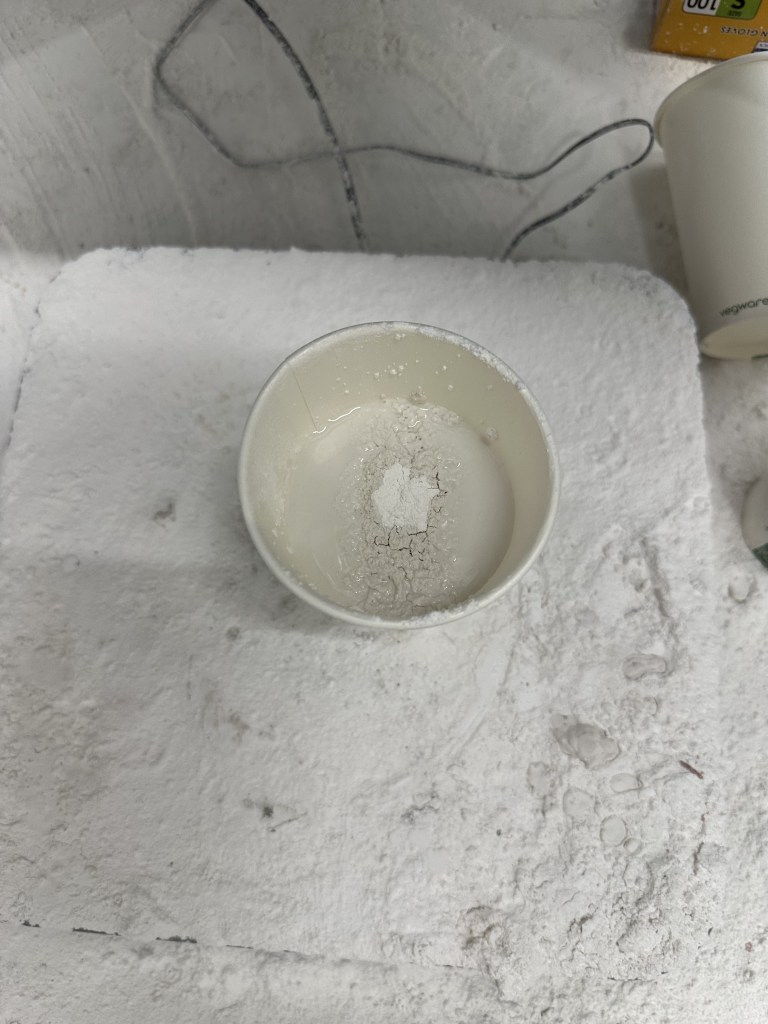
However as it is my first ever time casting, of course its not going to go to plan. I put too much powder into the water, however I feel like it may work but we will see. I am booked pretty much all week, save the external examiner meeting.

This was a bit of a contraption, not the most secure but it got the job done. I returned the next day to get the cast out, with great succes.
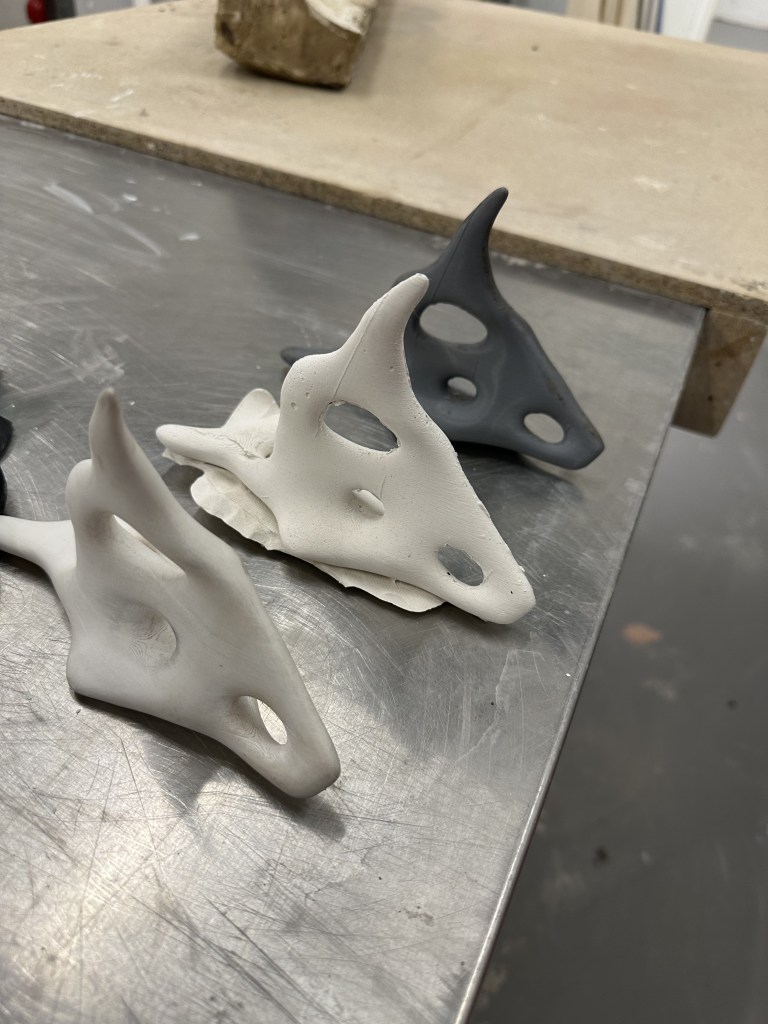
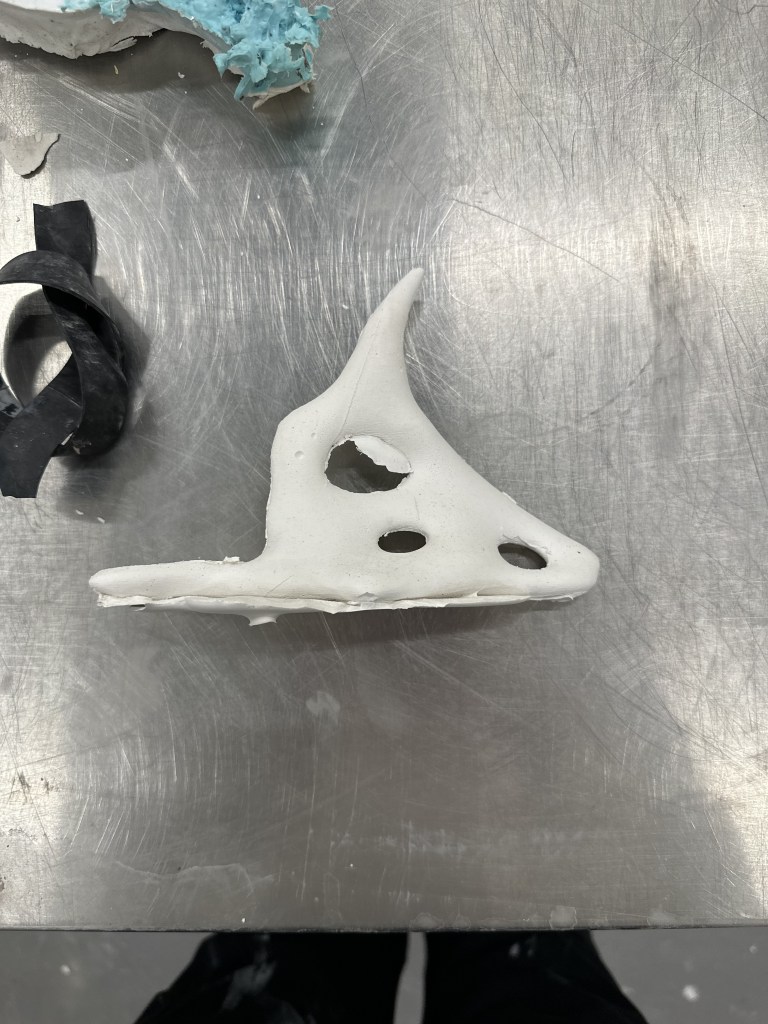
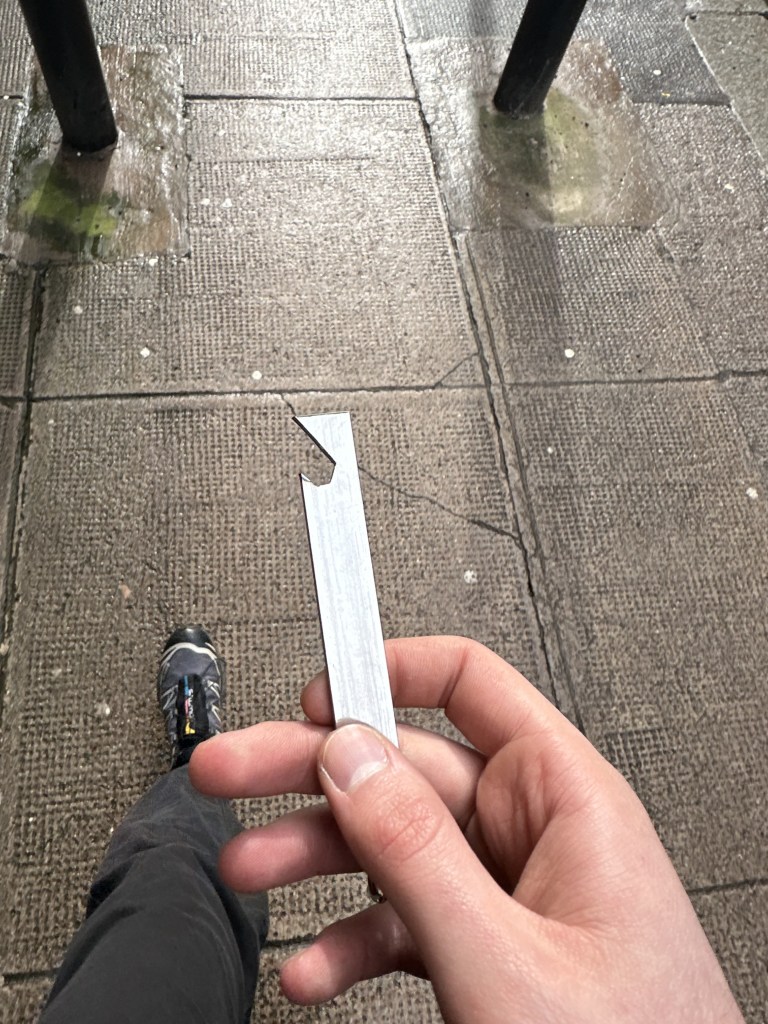
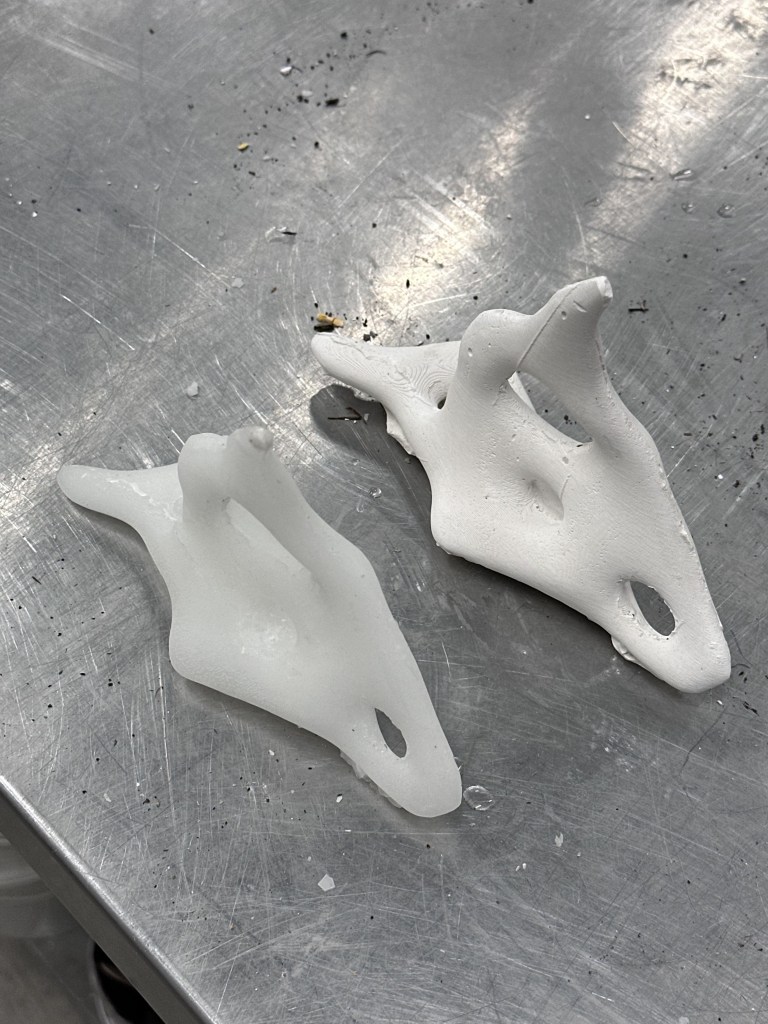
I am really pleased with this outcome it has a great weight to it that the 3D prints just don’t have.

The bottom is imperfect, but that is easily sorted, ill sort that if I feel the need to, however right now I think it works well. This fits into my previous research in november with imperfections in design. The casts still have charm in their own right. I will create as many as possible, even if they dont turn out as intended thats totally fine.

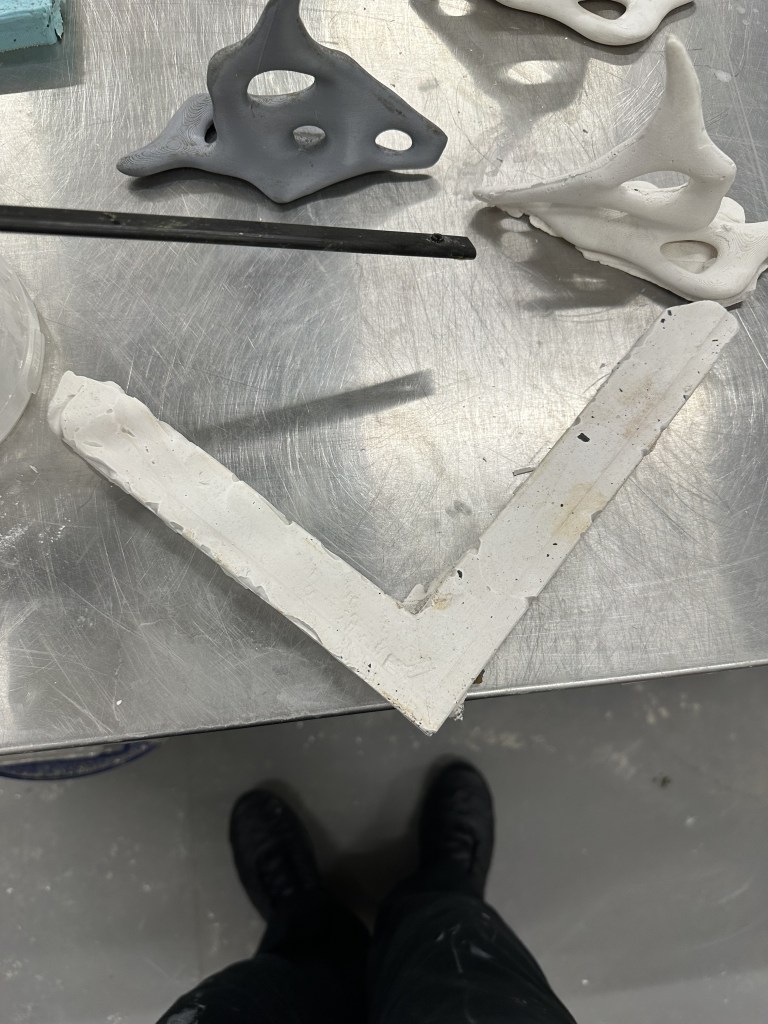
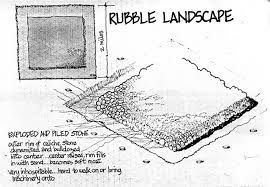
I tried to be cheeky and make another one within an hour at my 2nd appointment pouring, but only partial success, it broke apart as I didn’t leave enough time for it to set. I also mixed in slightly less plaster powder so the mixture wasn’t as thick which now I come to realise, the thickness probably helped set the cast properly. I will ask the technicians next time I’m in what the best approach is. I also always seem to overshoot the amount of plaster I need. Due to the volume more than doubling when the mixture is complete. I used Jennys picture frame mould so that my extra plaster wouldn’t go to waste I want to create an almost field of rubble on my plinth. This touches on nuclear semiotics a concept that I have touched on before but was unsure where to take it. However I will see how this goes down with TSD and the exhibition team as they might not like the potential for dust to be present but we shall see closer to the time.

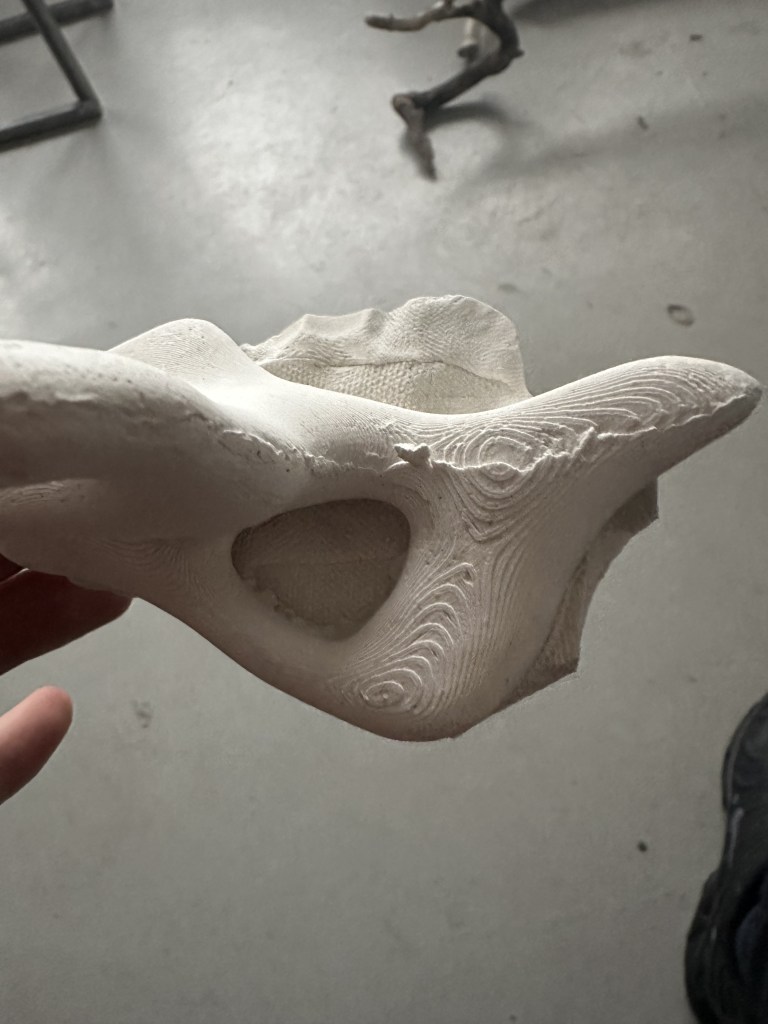
This process, albeit long due to illness and other factors, has been great. Getting a chance to bring something that I initially created as a digital sculpture to the real world is something I find really fascinating. It is nearly an exact replica. The cast has all the markings of a 3D print, but it is not one. With my sanded 3d print at first appearing more like a cast than my actual cast.
Poster
Alongside all this, I have worked closely with those in the studio to create our WIP exhibition poster.
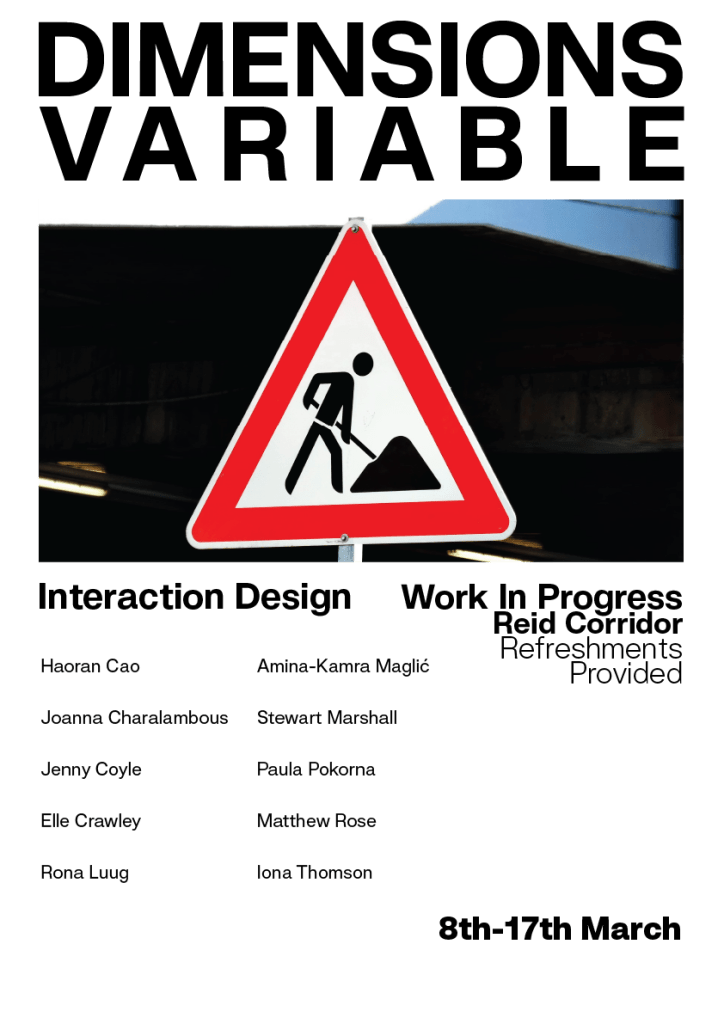
It went through multiple iterations. Developing it further and further with the help of my classmates.
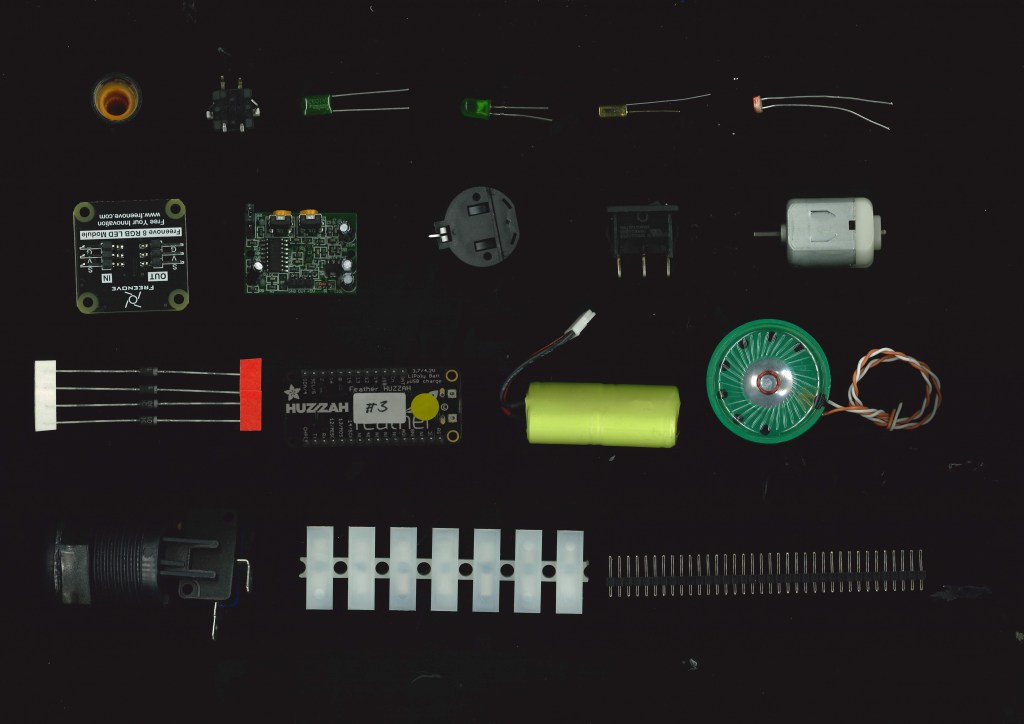
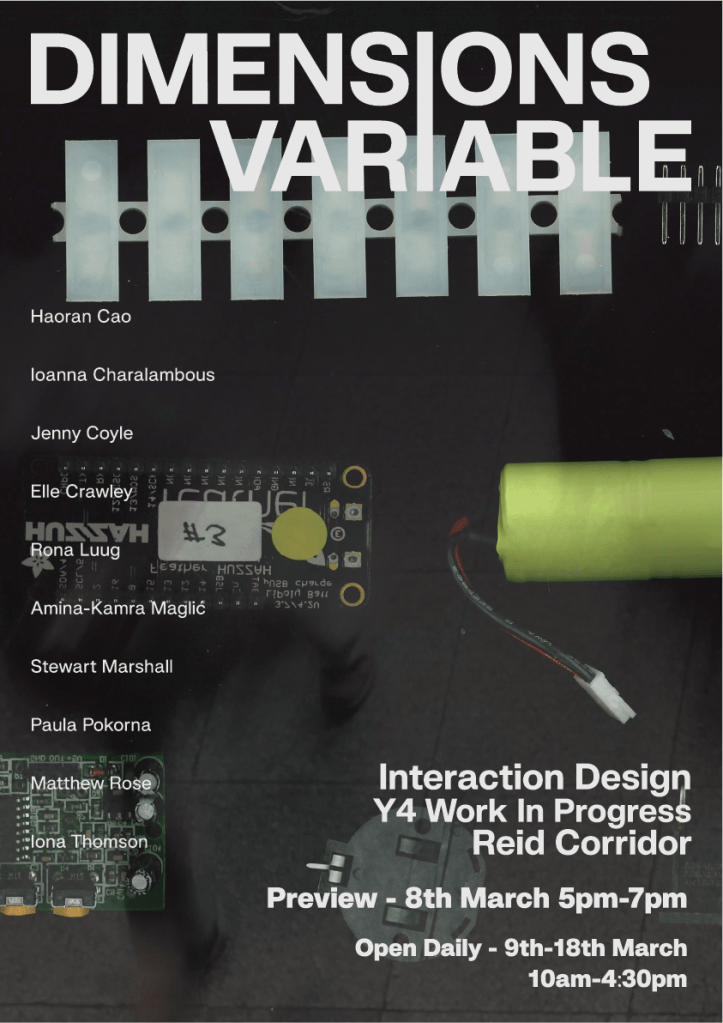
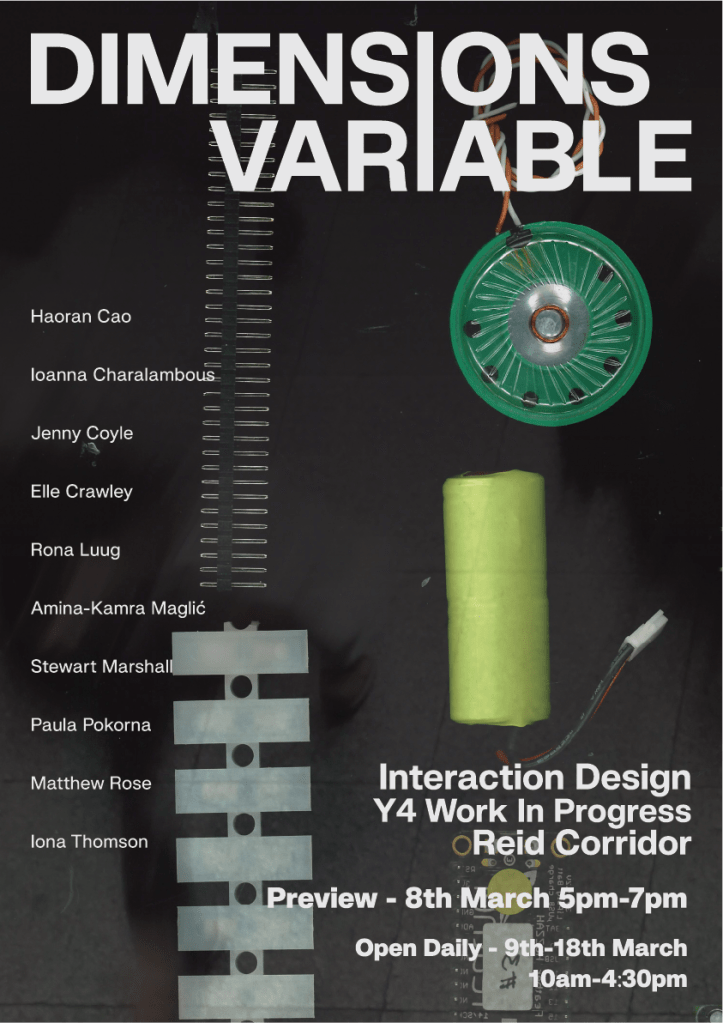
Matt and Iona then scanned in different components from the arduino drawer. This I feel creates a great deal of visual interest due to the different colours present, it also gives an idea of our course.

We then developed this outcome, however with the blurred background I didn’t feel as if it gave anything justice, the scan quality was so good I may as well use it. As well as this my eyes are constantly drawn to VARIABLE first instead of DIMENSIONS, which is an issue as it doesn’t read as well as I had hoped.

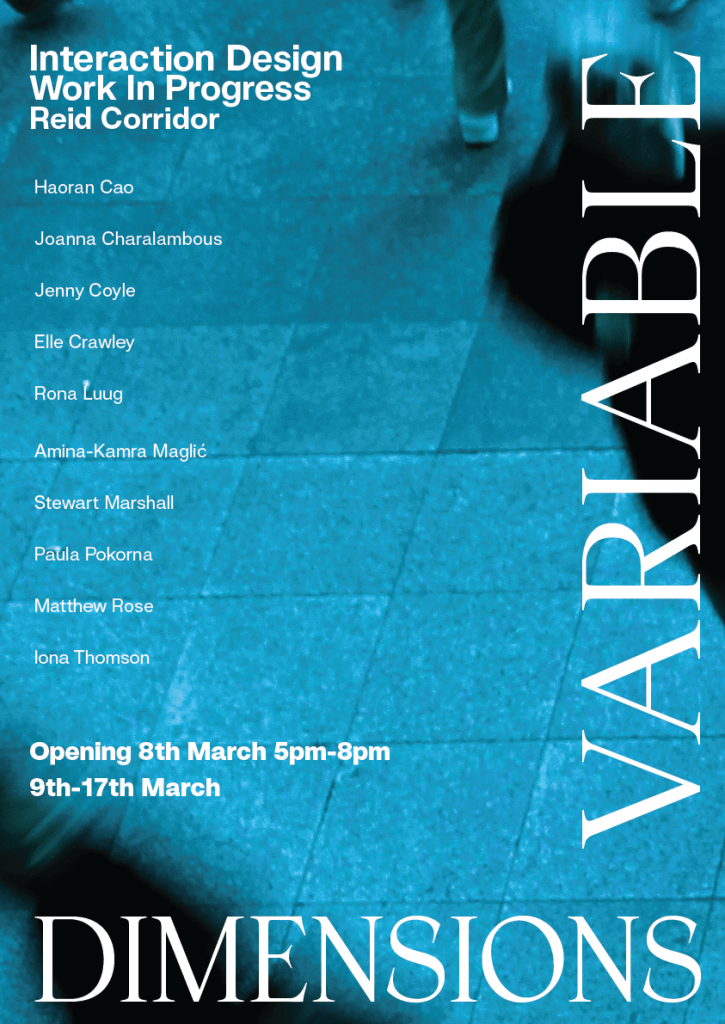
We then settled on this, I used the blue image of a crowd as a way to generate a sense of motion within the poster and the unified I as a way to show how our work is progressing throughout the year. I feel the final poster is a much more balanced piece with clear hierarchy and legibility.
However I didn’t stop there. I used the image as a tile to generate more backgrounds from.


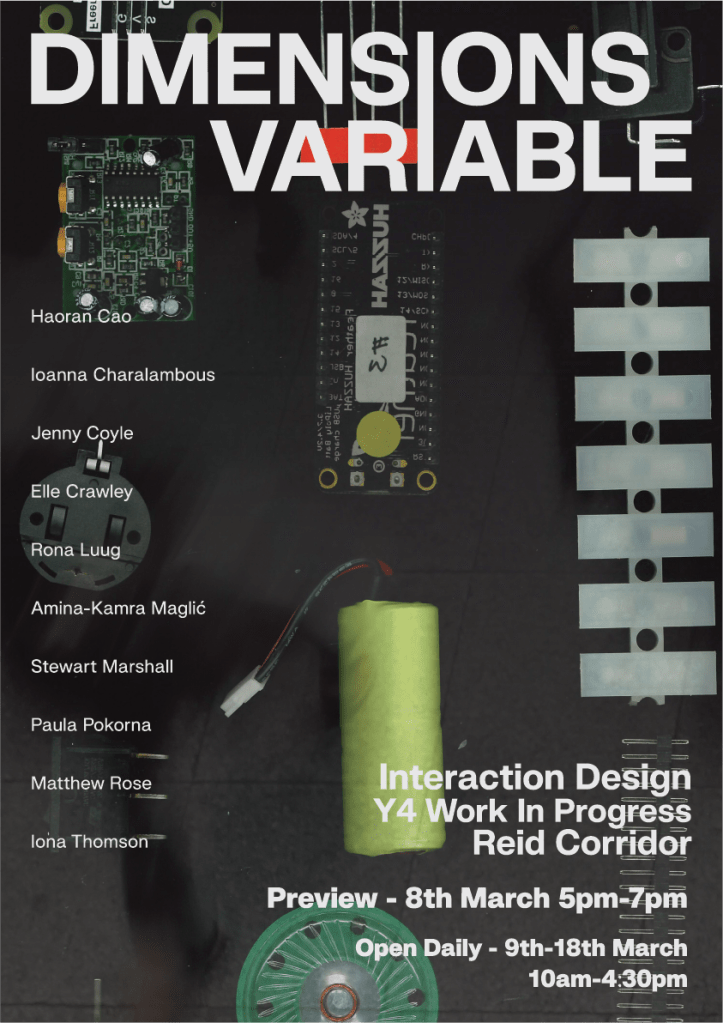


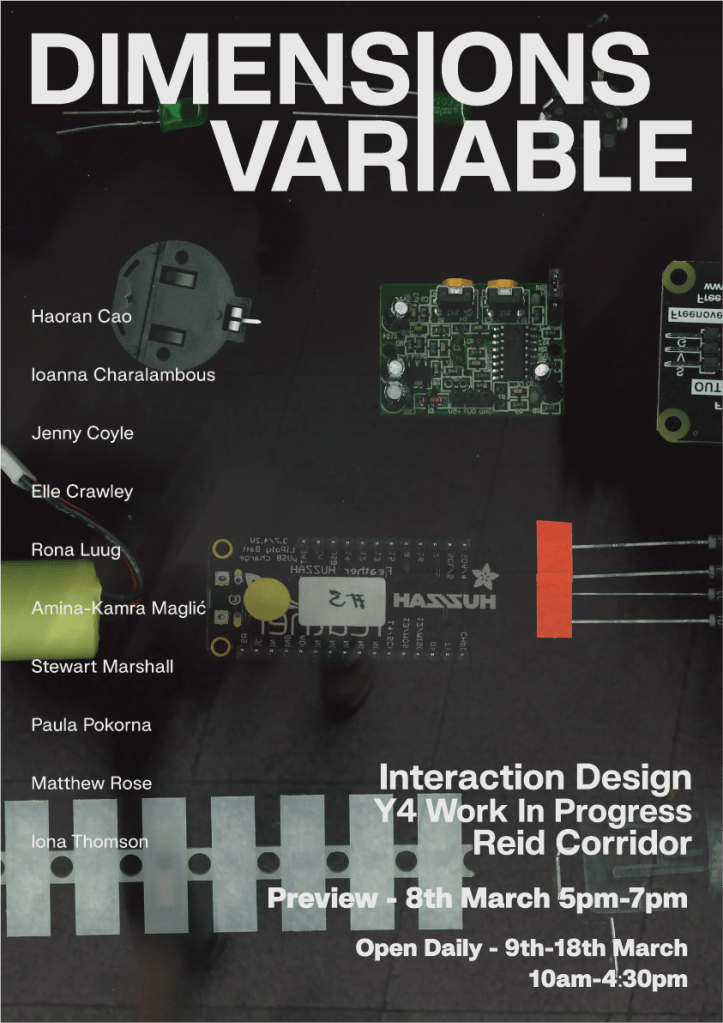
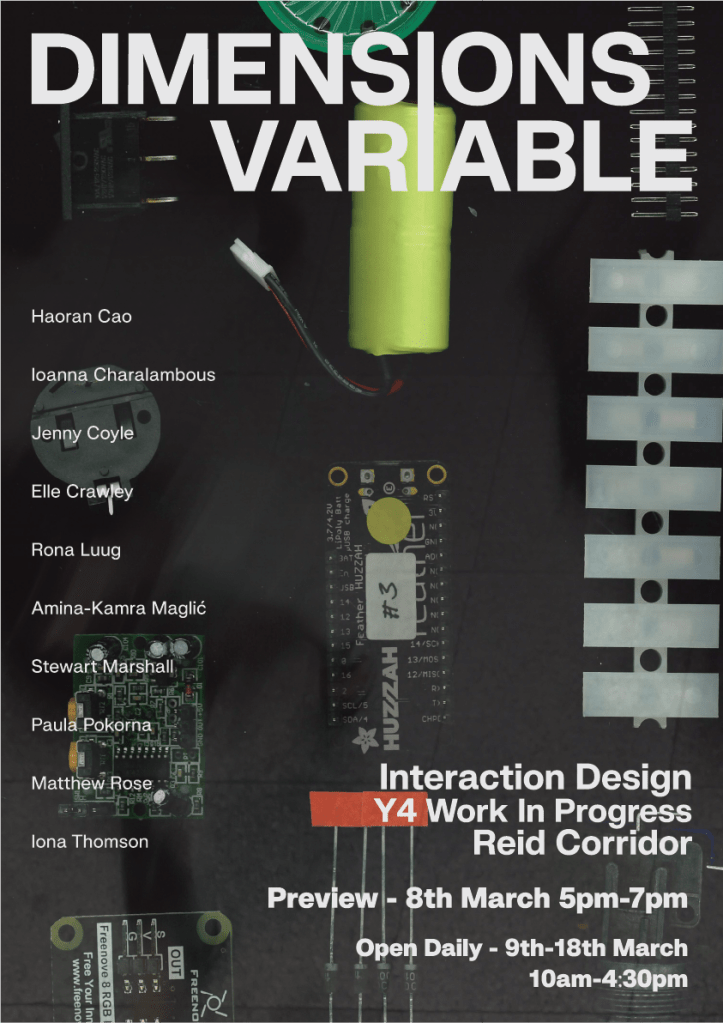

This gives the viewer the idea of perpetual change that the work is going through, constantly tweaking it and making fine adjustments.
I was then informed by Paul to include the GSA logo, which as far as I am aware is the last amend I had to make with the poster.

WIP Prep
We also took the time to then generate infocards based on the poster and create a concise branded experience.
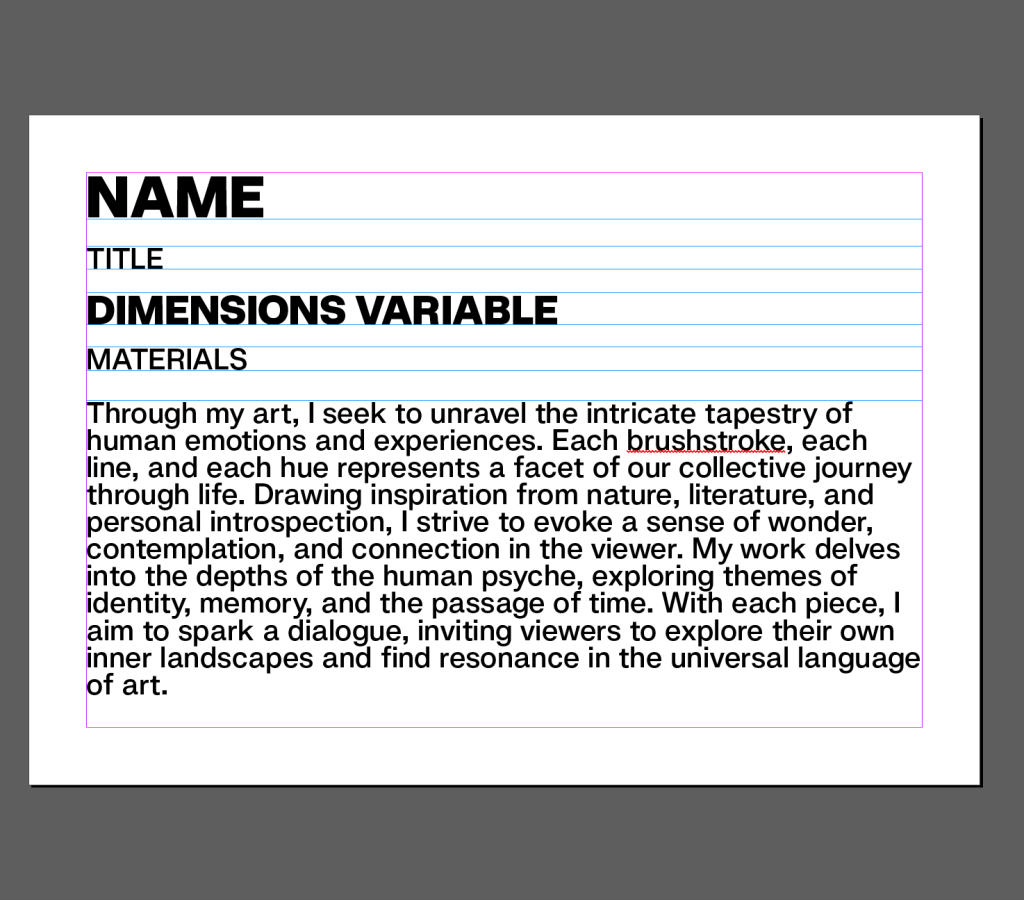
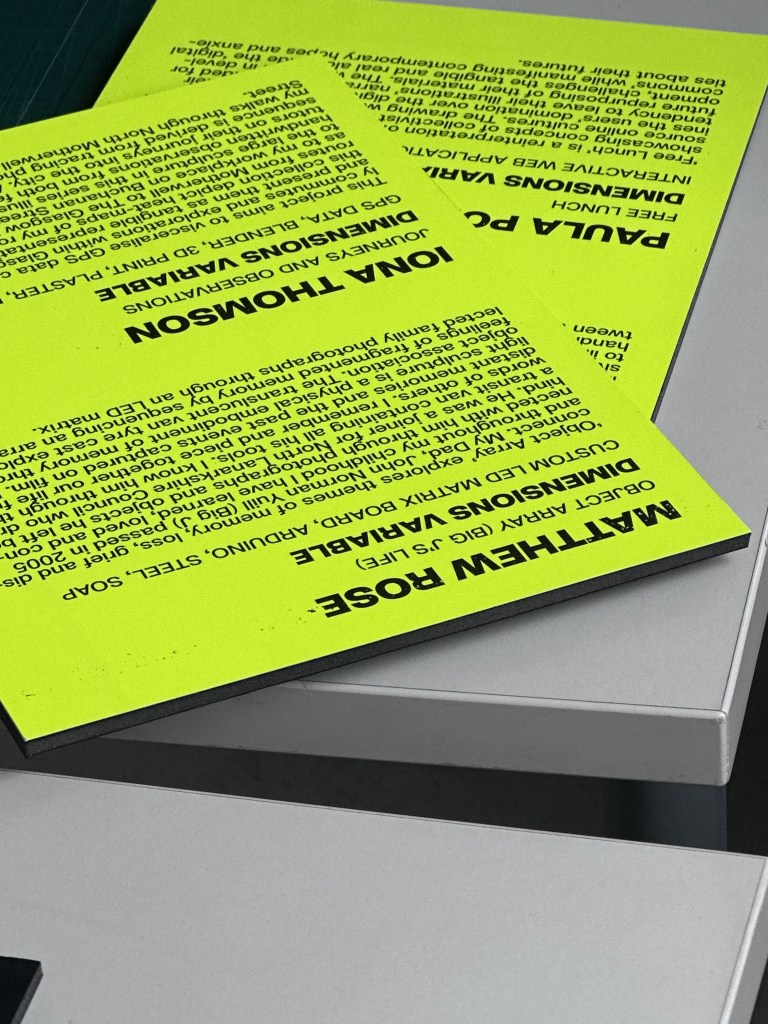
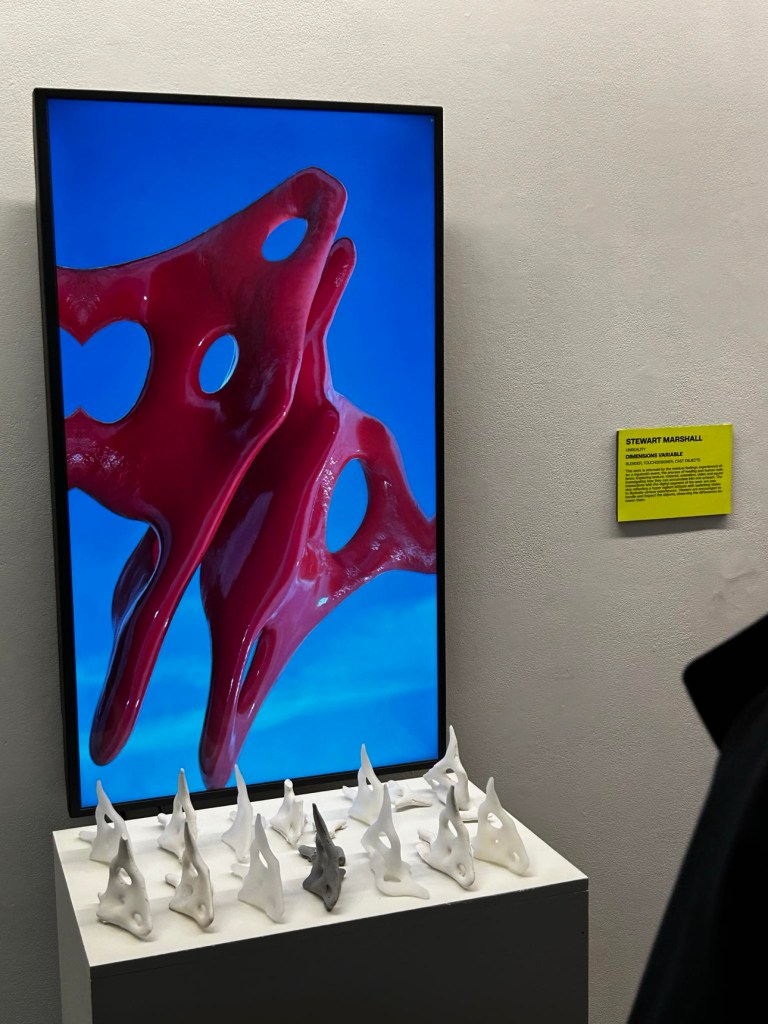
Using inDesign similar to the posters, I created a very simplistic typographic layout, this includes the basics that are typically included on our normal infocards. I also took the decision to remove the dimensions part of the card and replace it with the name of the exhibition “dimensions variable” this is a play on the fact that the work is not final and subject to change. Also usually with our work as it can be projection, screen or physical objects layed out in a certain way the phrase variable dimensions or dimensions variable is frequently used to describe work.
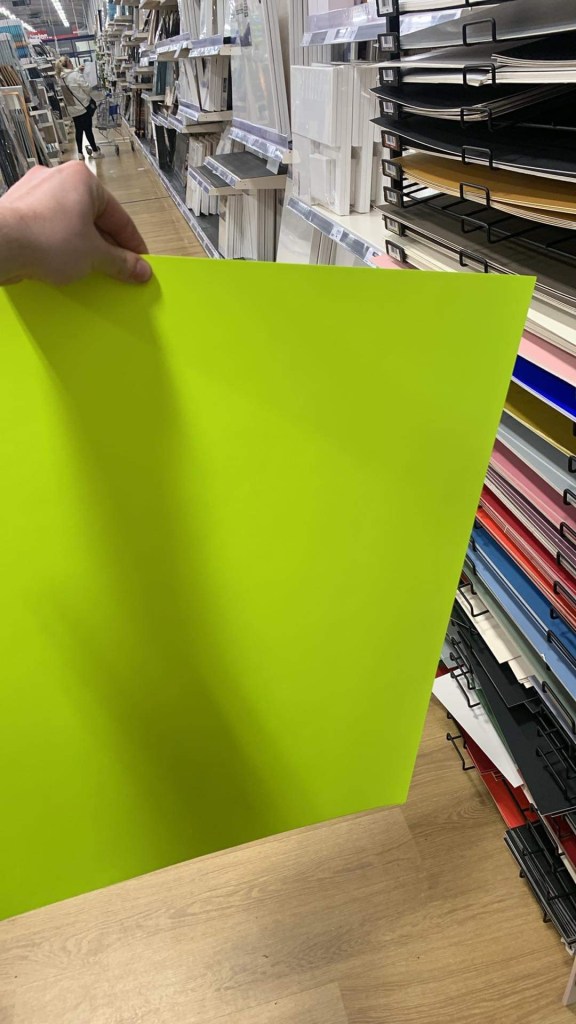
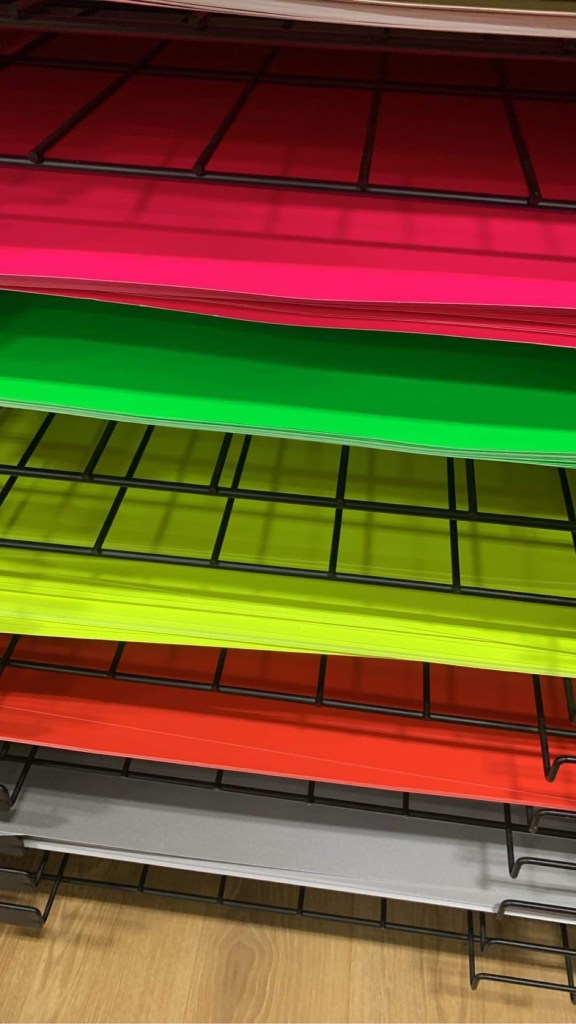
As we discussed the want to have a more unique infocard for our show, we chose a key colour that was present in the poster and to source cardstock to match the colour. We agreed on a bright green as it was common in many of the poster iterations. Matthew managed to source some brilliant paper at The Range.
After a bit of trouble with the printer, we managed to print them successfully, they came out amazing. With some slight distressing from whatever someone had put in the printer before. Creating an accidental distressed look, which I feel fits great with my research themes a few months ago. Paul also mounted them on black foam board an idea which I very much agreed with, adding an extra little detail to unify the cards even more.
While this was happening I encountered some technical issues with my TouchDesigner file. While porting the file to my old laptop to run, I realised that the video of the objects rotating was black and white. I quickly assumed that it must be to do with the fact that my old laptop was intel and there was a conflict with the TD version as the intel version is labeled “experimental”, however, even while rolling back the versions this did not seem to fix the issue. I realised that it must be an issue with the video itself as it is made with apple prores 4444 and I read online that there were some issues with that specific codec and older intel mac’s. So I set about developing a workaround for this.
A major issue I have realised is that there was no easy way to get transparency without using apple prores.
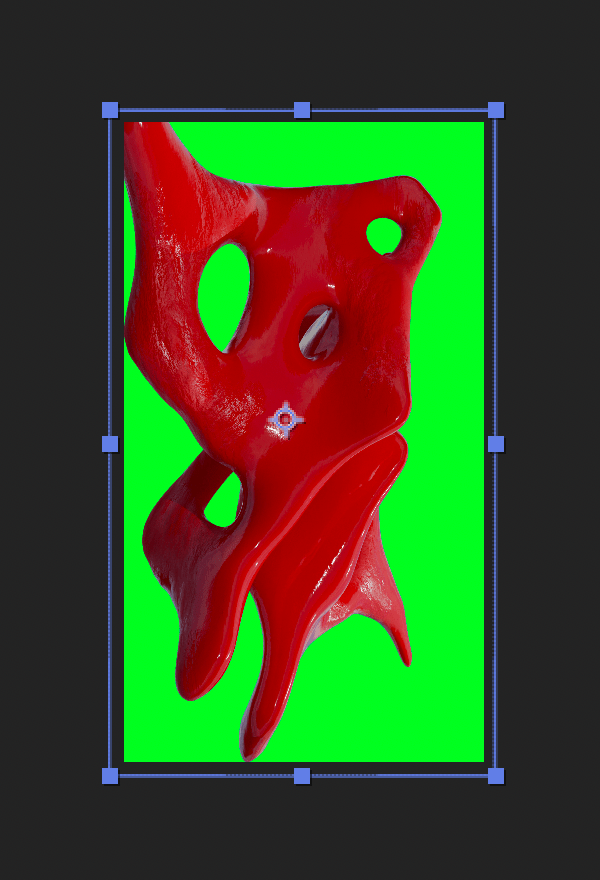
The only workaround I can think of is to use a chromakey in touchdesigner.

There was a large amount of pixelation around the edges. Using this tutorial I solved this issue. Using various nodes such as blurs and rearranges to soften the harsh edges of the pixelation.

Although the workaround was functioning perfectly, it was causing some impact on the performance. Therefore I decided to test it on the studios m1 mac mini. It is apple silicone and therefore if my thinking is correct it should work as intended. The prospect of running on my laptop was also of concern to me as it runs so hot, although everything was Pat Tested I still felt very unsure about this.
After some issues with TD licensing Gillian managed to get it running on the m1. I then ported my file over and it worked perfectly. Although I realised I’d have to use an external mic as mac mini’s don’t have them built in. Luckily the webcam I am using comes with one attached.
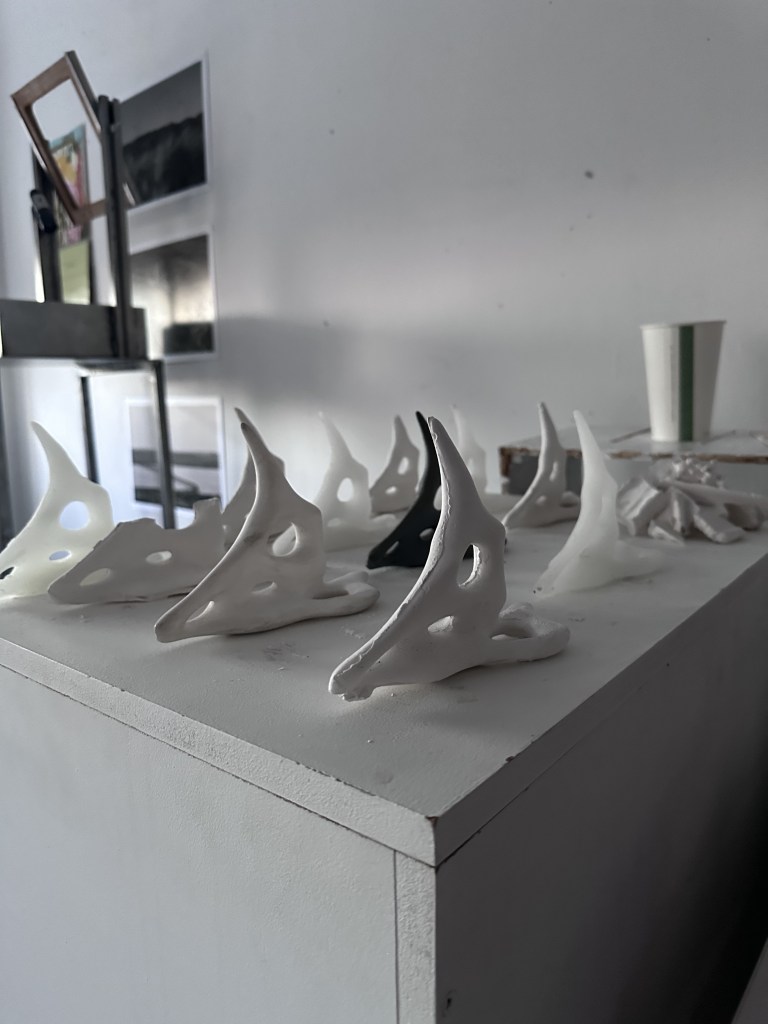
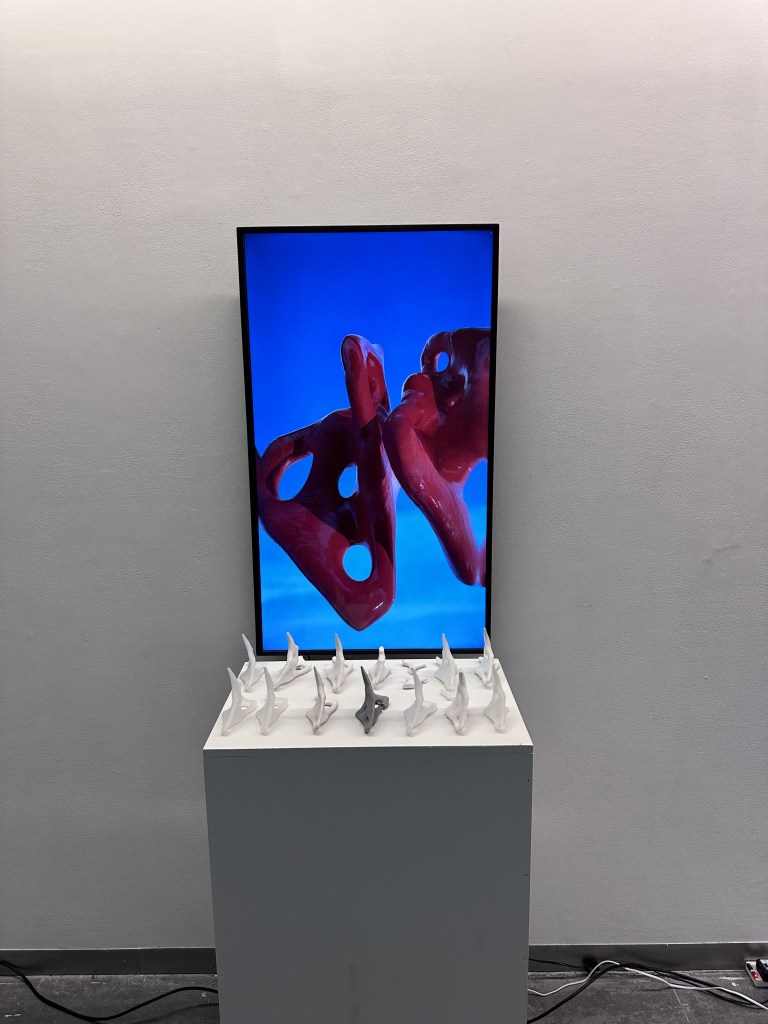
I have also been continuously attending the casting workshop to create a decent amount of my objects on the leadup to WIP. Using various hardness’ of plaster such as fine casting to create much softer forms or herculite 2 for harder more weighty forms. I also used wax for transparency with a completely different feel in the hands from the plaster materials.
I also used Herculite 2 mixed with iron filings in order to rust. Another nod to my ideas around time based processes.

With all these aspects complete, wip show was ready. Painting plinths and mounting screens was the last thing to do.
After setting up my own work, I took time to help others, fine tuning positions, wrapping cables, etc.
Seeing my work installed as intended, fully functioning is a great experience.
I also reached out to those I knew in industry, encouraging them to come along to our show if they had the chance, however we shall see how well attended it shall be in the next few days.
WIP show Opening
Opening night started out very stressful with last minute adjustments happening right up to the end, however it was very much worth it with an absolutely amazing turnout. For many of my family and friends its the first time they’ve seen something of mine working properly and installed.
I have decided that I will be coming in to see my work regardless of if i am invigilating or not meaning that if anyone wishes to discuss my work or if something happens there will be no issues.
There were however a few issues I noticed on the Saturday. The main one being that the Mac mini doesn’t remember the orientation of the screen. I fixed this over the weekend by inserting a flip node and setting the flop to bottom left.
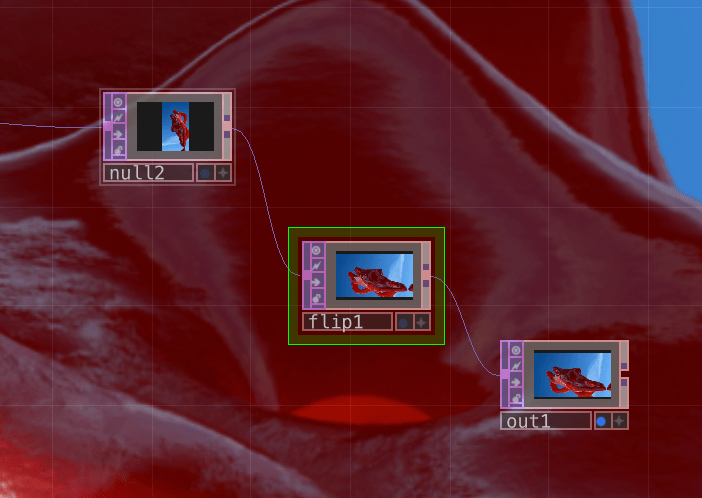
This ensures that the work is in the “correct” orientation. Meaning that when the device is connected to power it automatically launches the TD file and loads into the scene without the need for any setup whatsoever. A slight technical oversight on my end but none the less working properly.
I have also realised that there is a power saving mode on the TV, turning this off allows for no mishaps when it is on for the full day.
I was discussing my work with a Curatorial Practice student who came in to view the exhibition. She passed on her very positive feedback about the exhibition saying she found each outcome so unique. She was also interested in my 3D sculpture asking about the process of creating the object and how I cast it. It was really nice to have someone so external take an interest in my work, saying she really felt the message behind the work and could see it reflected in my objects. This was great feedback as it is something that I went into this exhibition with an open mind, the aspect that people may not “get it”. I discussed this with the external examiner when we spoke and he agreed to go in with an open mind. Discussing my work with people so external to the process is refreshing but also challenging. Explaining often times to people who have no idea about new media art / design and what goes into it. I also heard discussions in the Reid cafe referring to this, although sometimes ill informed I feel that this idea of sparking conversation about our course and having our work on display is fantastic and puts a face to an otherwise mysterious course.
Jenny from exhibitions also gave us an attendance sheet on Monday to keep track of those who stop to look at the exhibition. It has been really interesting to keep track of as putting a number to the amount of people that stop and check out the exhibition with around 80 people on both Monday and Tuesday.
https://drive.google.com/drive/folders/1FWed1IVgXTE_G1GKoA1_XqJ0XqKjMX0J?usp=sharing

After WIP?
I can safely say that I am a bit stuck with what to do now after wip. I still wish to continue with my 3d work but I am unsure where to take it from here. I want to revisit my work with type as it is something I left out entirely from the WIP show.
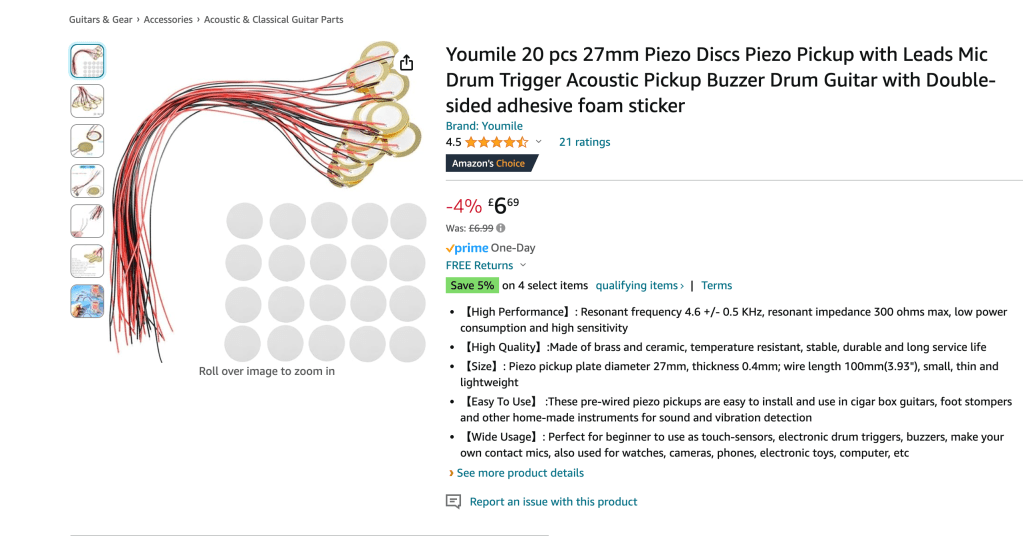

I have started to purchase some things I now want to experement with to potentially use at degree show. Things like a leap motion sensor and contact mics may be of use. I want to keep my options open at this point in terms of interactivity.
I also sent my form to the media studio regarding using a screen and projector, I have booked a consultation with them next week regarding this, I hope to have 2 monitors (ideally the 43″ samsung again), mounted vertically and a projector which bridges the gap in between them.
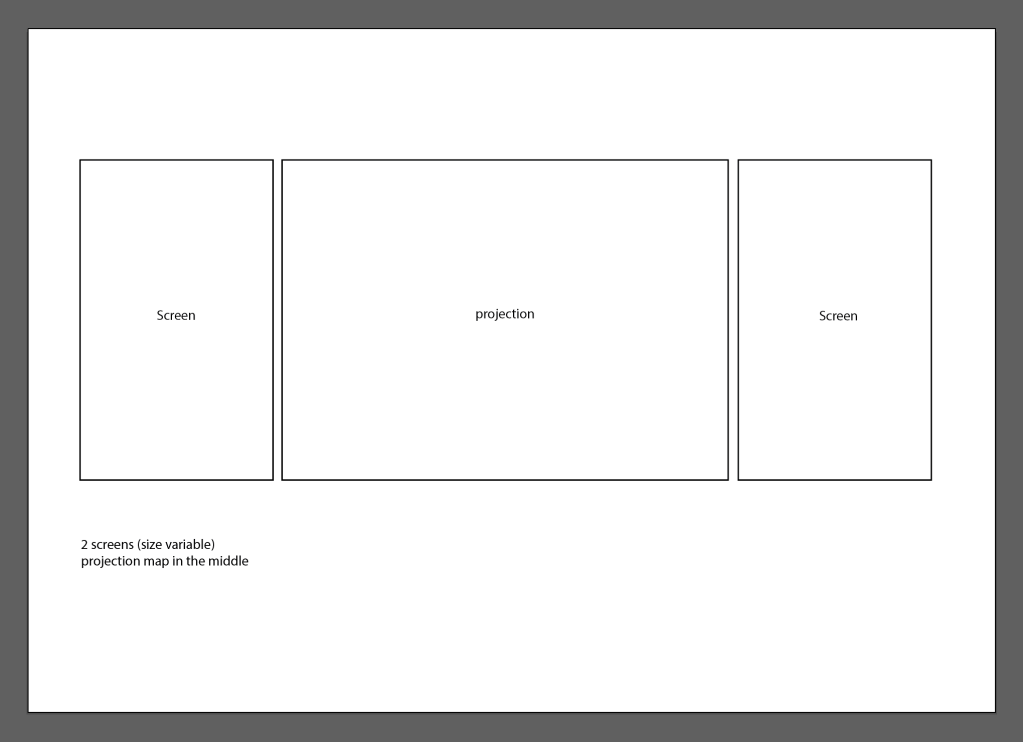
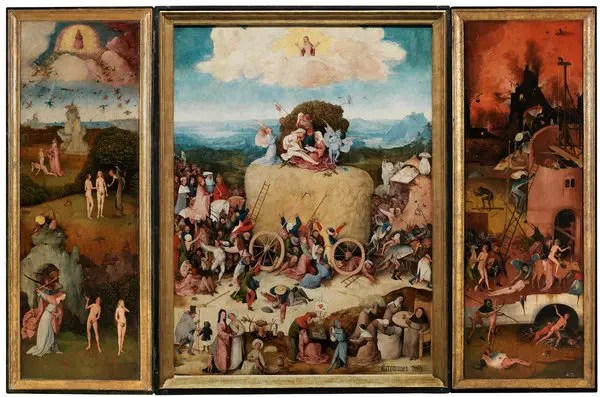
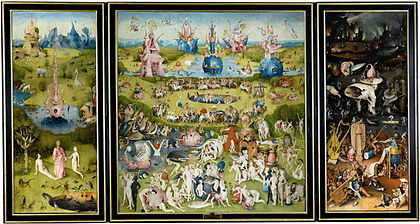
Iona mentioned it looked like a tryptic, artwork consisting of 3 parts usually connected by hinges that can be folded out. This idea of folding is great but unsure if its what I want to achieve at this stage.


For the rest of this week I will look into type, furthering my research and development. While also considering the medium of projection.
The past few months I have been using pinterest for inspiration, it is fantastic for staging, with it being fantastic for finding installation art.

This artist above I have followed on instagram for a good while now but he has also started to manifest his renders in the real world. Albeit at a larger scale,
Blender Revisited
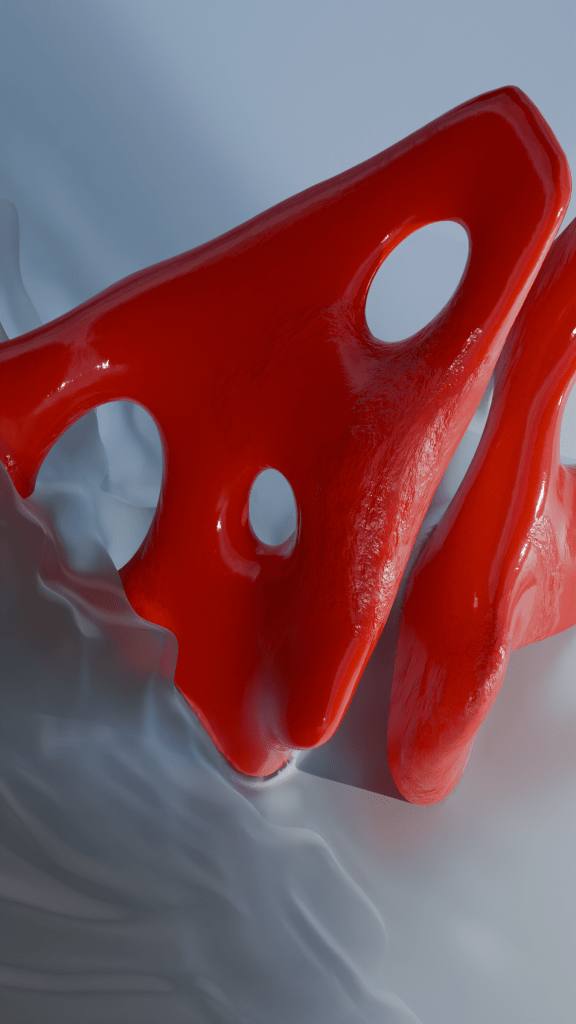
I went back to blender and experimented with different material properties, in this instance I used Dynamic paint, setting a plane to be a canvas and my objects as a brushstroke. Setting the canvas to be waves gives the illusion of water.


Using a combination of nodes such as the Glass BSDF shader and transparent BSDF, allows for a realistic ish water effect. This took some experimentation as sometimes what is the most real can sometimes look flat and bland.


I also wanted to experiment with Depth of Field as it was something Paul and myself discussed extensively talked about as it would bring another layer of realism to the work. However at this stage I still can’t seem to wrap my head around it, the blur seems to do nothing and the F stop seemingly does the opposite of what they say online.
I left it at this stage and wanted to do some animations of the water for documentation. However I noticed while rendering the water was taking the data from the first frame and just freezing while the rest of the animation played. I was at first confused by this, however the answer lay in the Cache segment in the dynamic paint options.
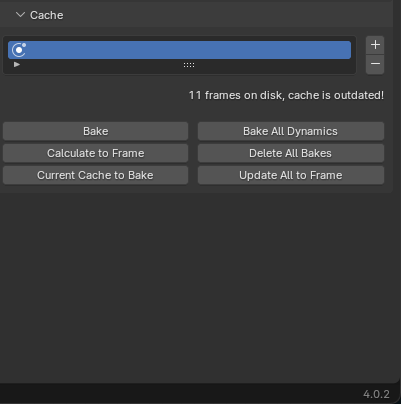
Selecting ‘Bake’ here allowed for the simulation to essentially become an animation instead of real time. Allowing the full animation to render as intended.
I then revisited Depth of Field as it was actually annoying me how close I was to achieving my desired effect. I also recently rewatched dune part 1 and saw dune part 2 in Imax. This reinforced the idea of scale that I have been working with up till now. With the scale reflecting the near impossibility of this universe.


I decided to again play about with my settings and see what gave me the best results.


Using this setup in my 3D scene I managed to get a successful render with a desired amount of blur from the DoF settings.

I think the main problem I have is that as it stands these objects are very close together, this is why it took me so long to get it to work with the settings I was getting from tutorials online. Proving the power of simply having a go yourself is sometimes the best way to go about it.


Here it can be seen that the foreground and background are blurred. I am considering these experimentations a breakthrough in my work thusfar and feeling more secure about my personal upcoming deadlines towards the end of this month.
I have also got into the habit of working with more than one camera throughout this process as to work non destructively.
Leap motion
Using some kind of motion controller is something that I have always wanted to try out, the kinect drivers required for touchdesigner on mac dont work so I have decided to go with a leap motion sensor for now, especially after trying nicks Design Domain project. I got a great deal on one from ebay.

Following this very quickfire tutorial I managed to grasp the basics of how it detects inputs and use it to generate a scrolling effect for video based off your pinch motion. I went with the pinch as it is a common gesture and is currently in use by the Apple Vision Pro as its main select or mouse click function.
The only problem with this input is that it goes completely against my designed ethos for passive interaction. All the motions are very deliberate and for most cases requires instruction for an unaware user (in this case my parents) to use correctly.
I also talked to Cat and Gillian about it and they mentioned the idea of Gesture Fatigue, that often times these inputs require a user to hold their arm out in an unnatural position for an extended period of time.
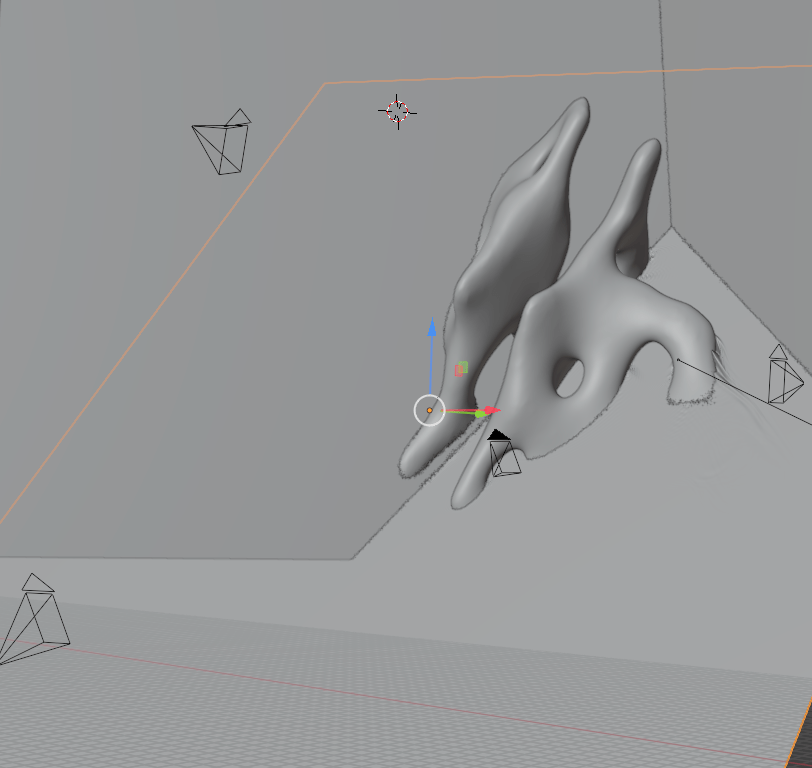
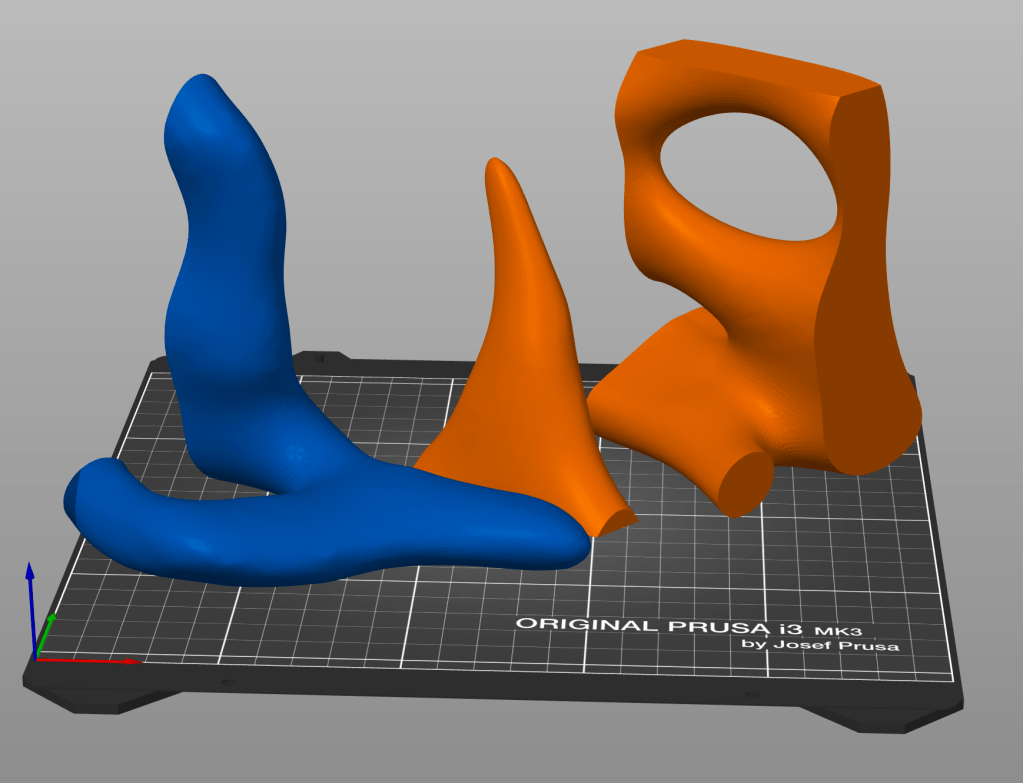
3D Print

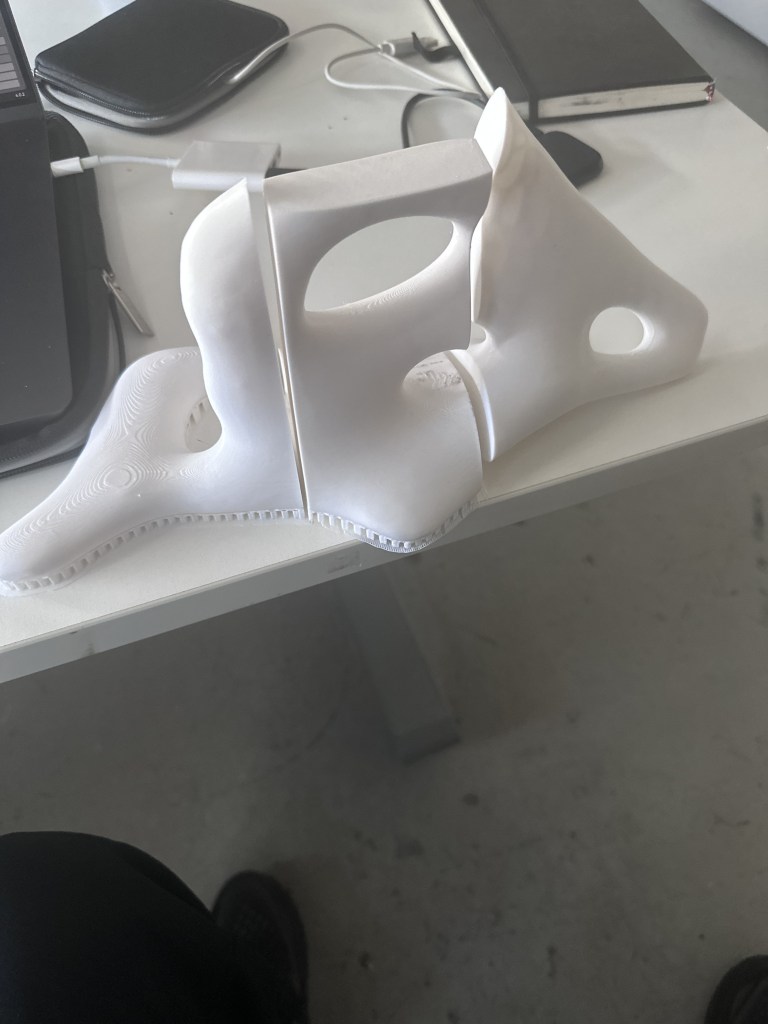
Part of my new experimentation will be to test larger scale versions of my 3d print. This can be made possible by splitting the object into multiple parts as seen in the model above.
Taking this into prusa slicer I can scale the object up to be twice the size with little to no problems with this split version of the print.
In the studio I will try the smaller half to see if I am happy with the scale of the object.

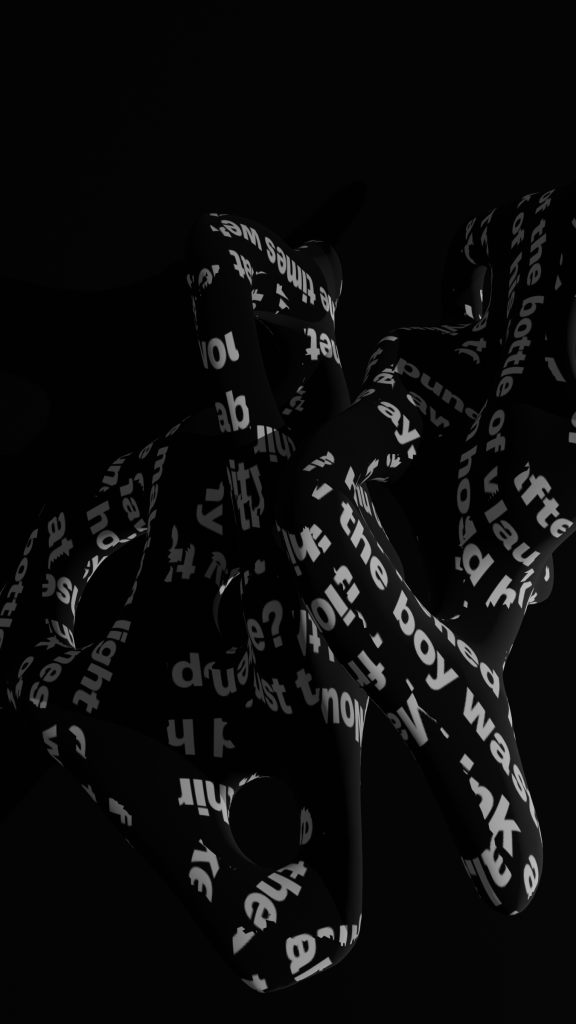
Text in Blender
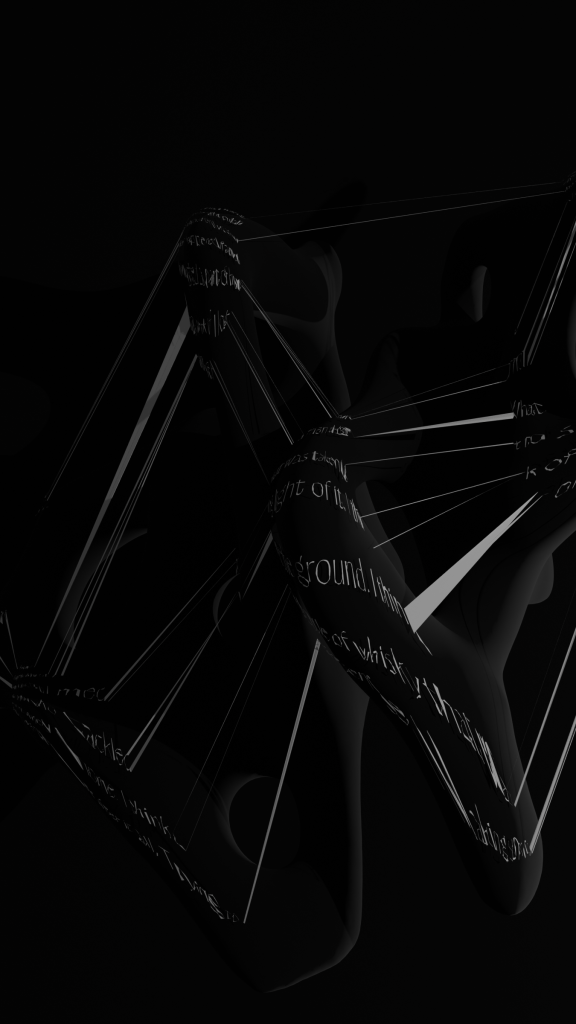
I did some experiments with text in blender, using the body of text I generated for the start of the years fleeting thoughts booklet.
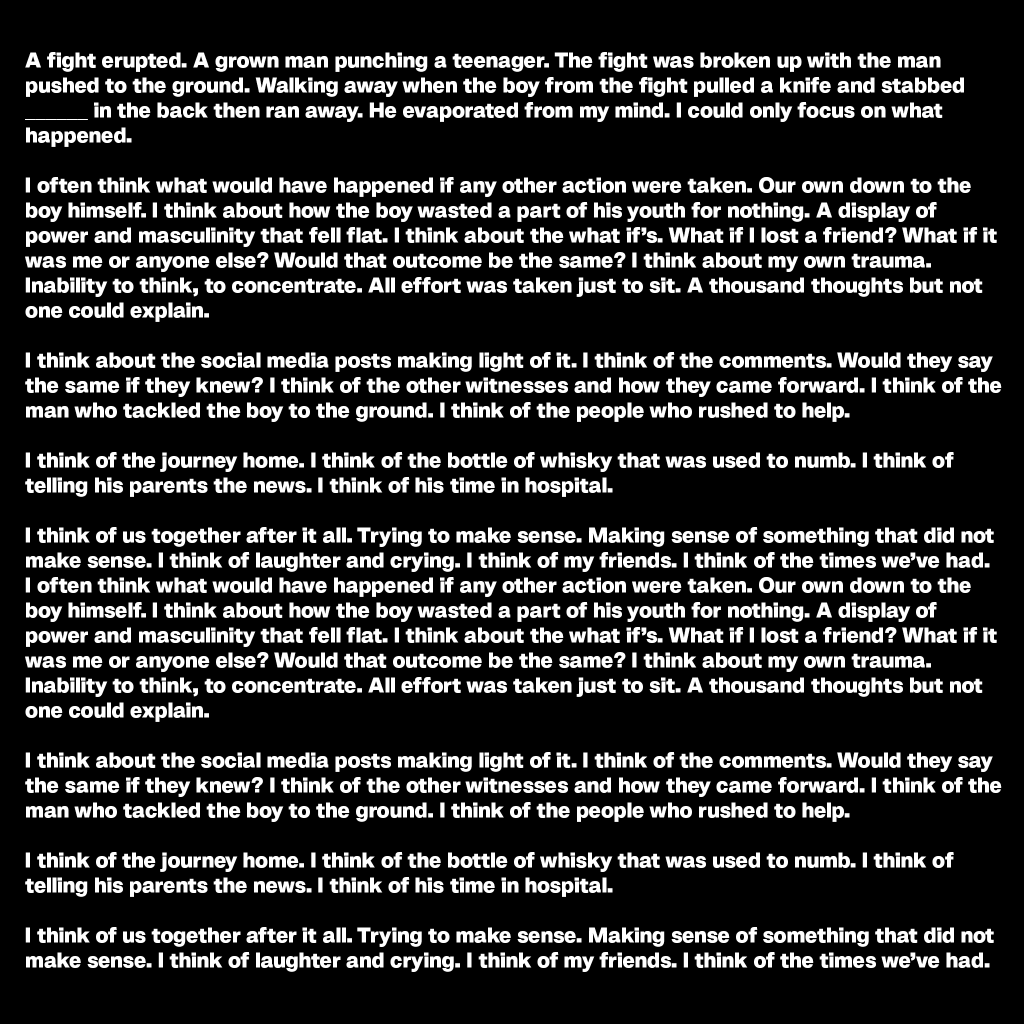
However due to the complex nature of the mesh the experiments I came out with were nearly completely illegible. That being said though, I do actually like the results. The fractal nature of the parts of text sticking to each other or cutting through each other I find reflects the way I perceive that event in my life, often very disjointed and appearing as if from nowhere, or from other thoughts.
Media Studio Appointment
I had my Media Studio Appointment to discuss what I need for degree show, which was super helpful to contextualise what I need. With Dan being confident in my ability to realise the project with the equipment provided.
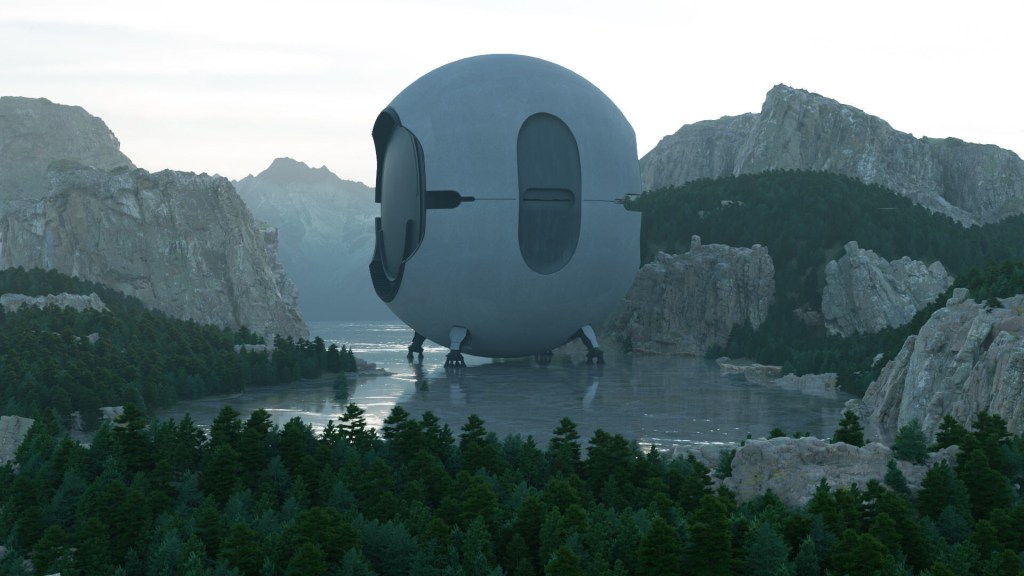
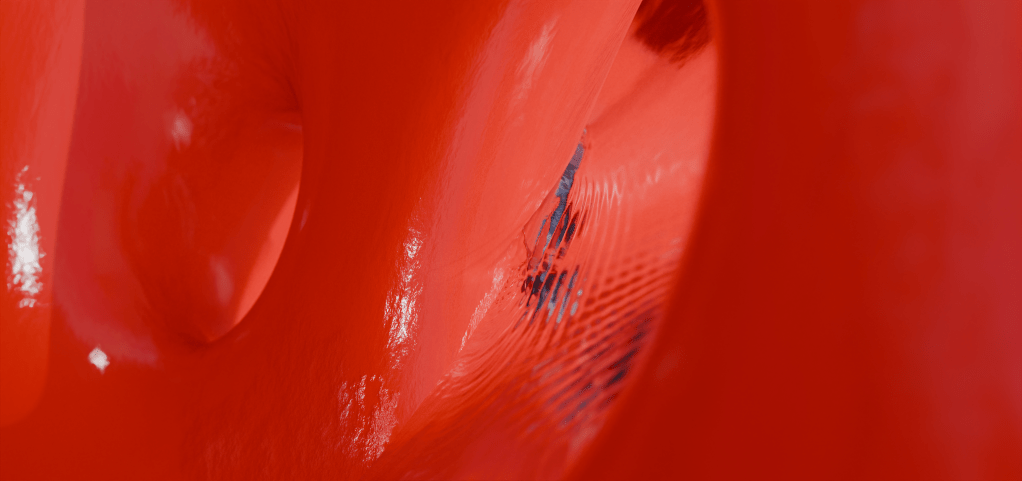
More Renders
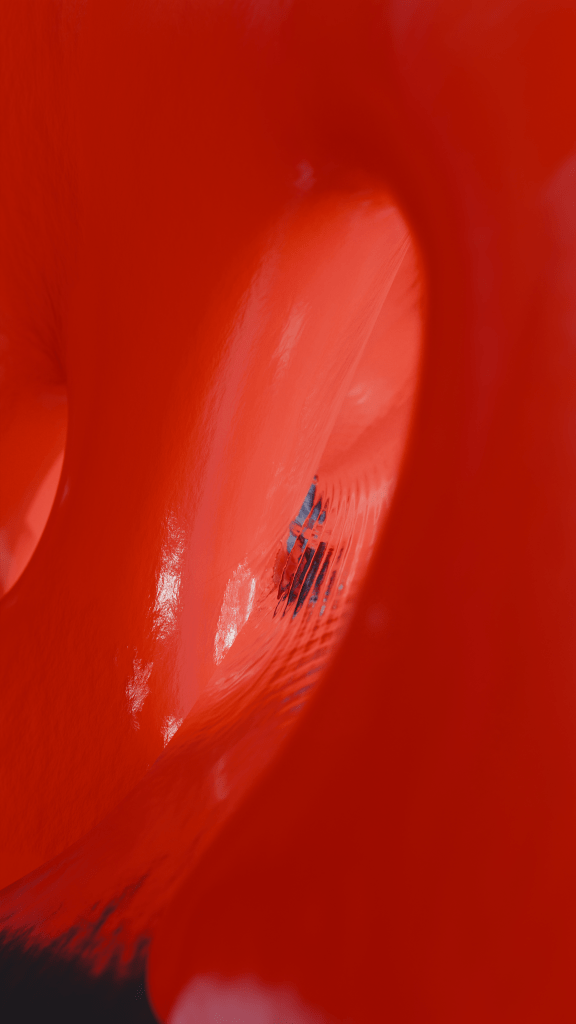
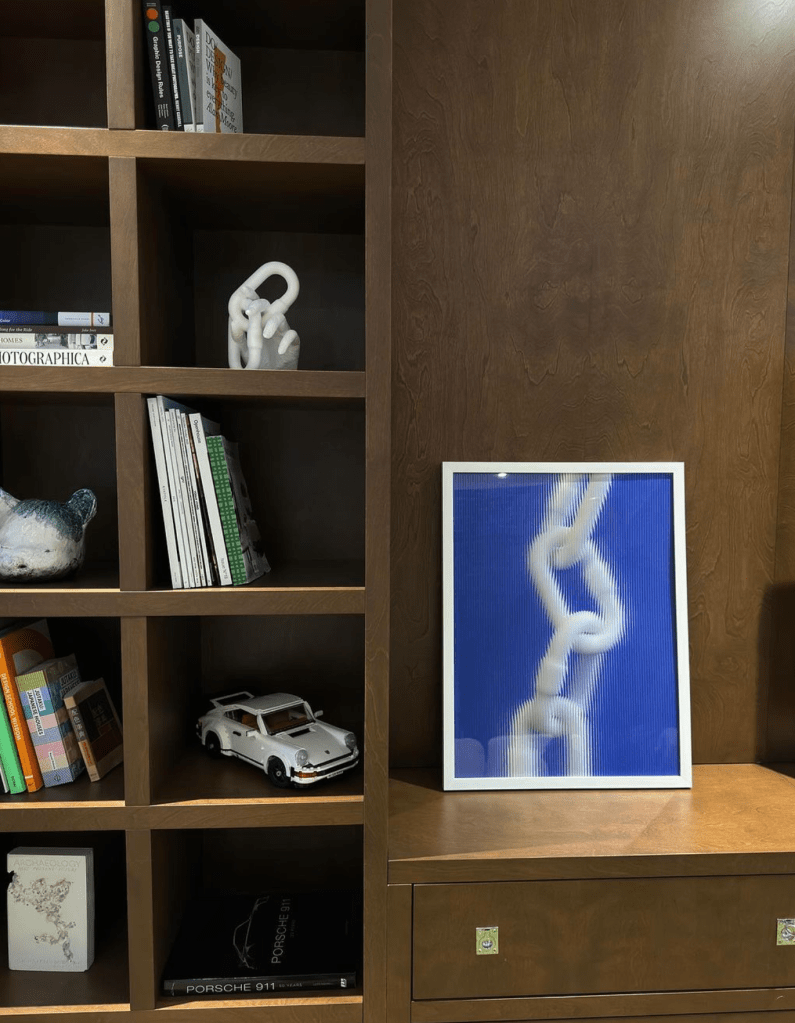
I’ve been experimenting with resolutions and DOF further and I am really enjoying the idea of having these renders being a really intimate view of the sculpture and the full version is manifested in the real world.
I am unsure how to set up this whole multi screen setup, I have the dimensions set up to be the equivalent of my display drawings at this time. However I may need to change this at a later stage.
3D Printing
I have decided to print my object in even more parts as the rear section on prusa slicer was estimating a time of over 10 hours, and regardless of how much I enjoy being in the studio I feel like that is far too long.
This severely breaks down the time required to print, with the longest part being the mid section at just over 6 hours. There was also the concern of the printers height not being large enough for what I want the size to be.
There was some issues with my first print, mainly being that when printing the base of the raft, when the extruder would move to start building the rest of the structure, it would peel part of it off the baseplate, not the most ideal thing to happen. I remedied this by slightly lowering the temperature of the bed within the Gcode for the first layer to 40, then raising it back to 50 for the rest of the print. However this provided its own problem of the raft slightly peeling up at some parts of the print, this doesn’t seem to be a problem for now as the prints have been created with no issue. However I will seek to fix this for any future prints I do.
It has been really interesting to get to use the 3D printer again, especially with something at this scale.
Soft and Rigid
Looking more into the physics properties in blender and experimenting with different properties such as soft and rigid bodies.
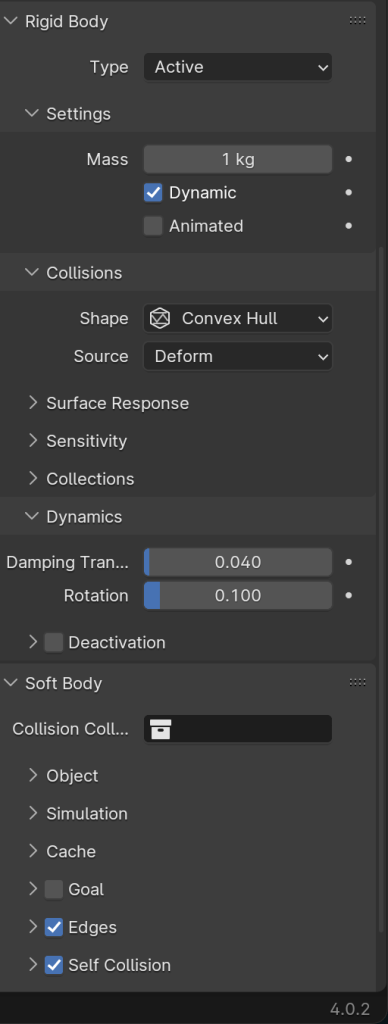
These settings can all be adjusted to create different effects, things like the weight of the object can be adjusted for the greatest
As this month comes to an end I feel like I have made some great progress with my 3D content, however, I need to find a way to better link or compse everything together, perhaps considering storytelling aspects and the symbolism of the different textures I have used, such as softness, submerged materials, clear materials etc. Perhaps considering how each oth these may represent a stage in the processing of my own traumatic experiences. I have also neglected to mention in this that after our WIP show, I was harassed and then punched in the back by someone on the street because of how I was dressed. I have been using this as a way to further fuel the fire underneath me, a much unneeded reminder of not only the feelings after the fact but during these events themselves.
